
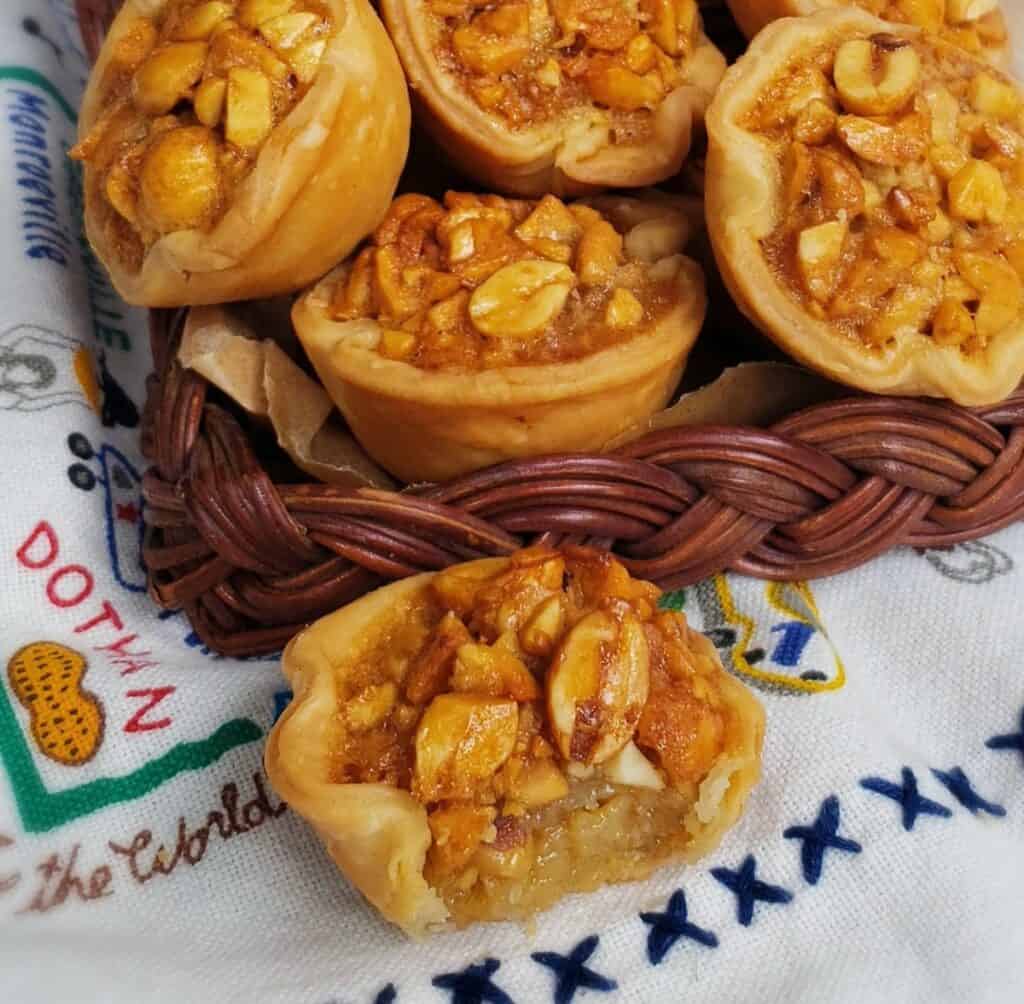
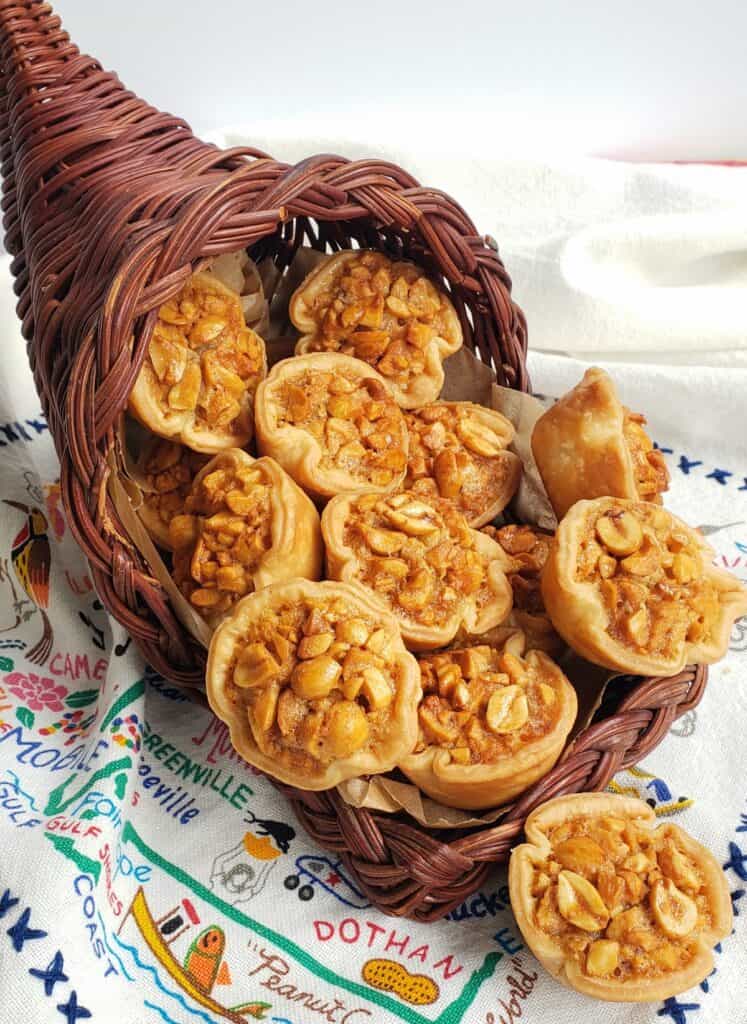
Honey Peanut Pie Tassies are bite-size peanut pies made with Alabama peanuts, refrigerated pie dough, and honey instead of corn syrup or refined sugar in the filling. The silky smooth, honey-kissed filling doesn't even need flour or corn starch to thicken it!
SAVE THIS RECIPE
This post is sponsored by Alabama Peanut Producers Association. All opinions are my own.
If you follow my blog or know me well, you know I'm a peanut and peanut butter lover: Roasted peanuts, Microwave Peanut Brittle, Instant Pot Boiled Peanuts, Peanut Butter Energy Bites, Instant Pot Chocolate Peanut Butter Swirl Cheesecake, salted peanuts in a glass bottle of Coke or Dr. Pepper (old school), or even just a spoonful of peanut butter on an apple wedge.
In 2019, I was fortunate to participate in the Farm-to-Table Peanut Harvest Tour in Dothan Alabama (Peanut Capital of the World according to the Alabama Peanut Producers Association). You can read about my peanut harvest adventure in my blog post here.
I learned that Alabama has about 900 peanut farmers and 94% of American households have a jar of peanut butter! I also learned that the tractors that dig up these "goober peas" or legumes are equipped with GPS technology that allows them to know where the peanut row begins and ends and everything in between.
My Honey Roasted Peanut Pie has been a huge hit on the blog and many of you have told me it is your new favorite pie to make for Thanksgiving and Christmas!
Why honey and not corn syrup & sugar in this recipe?
I know many people are watching their portion control at the holiday buffet and are also concerned about cooking with (and eating) high fructose corn syrup.
Voila! Enter these corn-syrup-free, naturally-sweetened with honey Honey Peanut Pie Tassies. When you want to sample everything on the family dessert table but maybe not a whole piece of pie, these miniature peanut tarts are perfect! Full warning, though. They are addictive and hard to stop at just one.
What is high fructose corn syrup?
First, corn syrup and high fructose corn syrup are not the same products. Both corn syrup and high fructose corn syrup (HFCS) are made from corn starch. While corn syrup is 100% glucose, HFCS has had some of its glucose converted to fructose enzymatically.
Corn syrup is an invert sugar which means it prevents sugar crystals from forming making it a perfect ingredient in many candy and baking recipes.
Scientists are studying the potentially negative effects of consuming large amounts of fructose in the form of HFCS. Corn syrup does NOT contain fructose but unfortunately, some manufacturers add some amounts of HFCS to corn syrup. Fortunately, if corn syrup contains HFCS, it will be listed as an ingredient on the label.
I use corn syrup in several of my recipes but I'm careful to always check the ingredient label to avoid HFCS.
Whether you are avoiding corn syrup or just like the taste of honey, you will love this recipe because the texture of my Honey Peanut Pie Tassies is silky smooth just like my Honey-Roasted Peanut Pie that contains corn syrup in the filling.
What's the shortcut?
- The main shortcut in Honey Peanut Pie Tassies is using a refrigerated, rolled-up pie dough.
- Melting the butter in the microwave
- Tilting the tassies sideways in the miniature muffin pan instead of transferring them to a wire rack to cool (optional tip)
Here's what you will need
Ingredients:
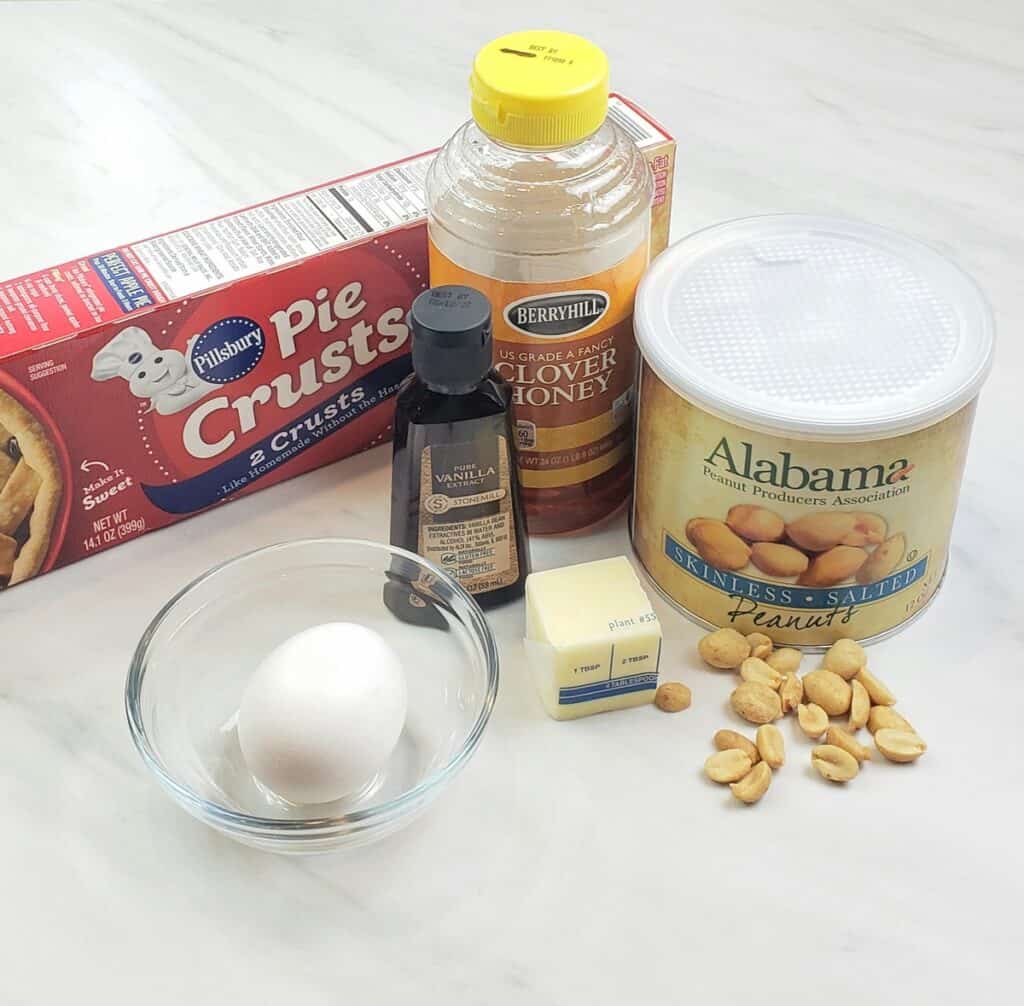
- Refrigerated, rolled up pie dough
- Salted or unsalted butter
- 1 large egg
- Honey
- Lightly salted, unsalted, or salted skinless peanuts
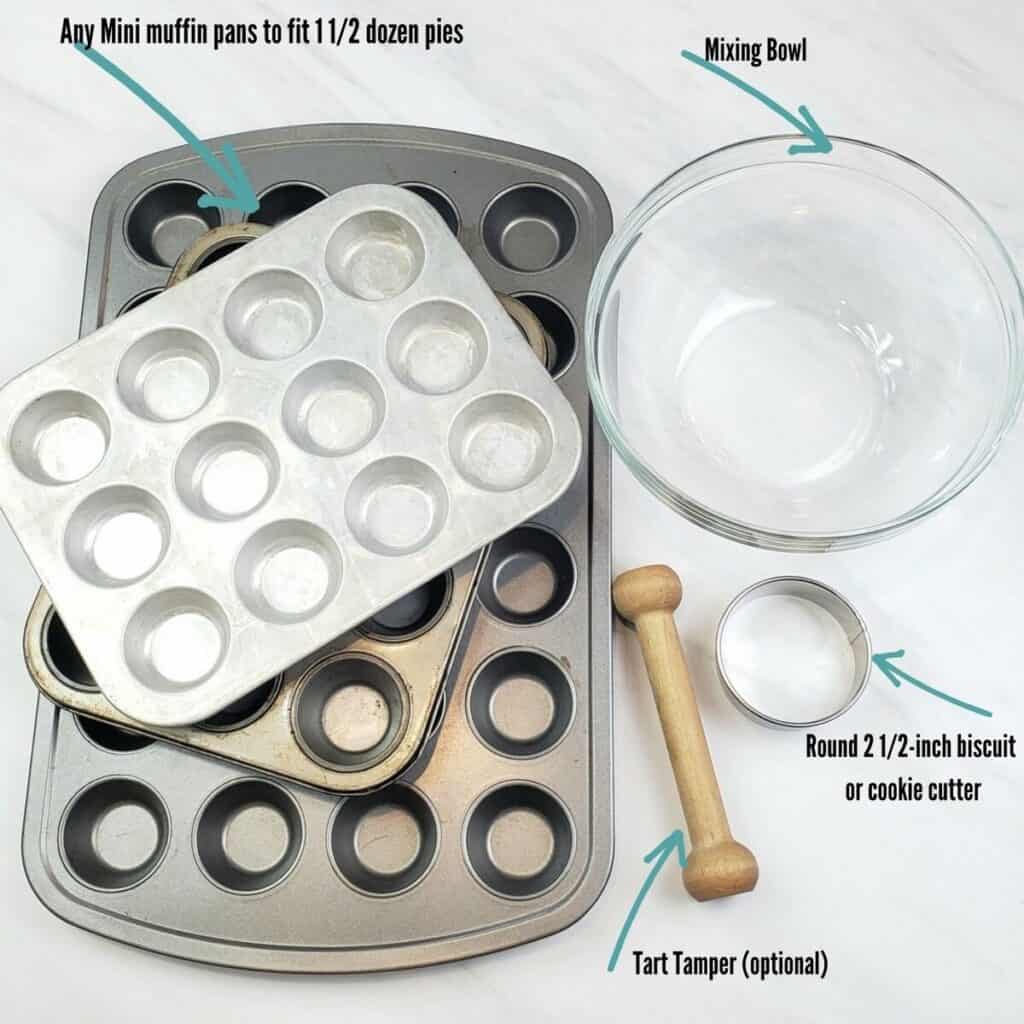
Equipment:
How to make Honey Peanut Pie Tassies
This 6-ingredient pastry recipe is super simple to make and does not require an electric mixer for the filling or a rolling pin or pastry cutter for the dough. The filling can be mixed with a fork or spoon and the refrigerated pie crust dough saves at least an hour.

- BEFORE MAKING FILLING, place the rolled up pie crust dough on the counter (unwrapped). The package gives instructions to do this but many people overlook it.
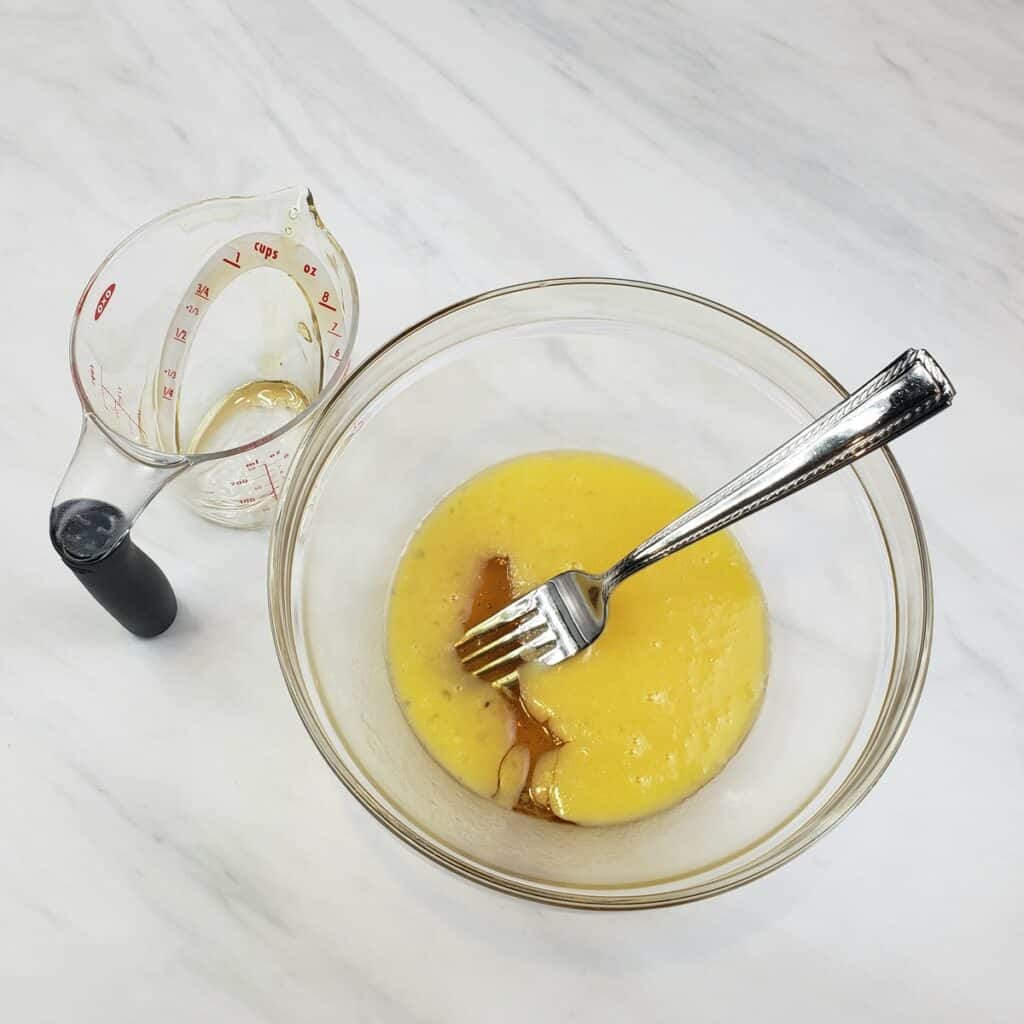
- While pie dough is standing at room temperature for 15 minutes, make the filling. First, melt butter in the microwave.
- Add egg and beat with a fork or wire whisk.
- Add honey and stir well.
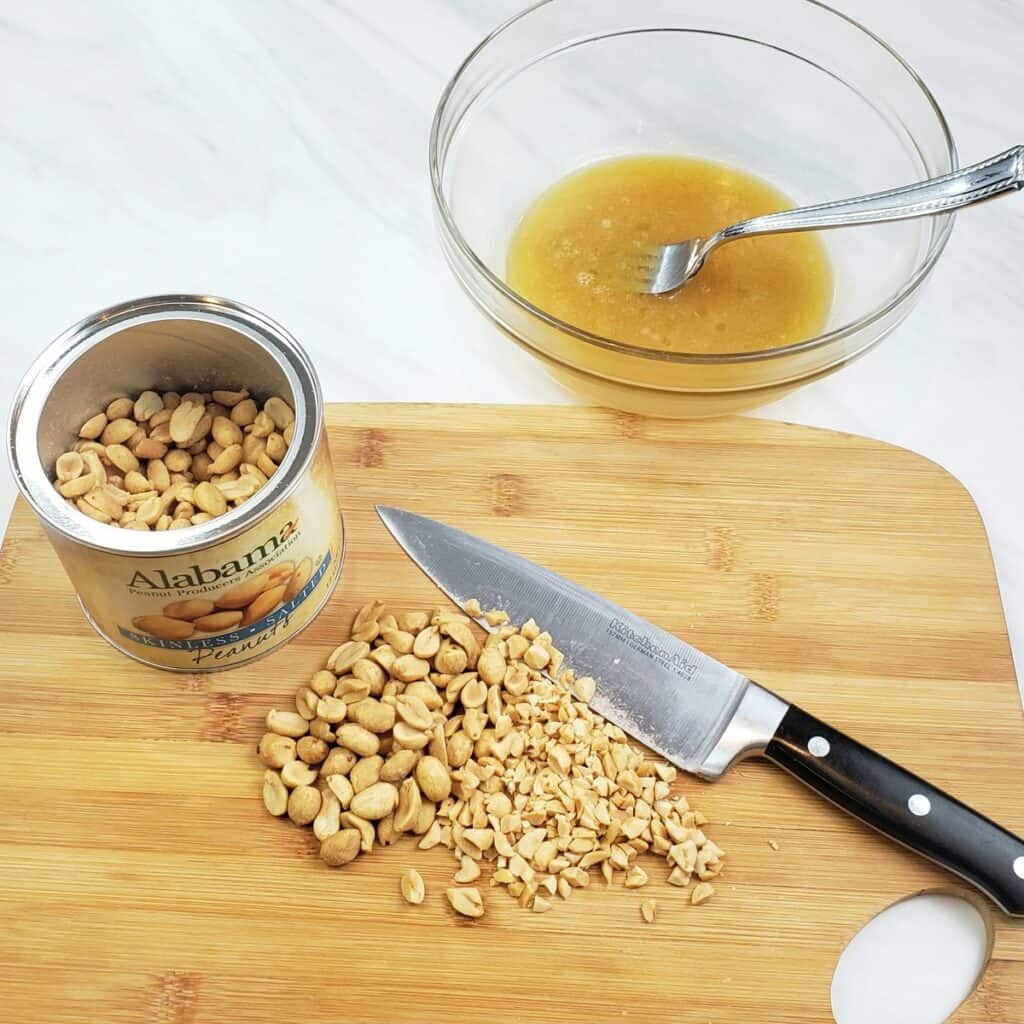
- Stir in chopped peanuts. Set aside.
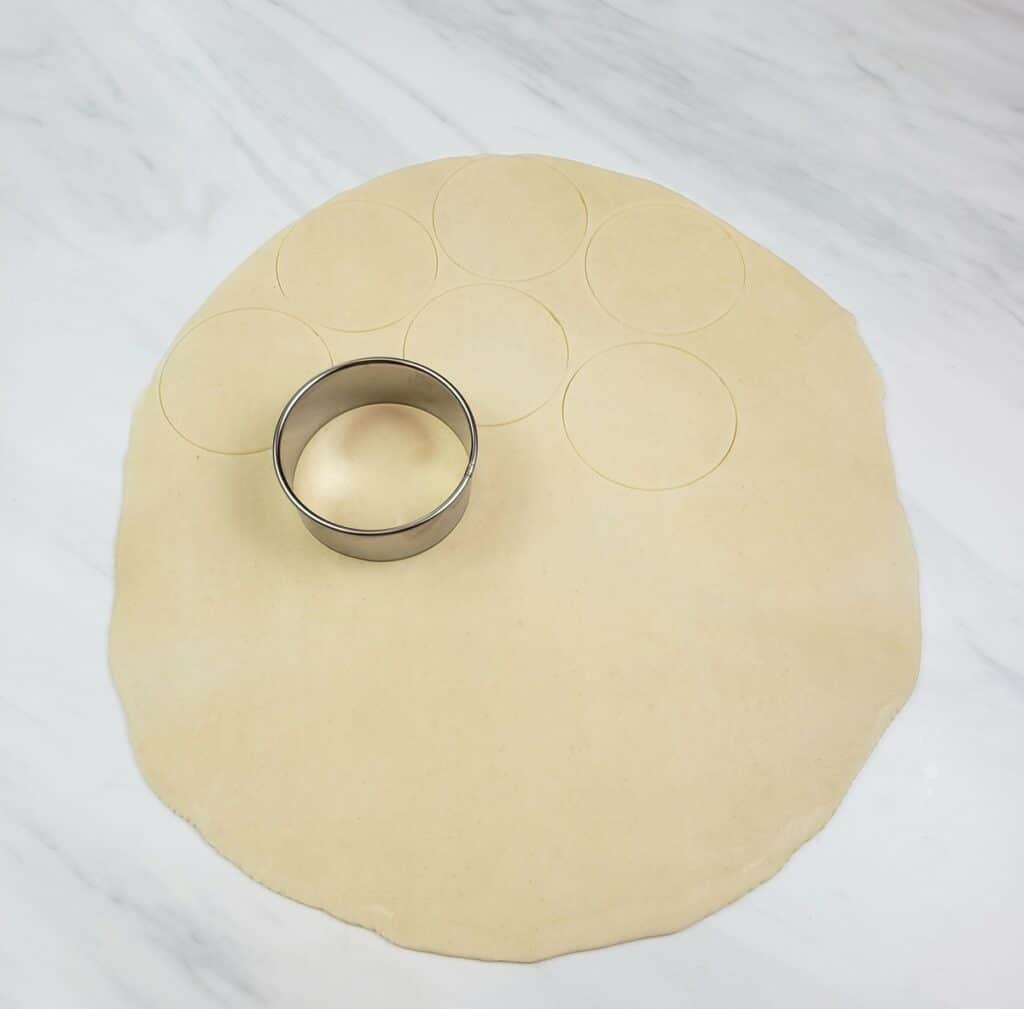
- Carefully unroll the pie crust dough. Use a smooth cylinder-shaped glass or rolling pin to smooth out any "wrinkles".
- Cut out rounds with a cookie or biscuit cutter.
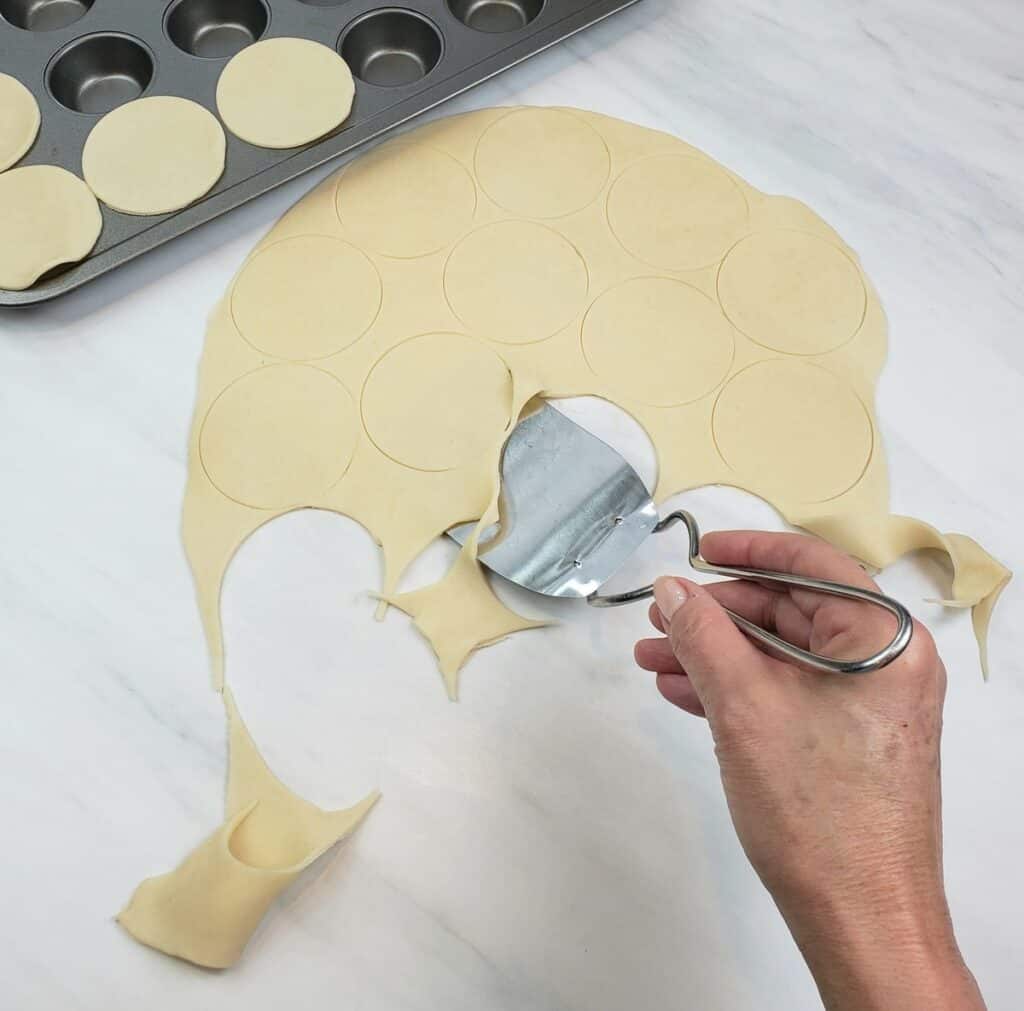
- Tip: It helps to use a thin spatula or dough scraper to lift up the rounds.
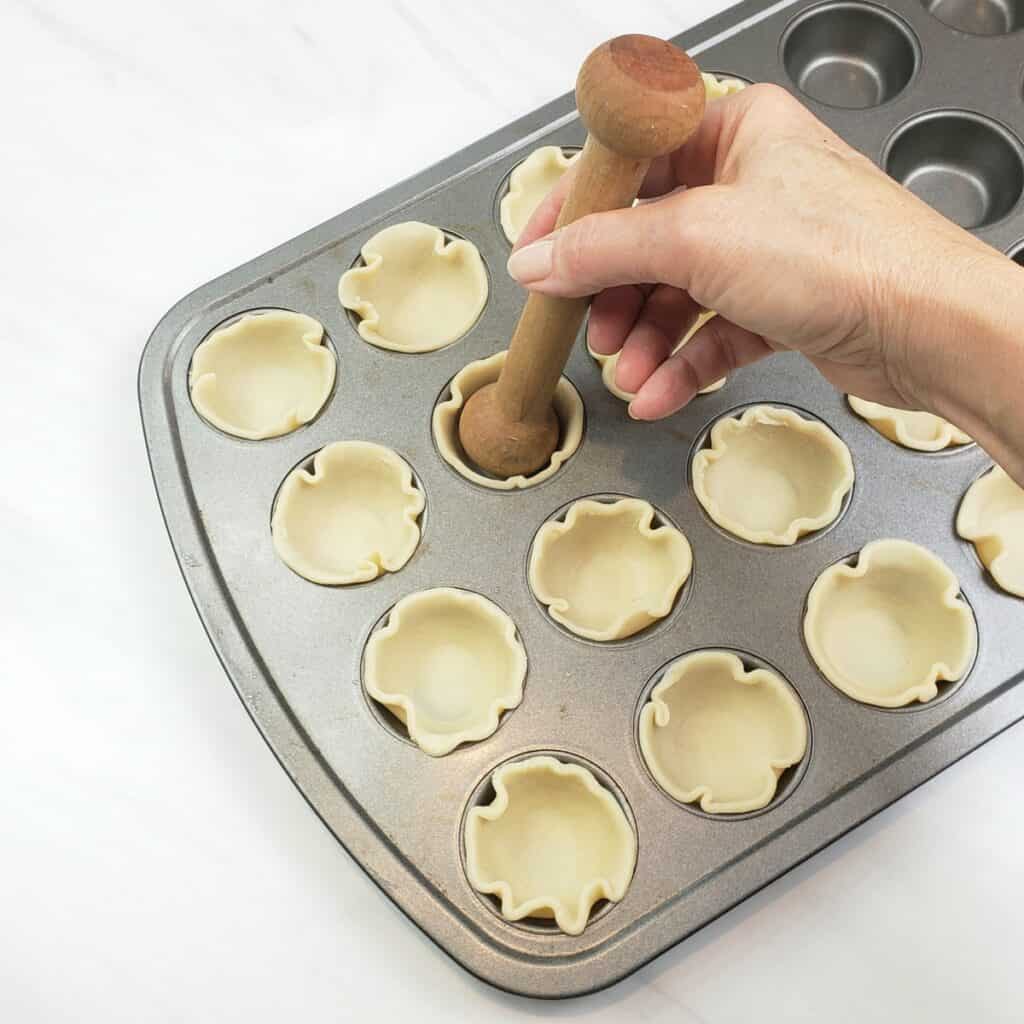
- Using your fingertips or a tart tamper, gently press the dough to the bottom of the mini muffin pan. No need to grease the pans.
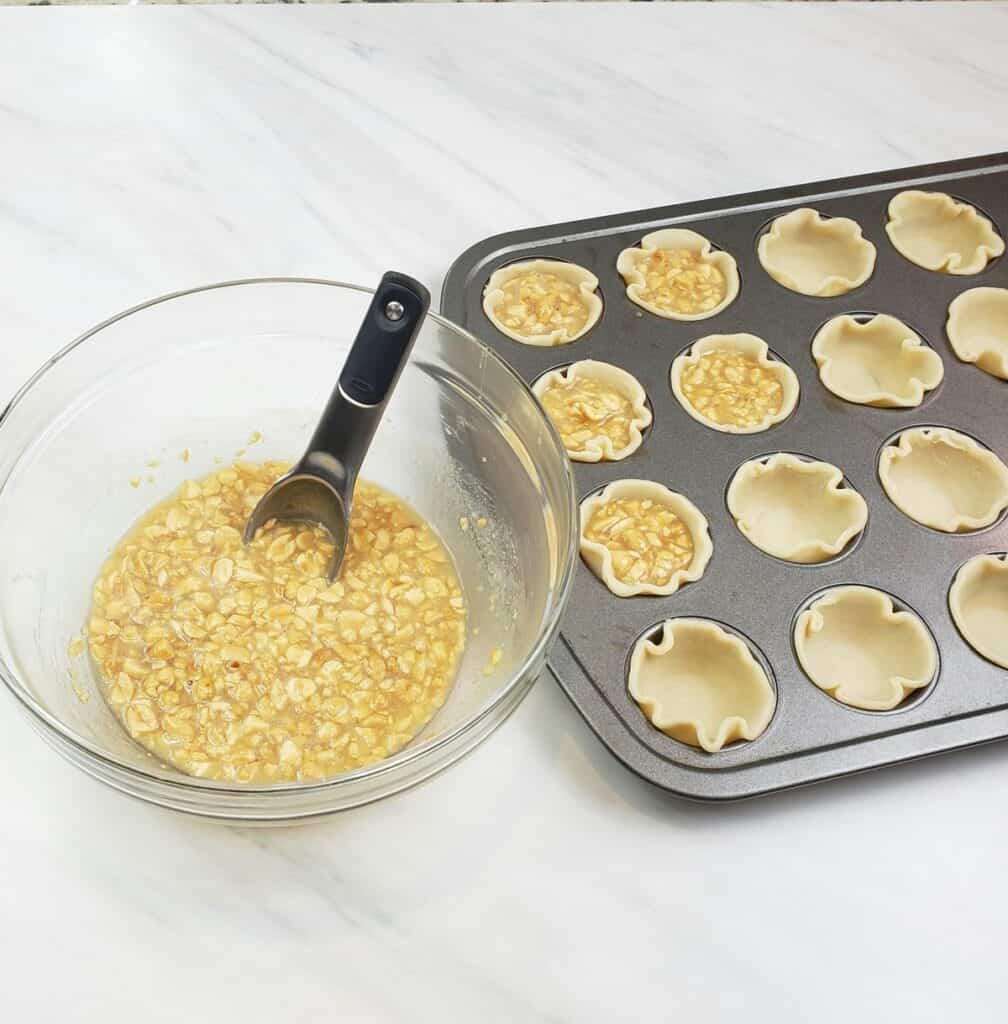

- Fill each tart shell with about 1 tablespoon of filling.
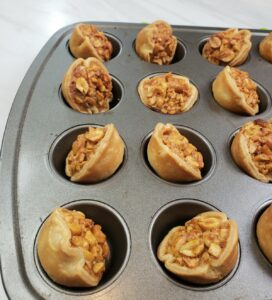
- Bake on the center rack of the oven at 350F degrees for 19 minutes or until the center of the filling is puffed and the crust is golden brown.
- Remove the pan(s) from the oven and run a sharp knife around the outside edges of any tassie where the filling has bubbled over.
- Tip: Instead of transferring the tassies to a wire rack (that you'll have to wash later) use the knife to gently tilt them to one side in the muffin pan to cool right in the pan.

What is the Alabama Peanut Producers Association?
The Alabama Peanut Producers Association (APPA) started in 1958. The Association represents the interests of Alabama peanut growers through a variety of promotions, research and educational programs. Activities target state and national levels for the enhancement and unity of the entire peanut industry. The Association is voluntarily funded by peanut growers.
Can I double this recipe for a party?
Yes! Every ingredient easily doubles to make 3 dozen. The package of refrigerated pie dough comes with 2 pie crusts in it.
Can I use homemade pie crust dough?
If you have a favorite pie crust recipe, you can absolutely use it in place of the pre-made, rolled out dough. Roll the dough to ⅛ inch thickness.
Can I freeze Honey Peanut Pie Tassies?
Yes. Arrange tassies in an airtight container in the freezer for several months. Or, arrange in a single layer in a freezer plastic bag on a level surface (or small baking pan) in the freezer. Remove the tarts from the plastic bag (to prevent any condensation from touching the tassies) and thaw at room temperature for an hour. Cover and store at room temperature once thawed.
Other baking recipes you will love
- Honey Roasted Peanut Pie
- Persimmon Spice Sheet Cake with Maple Frosting
- Honey Bread Pudding with Vanilla Sauce
- Best Ever One-Bowl Banana Bread
- Double-Stuffed Cinnamon Rolls

Honey Peanut Pie Tassies (No Corn Syrup)
SAVE THIS RECIPE
Equipment
- miniature muffin pans
- 2 ½ inch Round cookie cutter
Ingredients
- 1 refrigerated, rolled up pie crust dough (half of a 14.1-ounce package) Such as Pillsbury
- 2 tablespoons salted or unsalted butter
- 1 large egg
- ⅓ cup honey
- 1 teaspoon vanilla extract
- ¾ cup lightly salted, unsalted or salted skinless peanuts, chopped such as Cocktail peanuts
Instructions
- Preheat oven to 350F degrees.
- Place the rolled up piecrust dough on the counter (unwrapped). The package gives instructions to let stand at room temperature for 15 minutes but many people overlook it.
- While pie dough is standing at room temperature, make the filling.
- First, melt butter in the microwave for 30 seconds. It will be almost melted but not too hot. Add the egg and beat with a fork or wire whisk until the egg white is frothy and the butter is smooth.
- Add the honey and stir well. Stir in the chopped peanuts. Set aside.
- Carefully unroll the pie crust dough. Use a smooth cylinder-shaped glass or rolling pin to smooth out any "wrinkles" and make the circle 12 inches. (It comes in 11 ½- inch circle.)
- Cut out 16 rounds with a 2 ½-inch cookie or biscuit cutter. Tip: It helps to use a thin spatula or dough scraper to lift up the rounds over to the mini muffin pans. Re-roll dough to cut out 2 more rounds.
- Tip: I have found that if I place the side of the pie crust rounds that was touching the countertop up and away from the muffin tin, they never stick! Be sure to wipe off any filling from the muffin pan before baking. You will thank me when it comes time to wash the pans. 😉
- Using your fingertips or a tart tamper, gently press the dough to the bottom of the mini muffin pan. No need to grease the pans. (The tart tamper helps if you have long fingernails that tend to puncture the dough as you press on the bottom.) Don't press too hard into the pan to avoid the crust sticking.
- Fill each tart shell with about 1 tablespoon of filling. Be sure to stir the mixture in the bowl occasionally because the peanuts rise to the top.
- Bake on the center rack of the oven at 350F degrees for 19 minutes or until the center of the filling is puffed and the crust is golden brown.
- Remove the pan(s) from the oven and immediately run a sharp knife around the outside edges of any tassie where the filling has bubbled over.
- Instead of transferring the tassies to a wire rack (that you'll have to wash later) to cool, use the knife to gently tilt them to one side in the muffin pan to cool right in the pan.


Comments
No Comments