
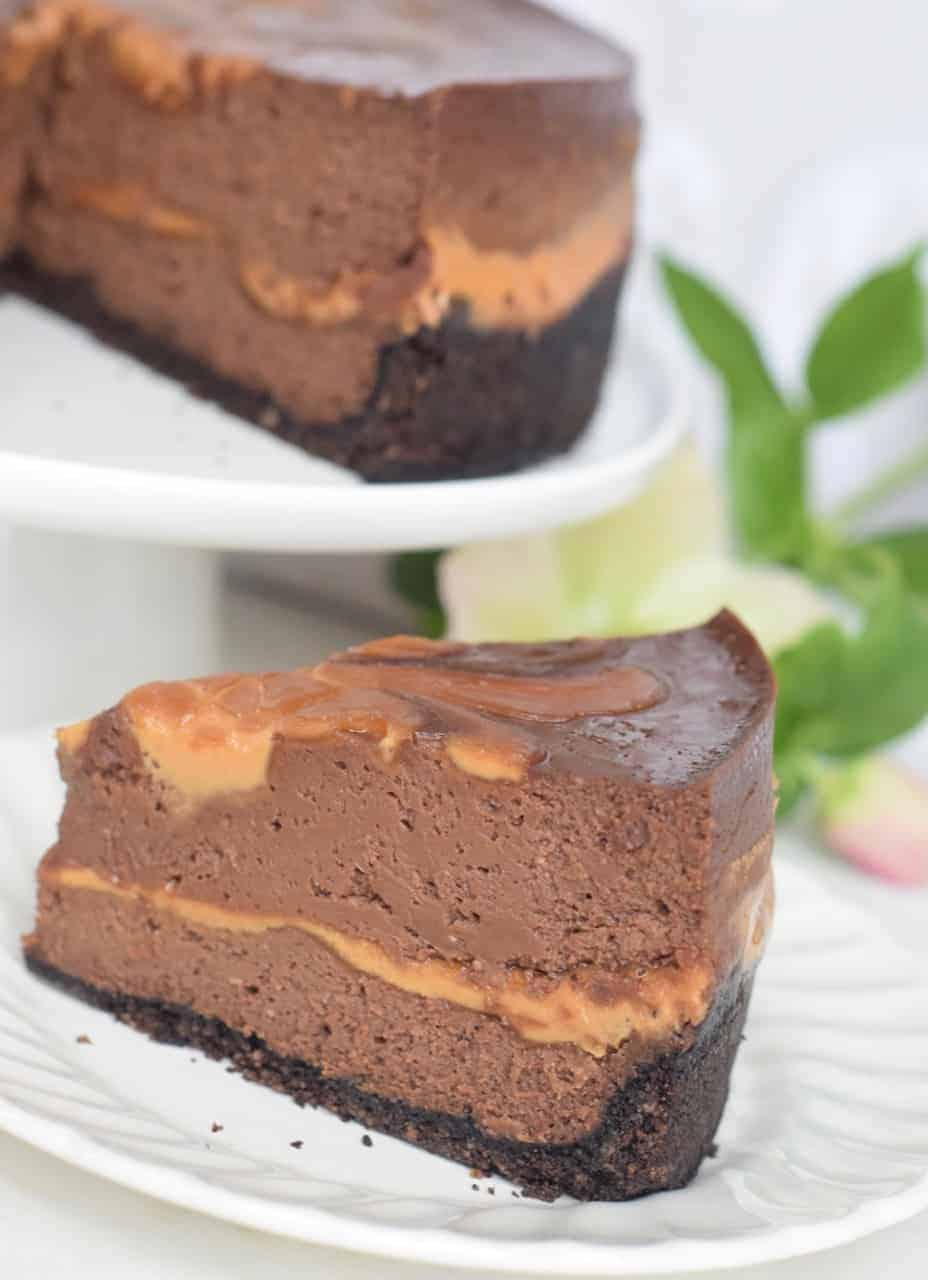
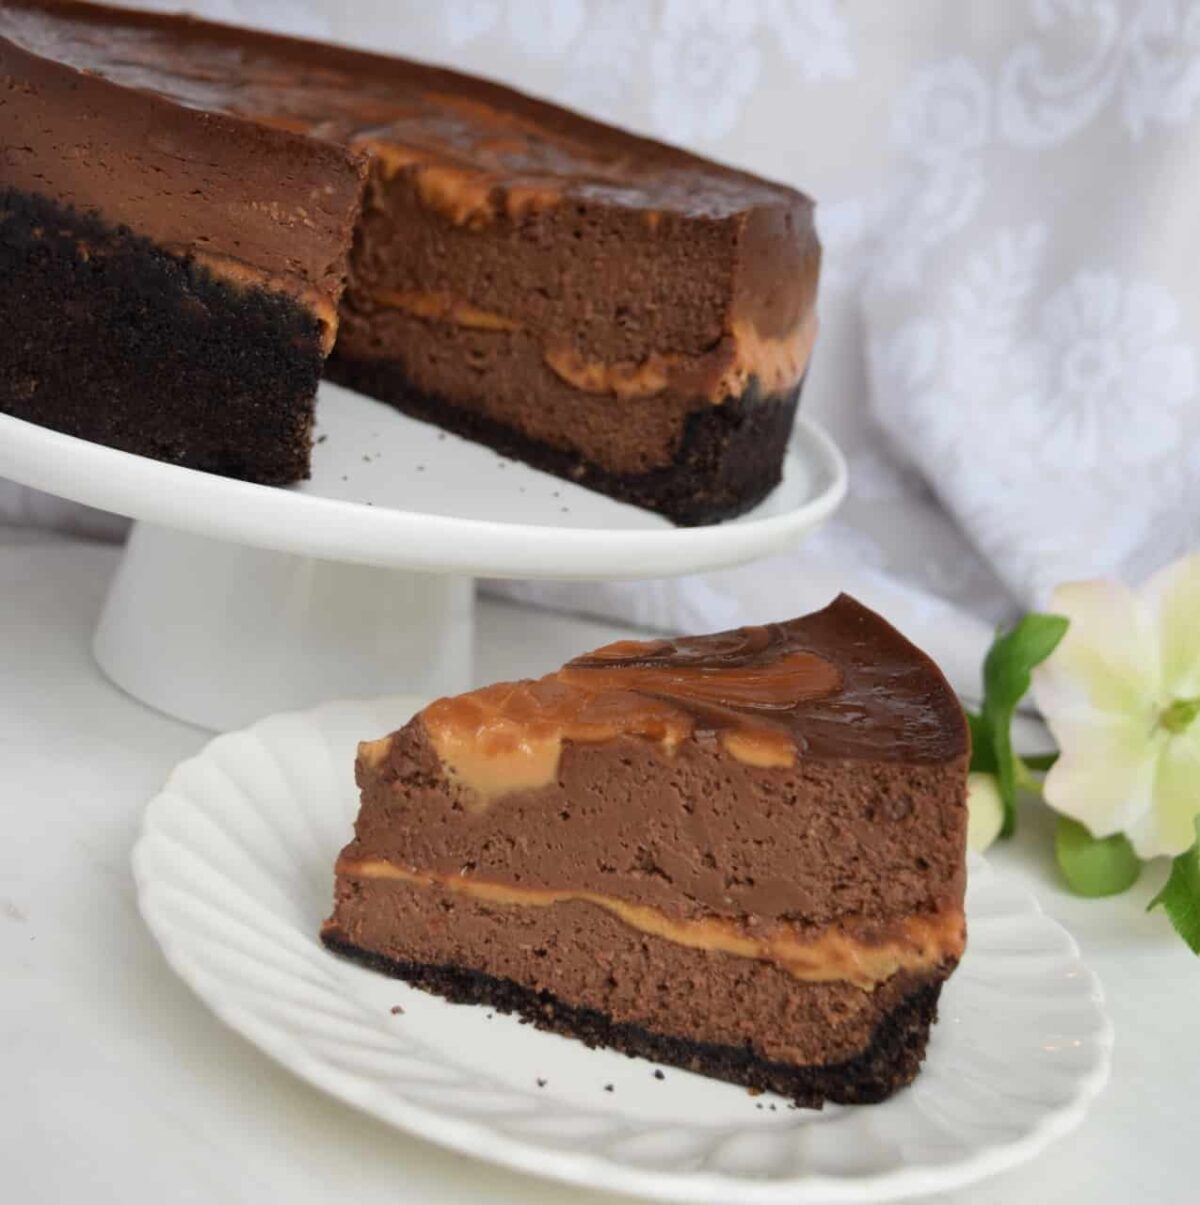
No fail, never crack Instant Pot Chocolate Peanut Butter Swirl Cheesecake never disappoints! Easy, step by step pics walk you through the process. Simply the best peanut butter chocolate cheesecake -ever! The pressure cooker is the perfect way to make cheesecake because of the steamy environment inside the pot with no drafts.
SAVE THIS RECIPE
I've joined the Instant Pot fan club! It's been a game changer for meal prep the last few months but did you know you could make cheesecake in it? Try my Instant Pot Chocolate-Peanut Butter Swirl Cheesecake and you may never go back to making cheesecake in the oven. It's not just convenient to make it in the Instant Pot, but it's the best tasting cheesecake you've ever had!
I now own two Instant Pots. My husband gave me the Instant Pot Duo Mini 3-quart Programmable Cooker for Christmas last year. I call it the baby. I had so much fun making New Years Day dinner in it including Instant Pot Beans and Greens.
My favorite thing to make in it is hard cooked eggs. I will never make them on the stovetop again! The shell seriously rolls off the egg all in one piece!
Shortcuts
- You don't have to wait for an hour for the cream cheese to soften to room temperature! It's like watching paint dry! Unwrap both packages and place on a paper plate or plate. Microwave at HIGH (1100 watts) for 35 seconds. Done!
- Same for the eggs. While it is important for the eggs to be at room temperature for cheesecake batter, there is a quicker way than setting them on the counter for an hour. Set them in a small bowl of very warm (not hot) for 10 minutes. They are magically now at room temperature!
Why is a pressure cooker the perfect method for making cheesecake?
The Instant Pot cooks cheesecake in a steamy environment with no drafts.
As soon as I got the Instant Pot 6 Quart Duo 7-in1 Multi-Use Programmable Cooker I developed then tested this cheesecake almost every day.
I tested different pans, cooking times, pressure release times, and ingredient amounts.
I've made it in two different pans, Fat Daddio's 7"x 3" removable bottom cheesecake pan and a 7" springform pan that came in a set of three when I was testing recipes for my cookbook Magic Cakes.
My favorite pan was the Fat Daddio's pan. I've perfected this decadent, over-the-top chocolate peanut butter cheesecake just for you!
Let's get started!
How to make Chocolate-Peanut Butter Swirl Cheesecake
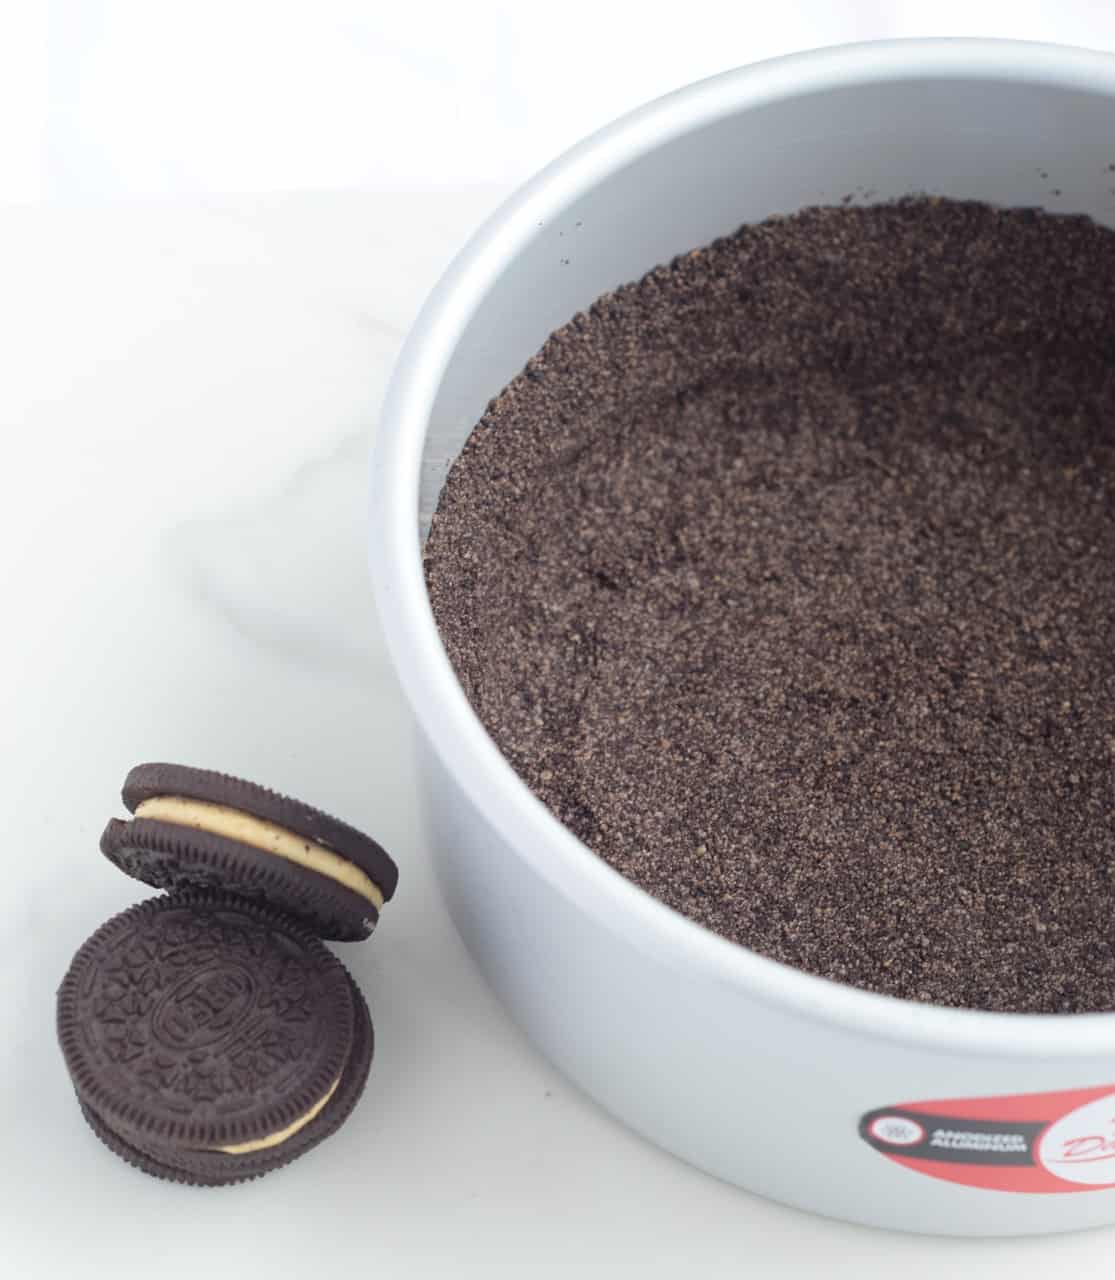
Start with half of a package of peanut butter creme filled Oreo cookies-you know what to do with the other half, right? Yep! Pass around a few in the lunch boxes then snack on them while you make the cheesecake! Or, I guess you could save the other half for a second cheesecake! You can also use regular Oreos.
Process the cookies in a food processor until finely crushed.
You can crush them in a large zip top bag but the peanut butter goodness tends to smash against the plastic bag. Using the whole cookie saves the step and ingredient of adding melted butter to cookie crumbs.
The peanut butter creme acts as the binder instead of adding butter.
Do I have to bake the cheesecake crust first?
I tried it without baking it first and the crust turned out a little soggy so it is worth it to me to bake for a few minutes while I prepare the filling.
Press the crumbs firmly in the bottom of your 7x3-inch removable bottom cake pan sprayed with cooking spray and 1" up the sides. Bake at 350 degrees for 8 minutes. Let it cool completely while you prepare the cheesecake batter.
You can also freeze the crust instead of bake it but it tends to be less crisp and it doesn't save time because it takes longer to freeze than bake it.
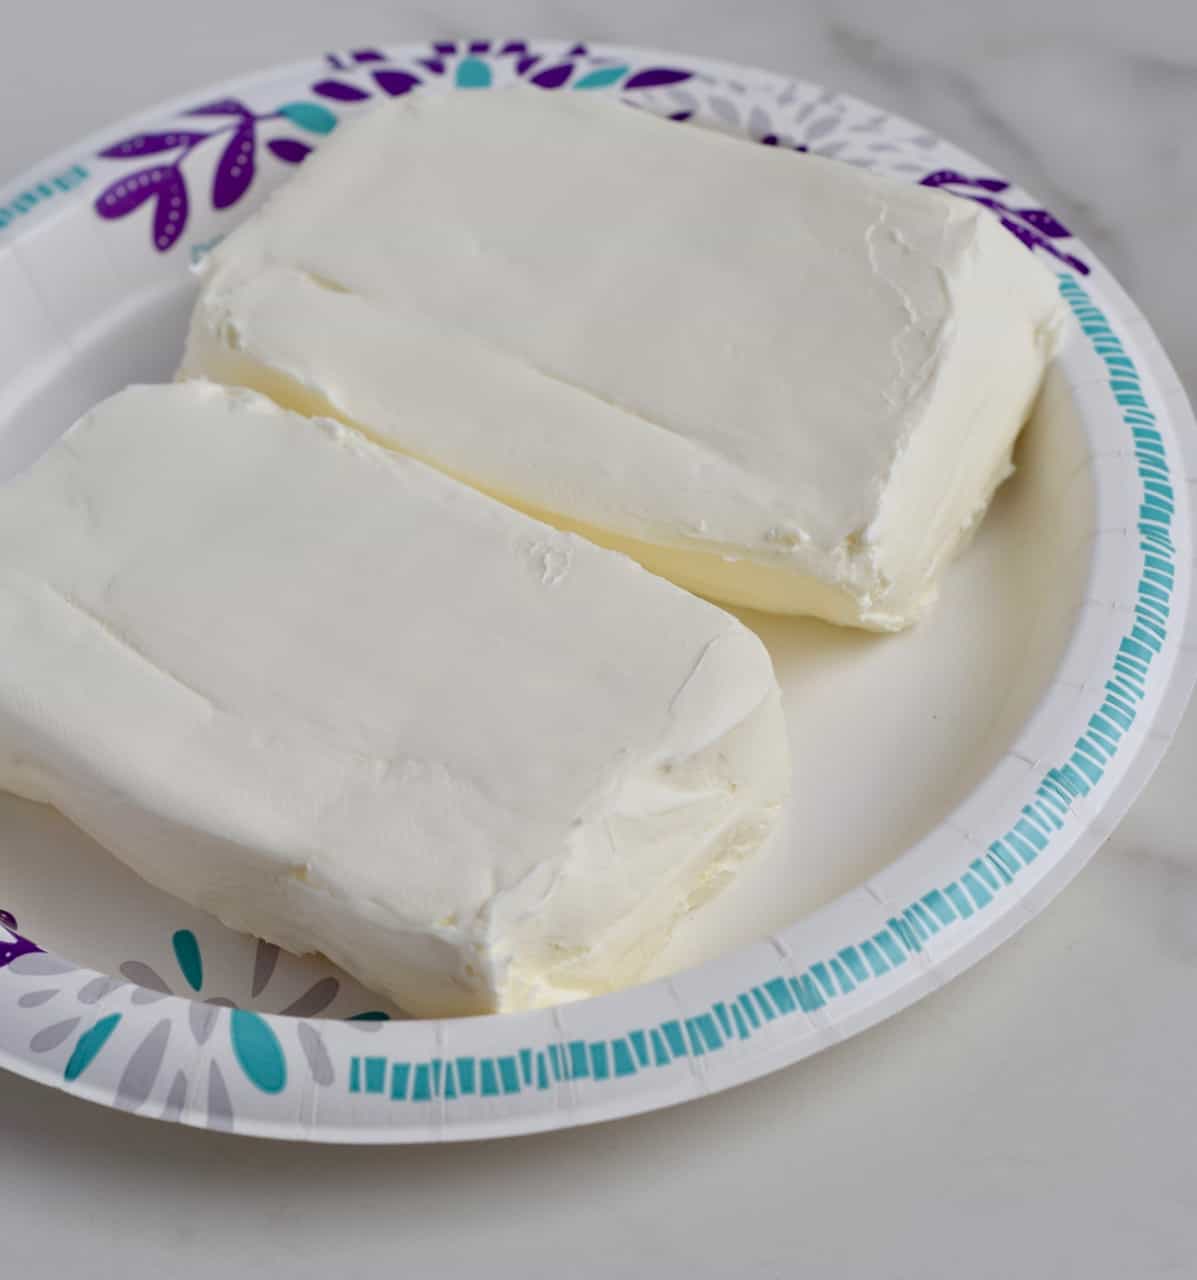
As I mention in my cookbook, Magic Cakes, you don't have to wait until cream cheese and eggs placed on the countertop come to room temperature.
For two blocks of cream cheese, microwave them together (unwrapped) on HIGH (1100 watts) for 35 seconds.
For the eggs, place them in a small bowl and cover with very warm water (not hot) for 10 minutes. The eggs can be warming while you make the crust.
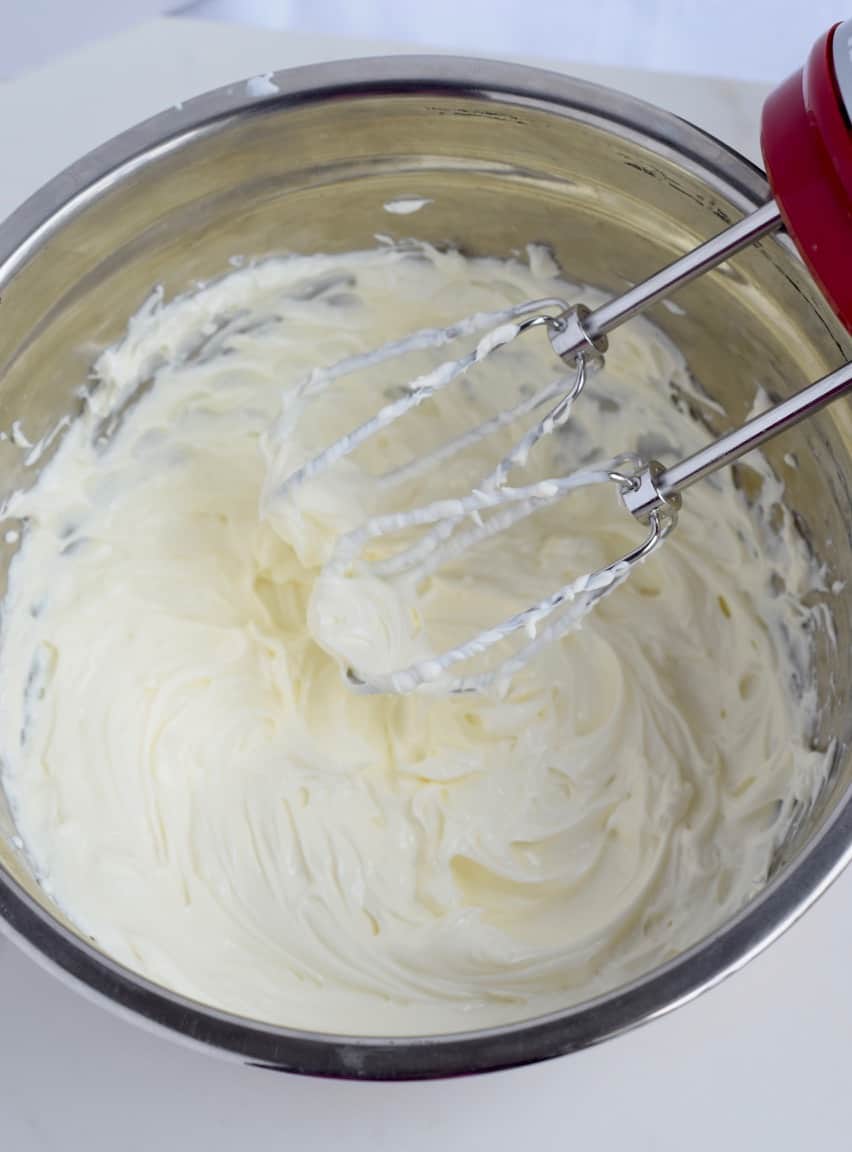
A hand mixer is better for cheesecake than a stand mixer. A stand mixer tends to incorporate too much air in a cheesecake which creates air bubbles in your cheesecake. Save the stand mixer for layer cakes where you want to whip air into the batter.
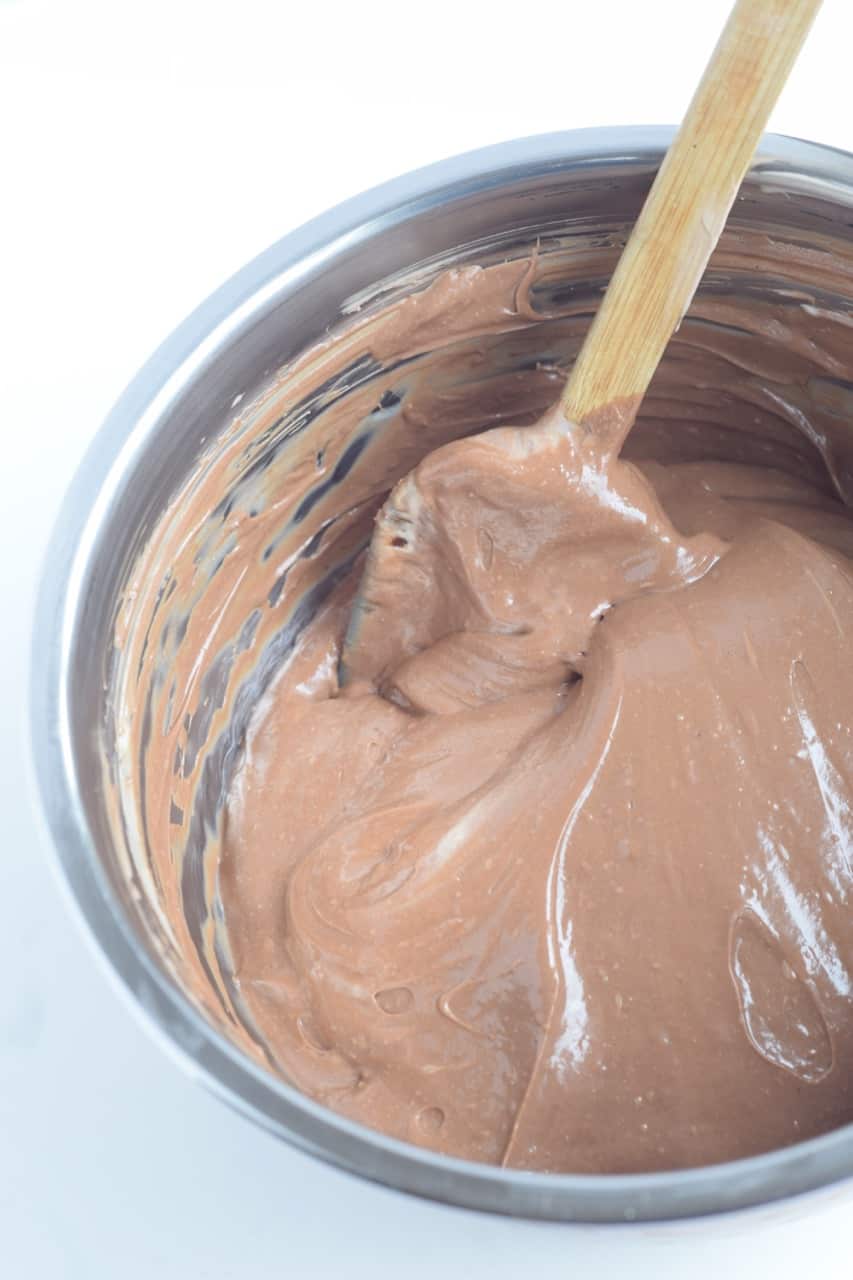
Keep the mixer on medium-low speed. You can even just use the spatula to stir in the melted chocolate to keep those air bubbles from forming.
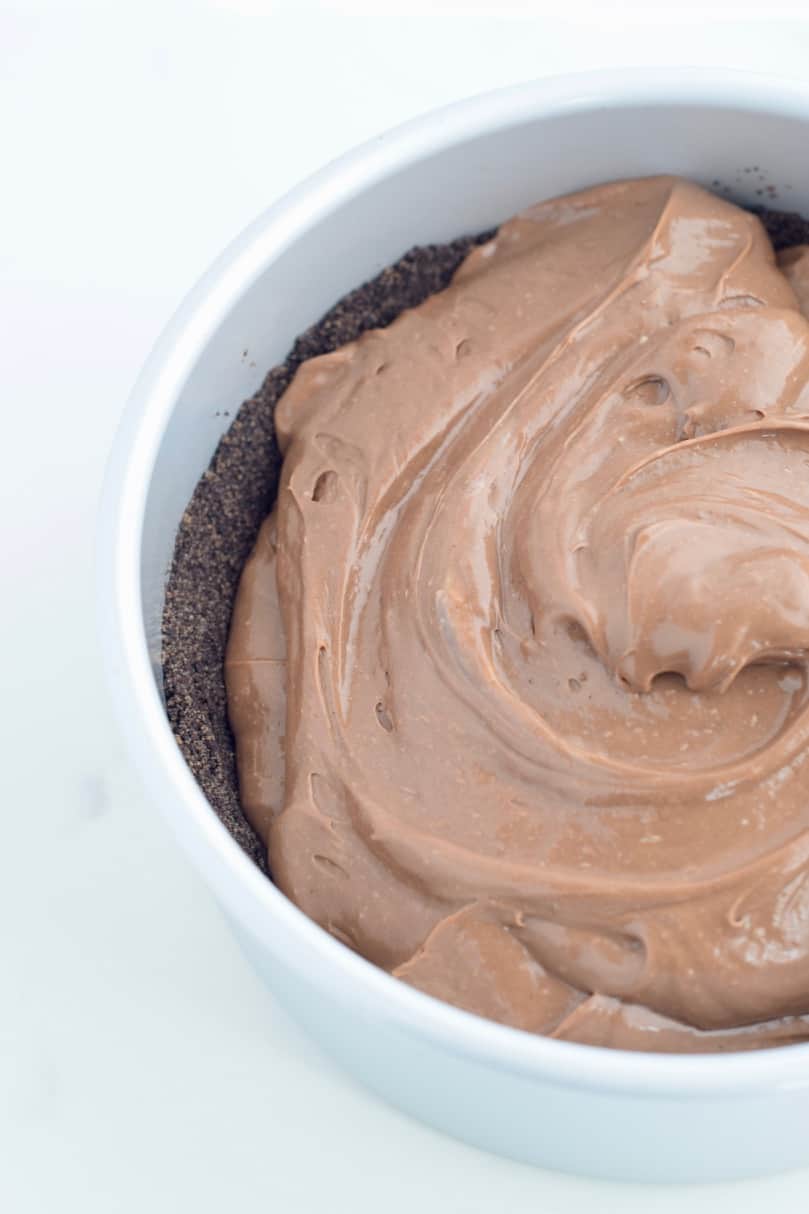
Dollop half of chocolate cheesecake batter in the baked and cooled crust. Gently spread it to the edges of the pan.
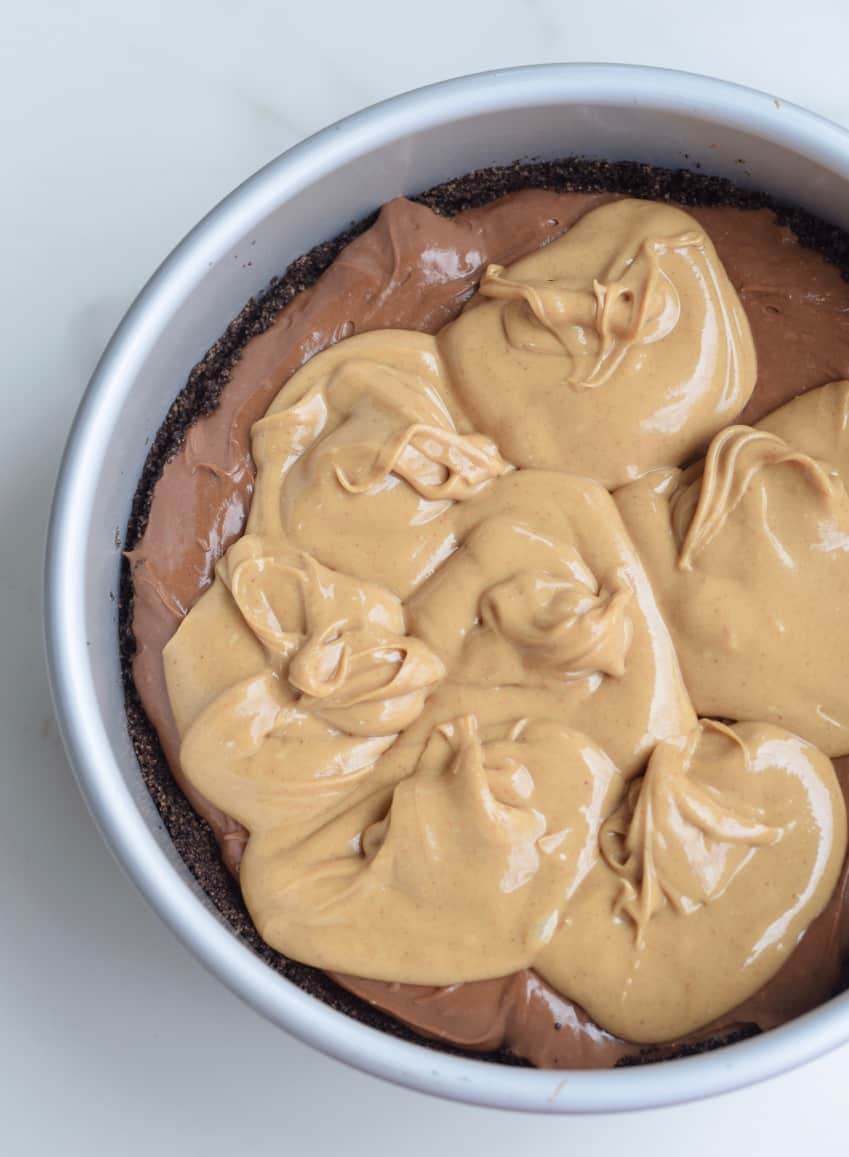
Microwave the peanut butter in a microwave safe bowl on HIGH (1100 watts) to thin out the peanut butter. This will make it much easier to spread on the batter.
Dollop ¾ cup of the peanut butter on the chocolate cheesecake batter, then spread with an offset spatula or the back of a spoon.
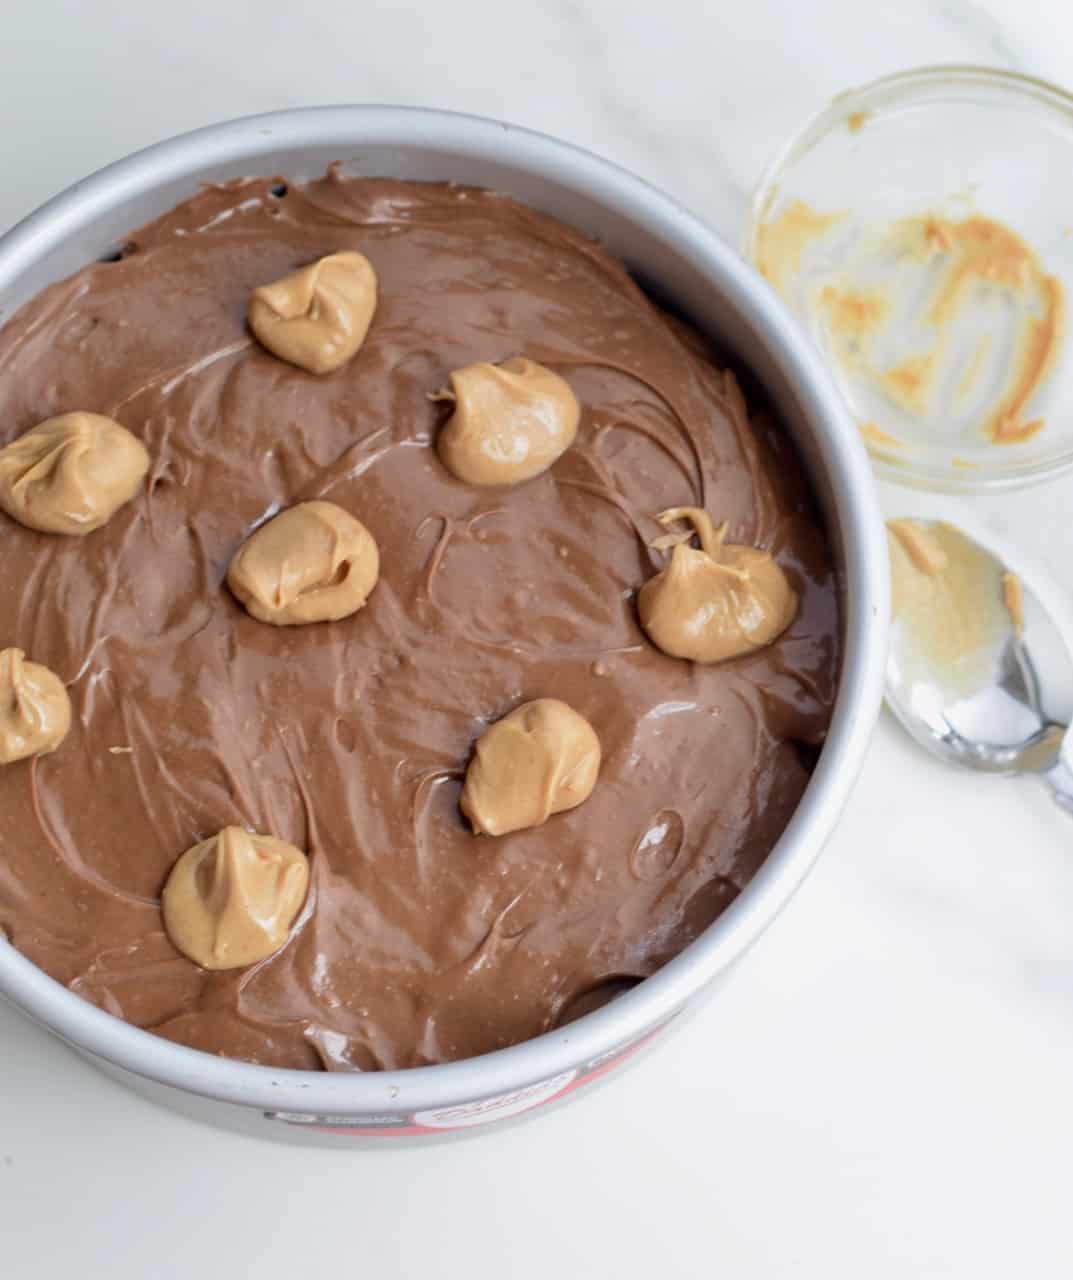
Spread the remaining half of chocolate cheesecake batter on the peanut butter layer, then randomly place tiny dollops of the remaining ¼ cup peanut butter on top of the chocolate layer.
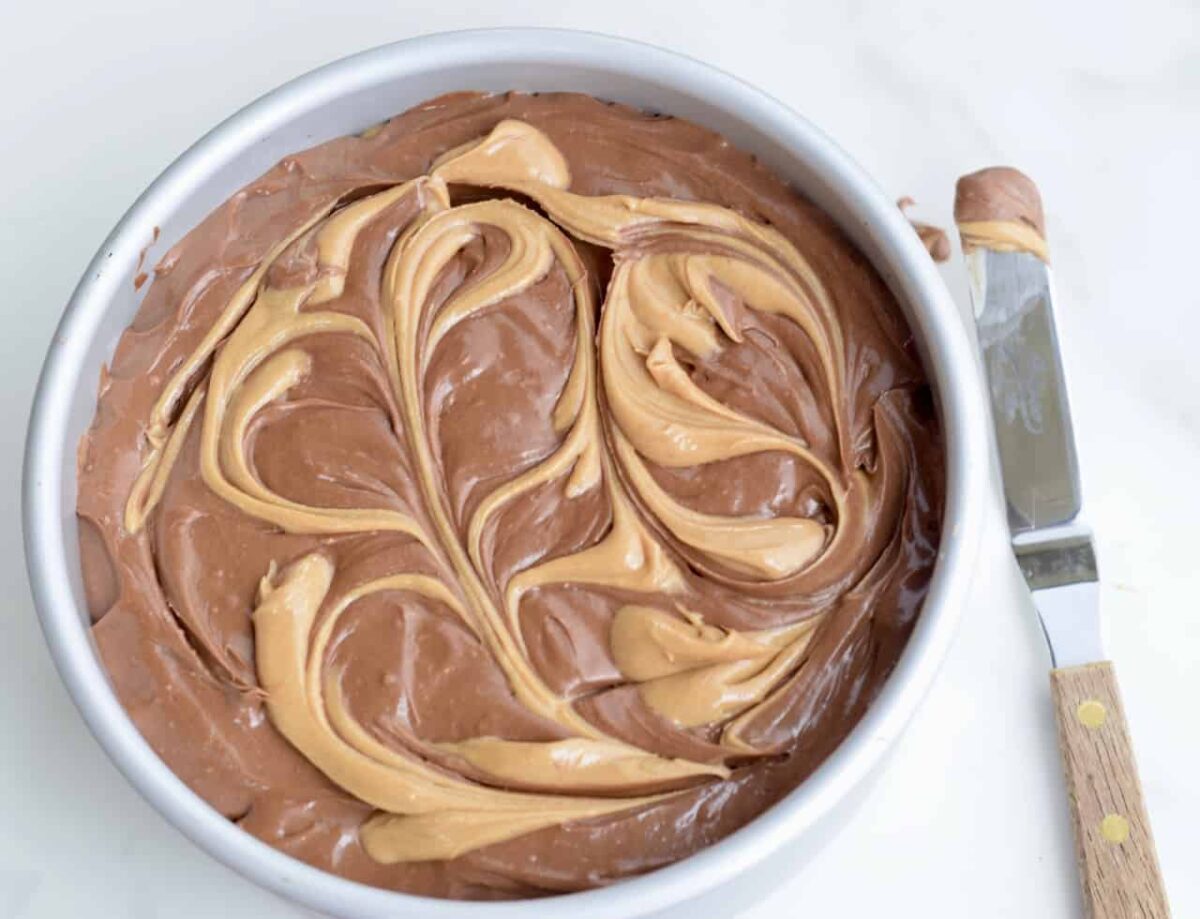
With a small offset spatula or table knife, gently run it through each dollop of peanut butter. Don't push the spatula into the middle layer of peanut butter, just rake it through the dollops.
I've made about 6 of these cheesecakes while perfecting them and I'll have to admit I've had fun with this part. No two cheesecakes have looked the same on top. They each have their own unique "ink blot" art designs. What do you see in this one?
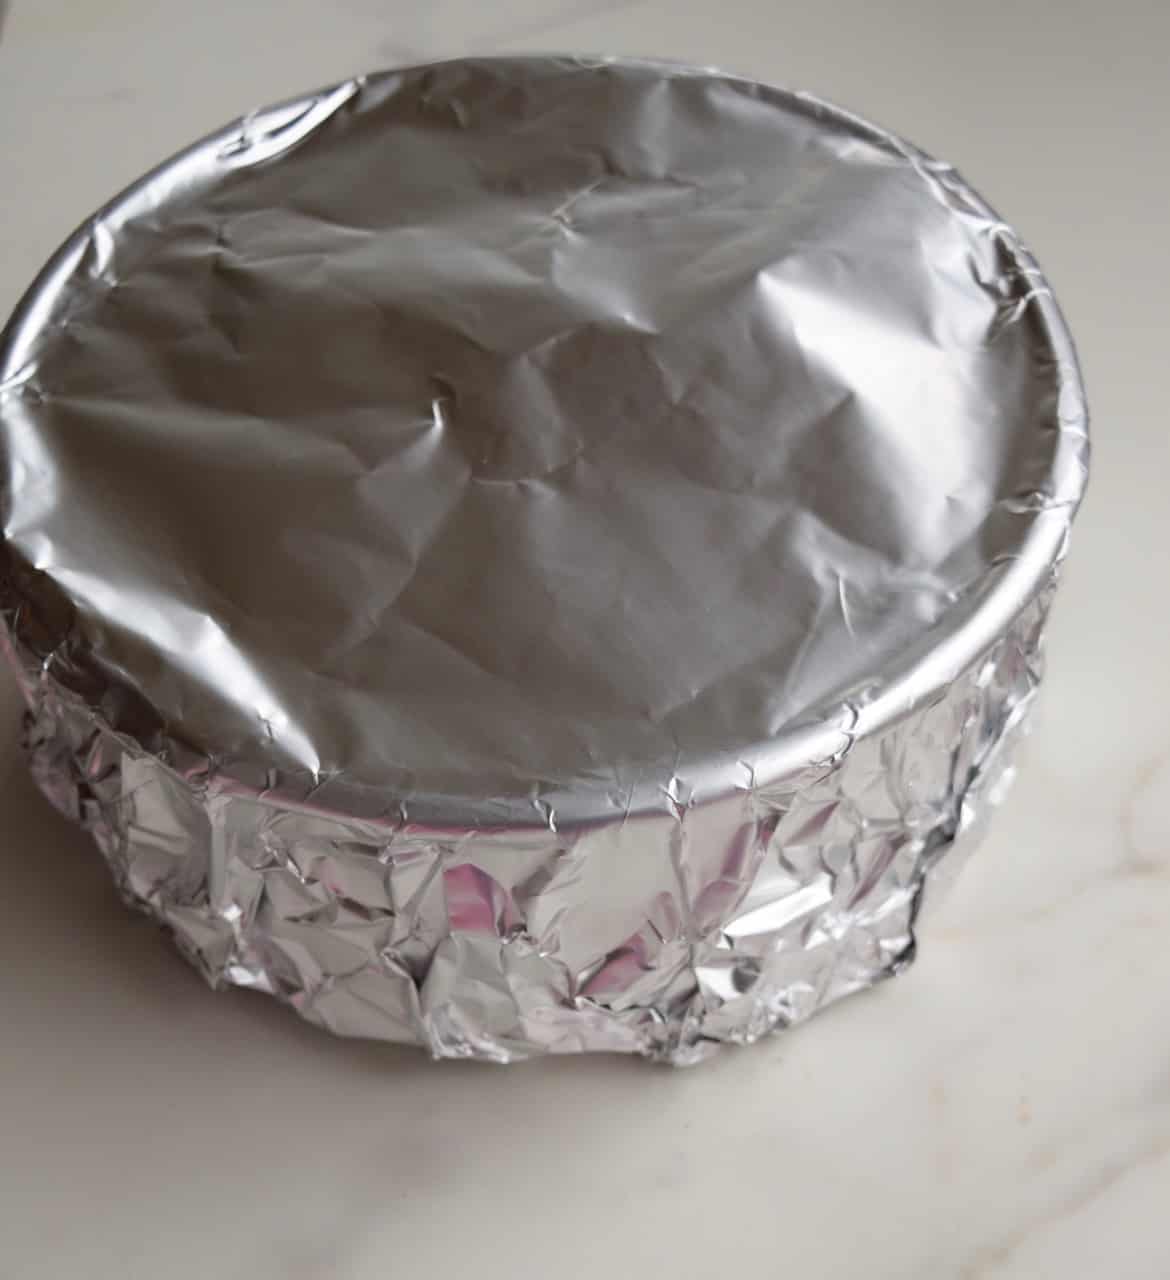
Place a large piece of heavy duty, extra wide aluminum foil over the top of the cheesecake pan, but don't let it touch the batter.
"Tent" it slightly by punching the foil up slight with your fingertips before pressing it down the sides and flattening it on the bottom. Be sure to gently push the covered pan down on the countertop so the bottom is flat.
You don't want to end up with a cheesecake that has baked a little sideways.
How to make a sling for the Instant Pot with foil
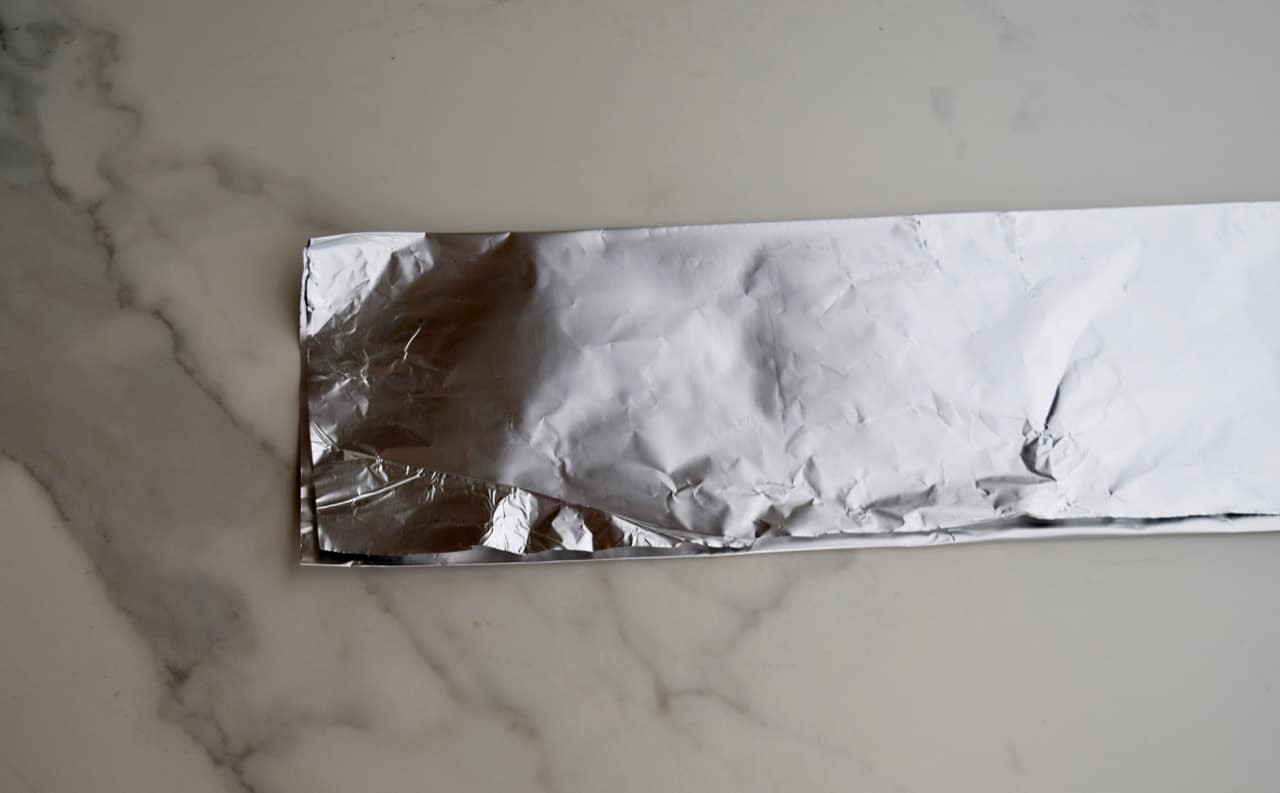
If you think your Instant Pot trivet handles are too short or your brand of programmable cooker doesn't have handles on the trivet.
Create a "sling" by folding an 18"x12" piece of heavy duty, extra wide aluminum foil in thirds and lower the covered cheesecake pan down into the pot filled with 1 ½ cups water on the trivet.
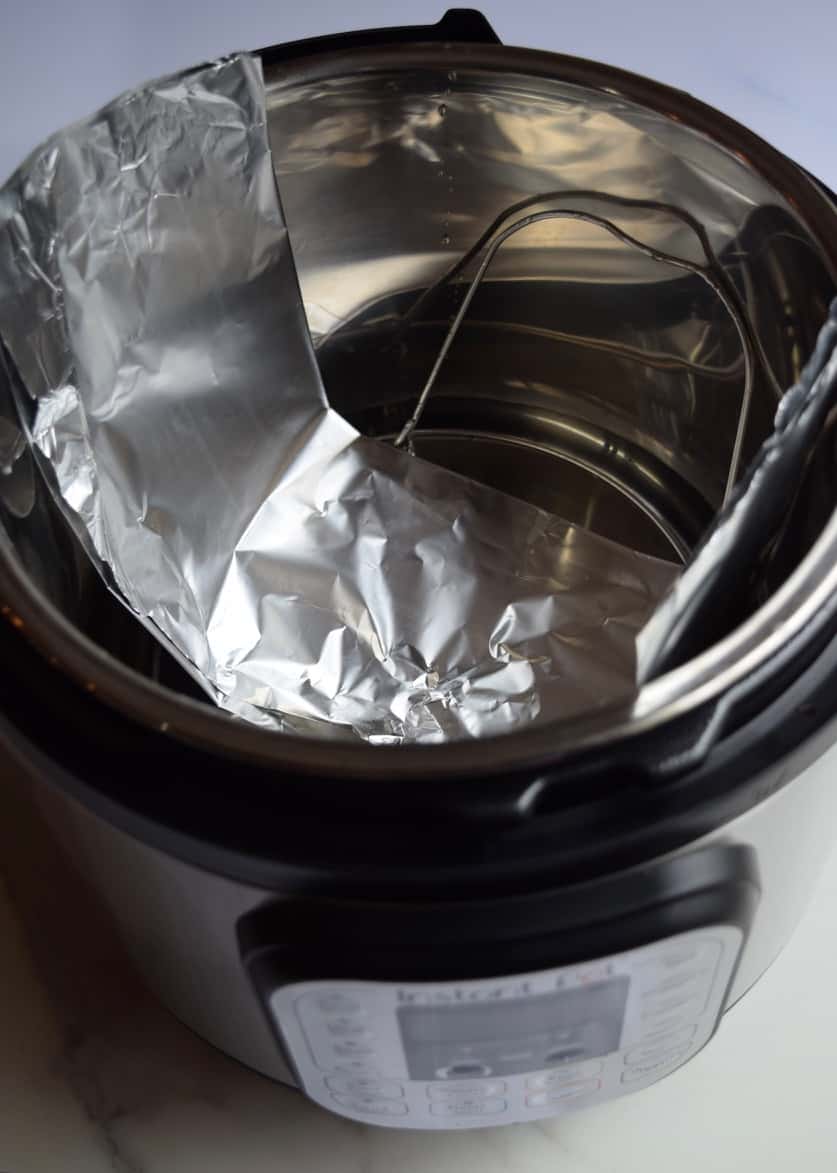
This is what it looks like with the sling in the Instant Pot without the cheesecake pan. I use the trivet handles with pot holders but some people swear by the sling.
Be sure to push the pressure release valve over to sealing not venting and then push the Pressure Cook button. Push the +/- button until it reaches 50 minutes on the timer. In 10 seconds the screen will say "ON". In about 6 minutes the pressure will build up and the screen will change back to 50 and start the countdown.
The natural pressure release method will kick in and take about 15 minutes before the pin drops and it is safe to remove the cheesecake. Remove it slowly.
When a cheesecake goes from one temperature to a different temperature too quickly, it "shocks" it. I read one blog that said this caused dimpling on the top of their cheesecake. I haven't had any trouble with the top of mine and have loved the swirl on top.
Uncover the cheesecake and let it cool for 1 to 1 ½ hours before covering and chilling for at least 8 hours or overnight is best. If any water drips from the foil onto to the top of the cheesecake when you uncover it from the pot just gently blot it off with a flat paper towel.
To remove the cheesecake from the bottom of the cheesecake pan, use two flat spatulas, one on either side of the cheesecake crust to gently remove the crust off the pan. Place the cheesecake on a serving plate.
Do all Instant Pot Cheesecakes cook 50 minutes?
No. This recipe is thicker than most and smaller than many but oh so decadent!
Here is a tried and true plain cheesecake recipe from PressureCookRecipes.com. It takes 26 minutes to cook in the Instant Pot, but it is thinner.
Although my Chocolate Peanut Butter Cheesecake does take 50 minutes to cook, it is still less time than most tall, dense cheesecakes. And, you'll never have to wonder if it is going to be brown around the edges or crack.
Enjoy and I'd love to hear your Instant Pot cheesecake adventures. Be sure to click on the side bar to the right to sign up for my email list so you never miss a post.
Other Instant Pot recipes you will love
Instant Pot Chicken Bacon Ranch Alfredo
Instant Pot Bone-In Pepper Jelly Ham
Instant Pot White Bean and Chicken Chili
Watch the videos!
Watch my three ABC 33/40 segments on Talk of Alabama here and here and here showing how to make Instant Pot Chocolate-Peanut Butter Swirl Cheesecake
Follow me on Facebook, Instagram, Pinterest and YouTube. Be social and share, y'all! Want all my new recipes and updates? Get my weekly newsletter in your inbox!
Leave a comment below the printable recipe if you have questions or want to tell me how you liked the recipe. Don't forget to give the recipe a rating of 5 stars if you love it!
Pin It For Later


Instant Pot Chocolate-Peanut Butter Swirl Cheesecake
SAVE THIS RECIPE
Ingredients
- 15 peanut butter creme Oreo sandwich cookies (regular Oreos are fine)
- 2 8-oz packages cream cheese, softened See microwave tip in notes
- ¾ cup sugar
- 1 tablespoon unsweetened cocoa powder
- 2 large eggs, room temperature See quick tip in notes
- ¼ cup sour cream
- 1 teaspoon vanilla extract
- ¼ cup heavy whipping cream
- 1 cup semi-sweet chocolate chips [half of (12-oz bag)]
- 1 teaspoon espresso powder or instant coffee granules (optional)
- 1 cup creamy peanut butter divided
Instructions
- Preheat oven to 350 ° for the crust only.
- Place cookies in the bowl of a food processor and process until finely crushed (1 ¼ cups). You can also crush them in a zip top bag and a rolling pin but the peanut butter filling tends to stick to the bag.
- Coat a 7”x3” removable bottom pan (I use Fat Daddio’s) or springform pan with cooking spray. Press cookie crumbs into the bottom and 1-inch up the sides of the pan with your fingertips or the bottom of a glass. Bake for 8 minutes. Let crust cool while you prepare the filling (about 10 minutes). It is possible to make this crust without baking it, but the crust will be slightly soggy.Just freeze it for 30 minutes after letting it cool while you prepare the filling.
- Meanwhile, place cream cheese in a large mixing bowl and beat on medium-low speed with a hand mixer until creamy. A stand mixer is more powerful and tends to incorporate too much air in cheesecake. Scrape down sides of bowl.
- Combine sugar and cocoa in a very small bowl. This will help the cocoa incorporate into the cream cheese mixture without lumps. Add sugar mixture to cream cheese mixture and beat at medium-low speed until combined. Scrape down sides and bottom of bowl.
- Add eggs, one at a time, and beat on medium-low speed just until each egg is incorporated.
- Combine whipping cream and chocolate chips in a glass measuring cup or microwave safe bowl. Microwave on HIGH (1100) watts for 40 seconds. Stir until mixture is smooth. It will look like it won’t come together but it will suddenly and be silky smooth. Stir in espresso powder for a more intense chocolate flavor, but it’s not crucial. Add chocolate mixture, sour cream, and vanilla to cream cheese mixture and beat on medium-low speed just until incorporated.
- Microwave on HIGH (1100 watts) peanut butter in a glass measuring cup or microwave safe bowl 16 seconds or until slightly thinner.
- Spoon half of chocolate filling into the prepared crust. Spoon ¾ cup of the peanut butter in dollops over the chocolate filling, then spread almost to the edges of the pan. Pour the remaining half of chocolate filling over the peanut butter, spreading it to the edges of the pan. Dollop 1 teaspoonfuls of remaining peanut butter randomly onto the chocolate filling. Run a table knife through the peanut butter but not through to the middle peanut butter layer.
- Wrap a large piece of heavy duty aluminum foil (about 20"x 18") by placing it on top of the pan, slightly tenting it so it doesn’t touch the filling. Press the foil down the sides of the pan and around the bottom. Press the pan down on the countertop mashing the foil flat on the bottom.
- Pour 1 cup of water in the 6-quart Instant Pot and place the trivet on the bottom of the pot.
- (Optional) Make a “sling” of aluminum foil to help remove the hot pan when finished by folding a 20” long piece of heavy-duty aluminum foil in half then in thirds. Place this on top of the trivet that fits inside the 6-quart Instant Pot pan. I don’t have any trouble removing the cheesecake pan with the handles on my trivet but if your brand trivet doesn’t have handles or are hard to reach with potholders, the sling will make it easy to remove. Just fold the ends of the sling over the covered pan.
- Place the covered cheesecake on the trivet (and sling if using) in the insert pot.
- Seal the lid and pressure cook on HIGH for 50 minutes. (Be sure the valve is set to "sealing" if using a 6-quart Duo model.)
- The pressure will naturally release in about 15 minutes after pressure cooking. The lid will open easily when all pressure is released. Remove the lid and let it cool a few minutes and give it time for the steam to evaporate.
- Remove pan carefully, using the trivet handles (or sling if using) and pot holders. Place it on a wire rack. Let stand 5 minutes for foil to cool down. Remove foil carefully. I tore it from the bottom up the sides in a couple of pieces. Let cool completely on a wire rack 1 ½ hours or until room temperature.
- Cover with plastic wrap making sure it doesn't touch the cheesecake. Refrigerate at least 8 hours or overnight before serving.


Kay
Could you use the 4oz mason jars to make this in?
gritsandgouda
I've never made them in the jars so I couldn't suggest a cooking time but I would love to know if you make them in the jars and how they turned out. I would share the information on the recipe in the notes!
Kay
Can this be done in the 4oz mason jars?
Sandra Reed
Can I use a food processor instead of a hand mixer?
gritsandgouda
I do not recommend a food processor for the cheesecake batter because it whips so much air into it-even more than a stand mixer. A stand mixer can be used but only on low to medium-low. I totally understand wanting to use the food processor since you already have it out to crush the cookies, though. For cheesecakes, I'd use a mixer. Let me know how it works for you an enjoy!