
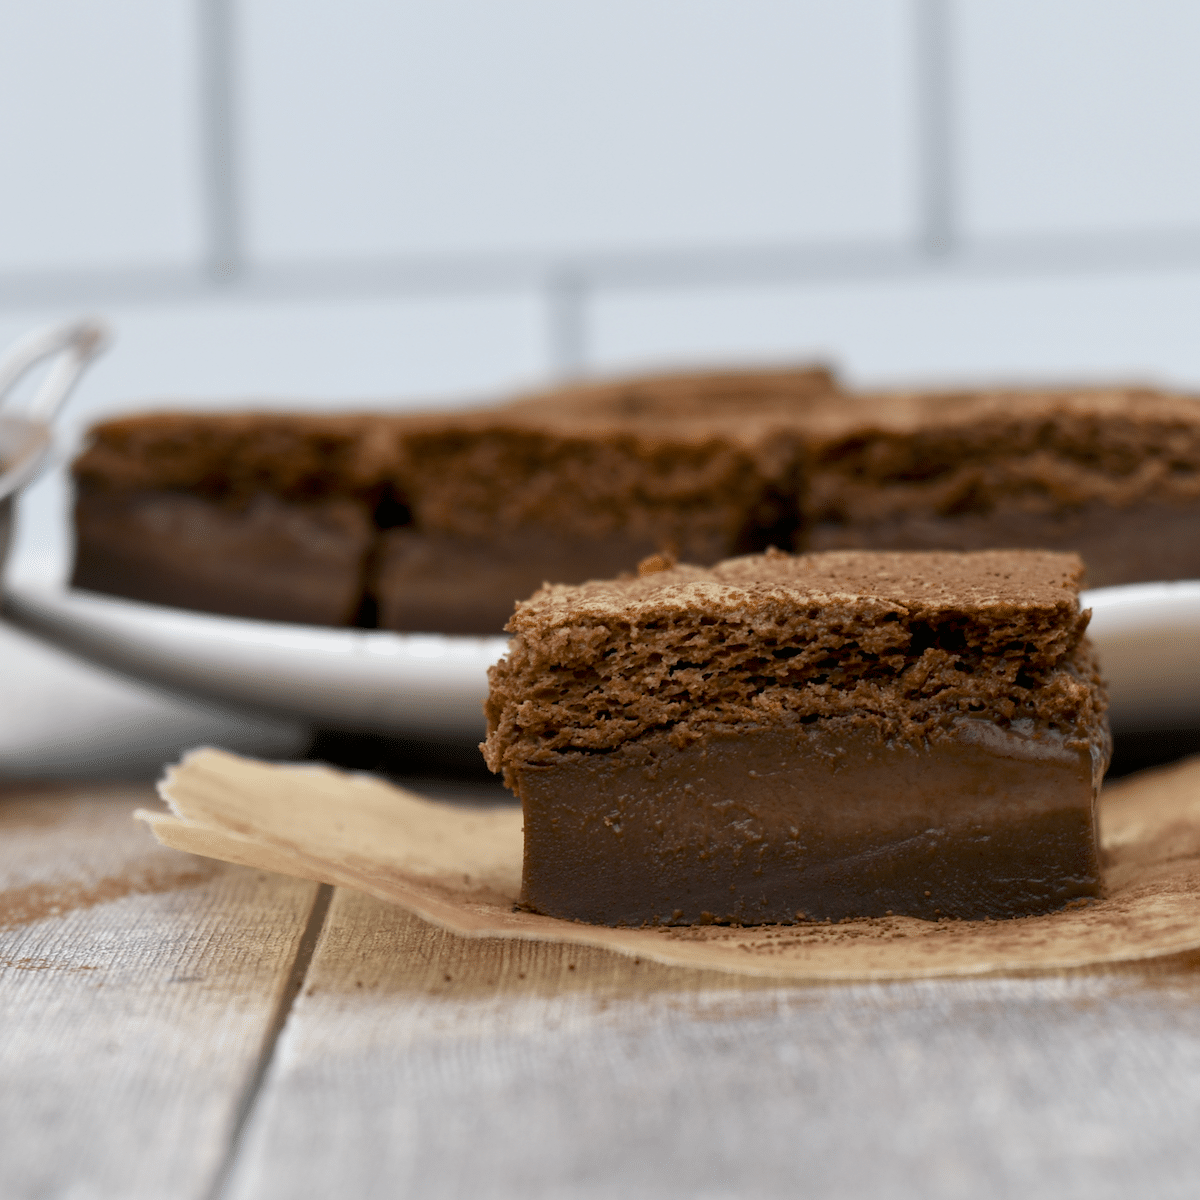
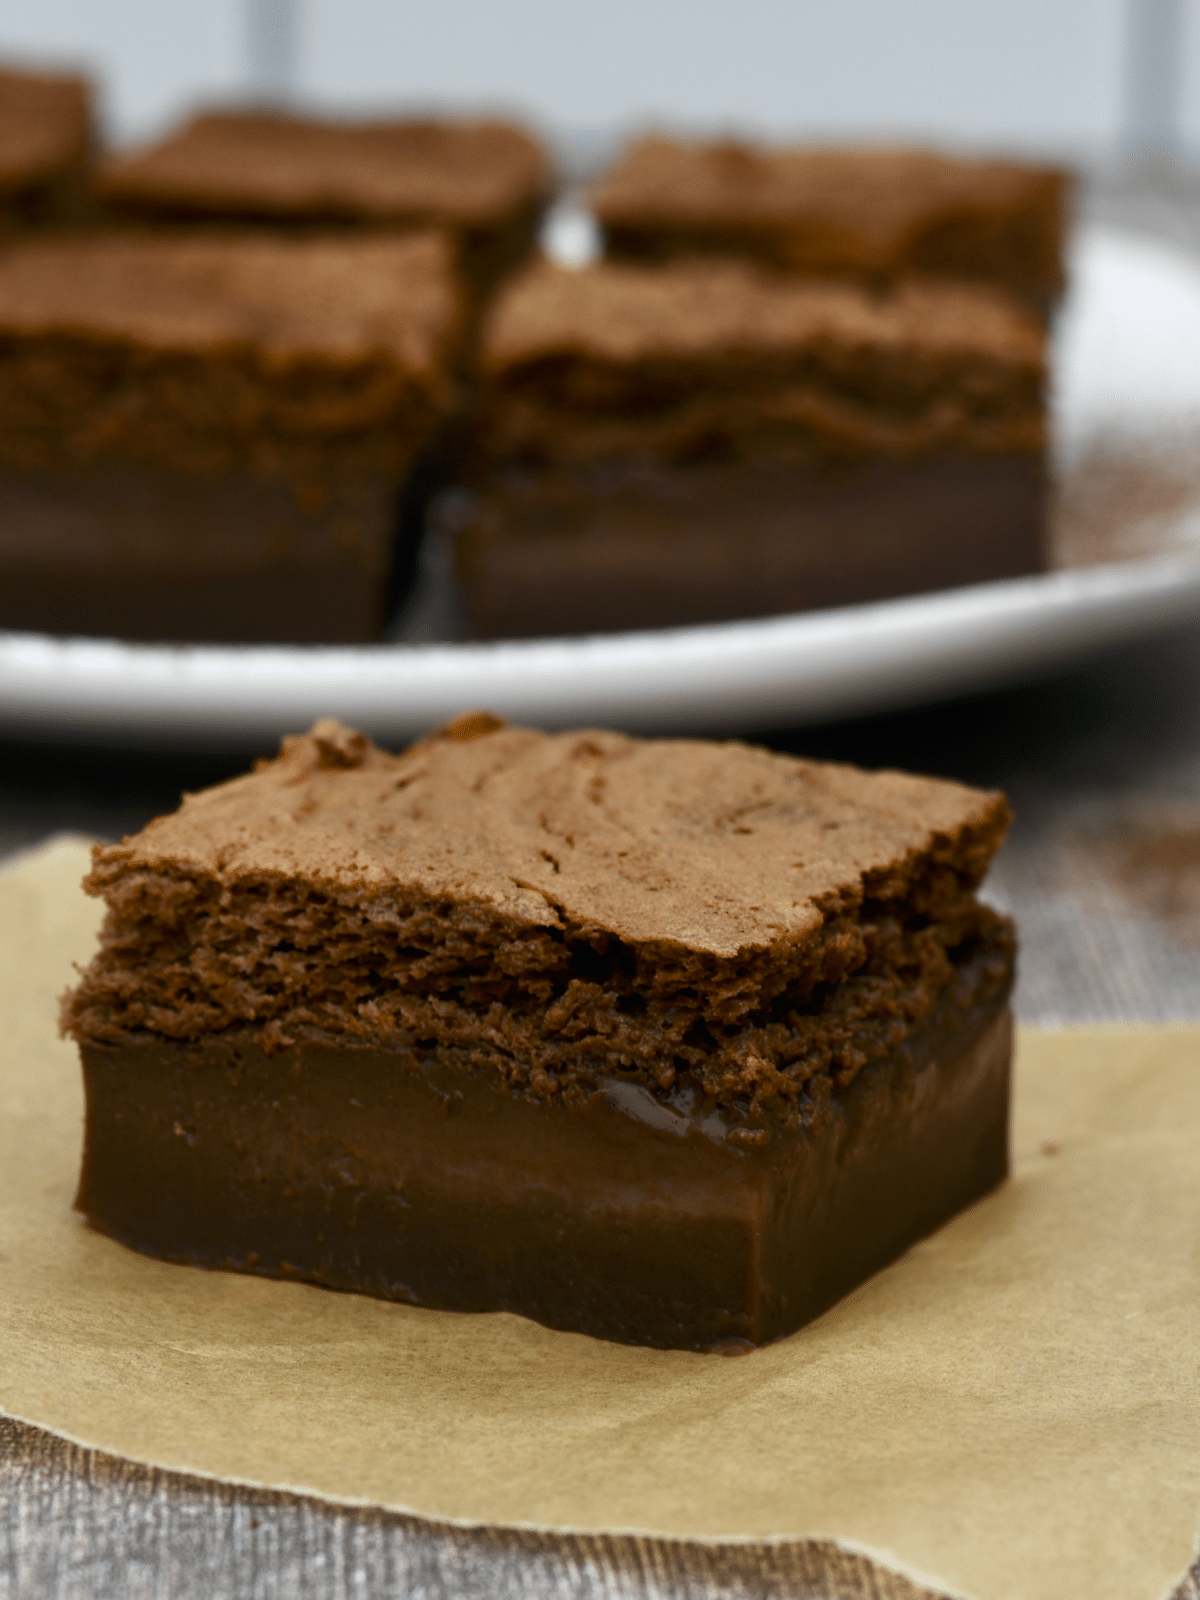
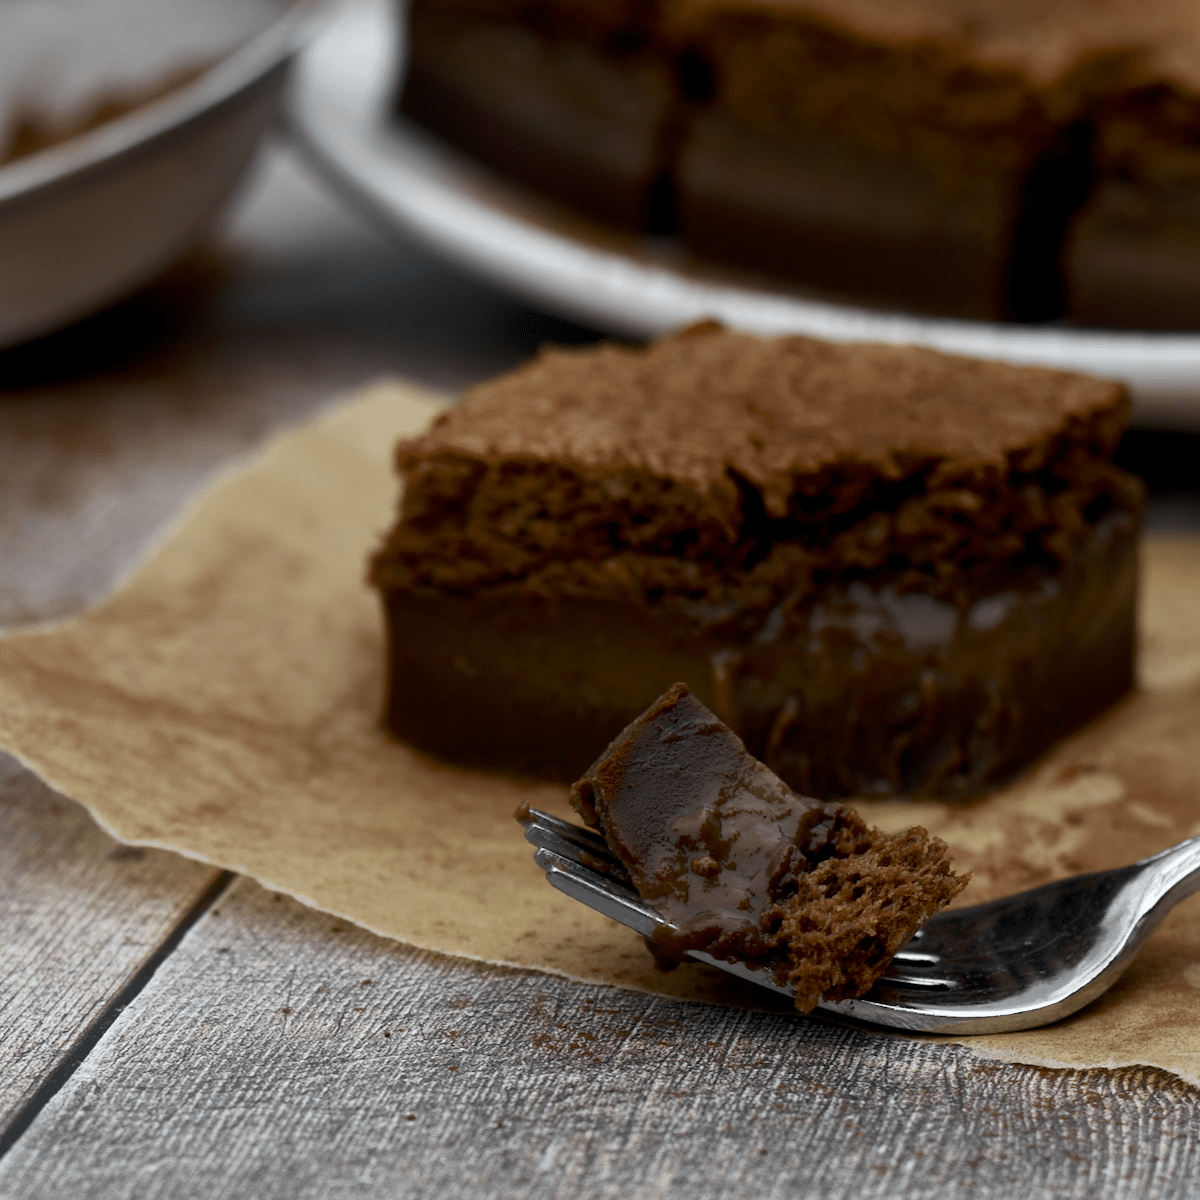
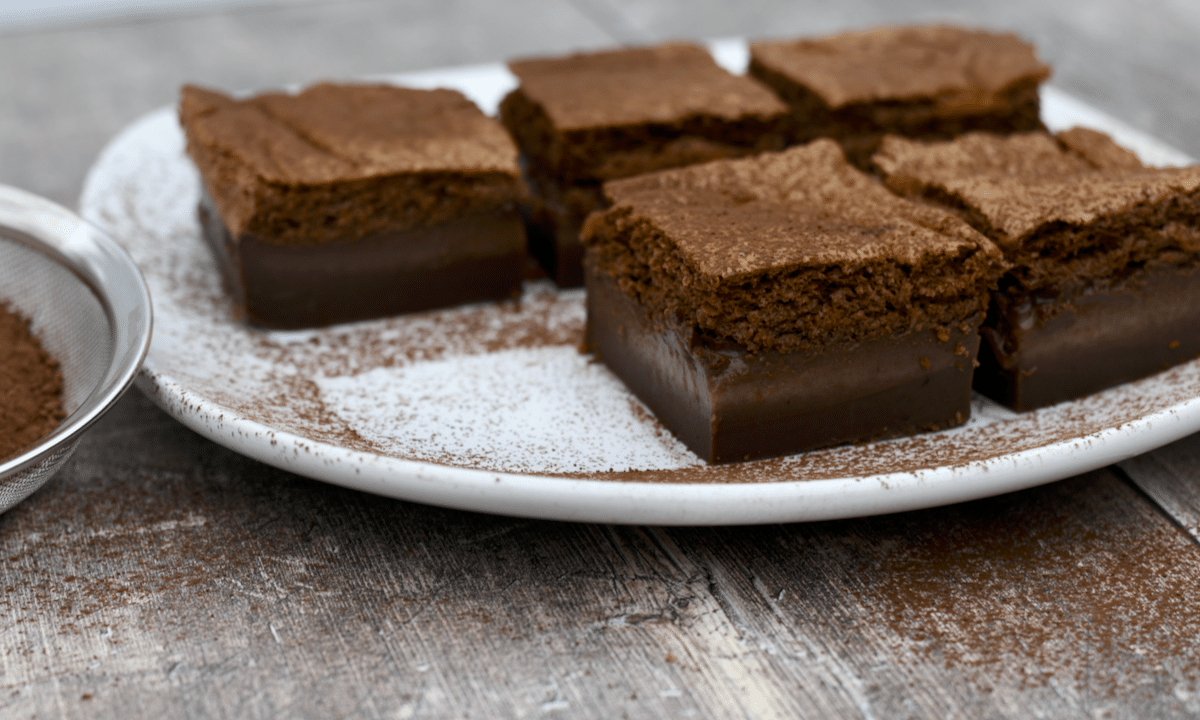
This decadent Chocolate Magic Cake recipe is magical for a reason! Fudge-like, chocolatey base layer. Creamy custard layer in the middle. Light and spongy cake on the top. Three layers with just ONE thin batter in baked in ONE pan. The "magic" happens in the oven!

SAVE THIS RECIPE
This easy chocolate custard "layer" cake is a unique and chocolatey dessert that you have to try to believe! It separates into 3 tasty layers while it bakes, just like a delicious magic trick.
No fancy ingredients needed. You probably have all of them in your pantry and fridge and only takes 15 minutes prep time before popping it in the oven.
It's a super easy chocolate dessert recipe but be sure to follow the directions exactly. Folding the egg whites into the liquid-y batter may seem crazy, but that step is what results in these 3 separate layers while it bakes at the low temperature in the oven!
Why is this the best Magic Cake recipe?
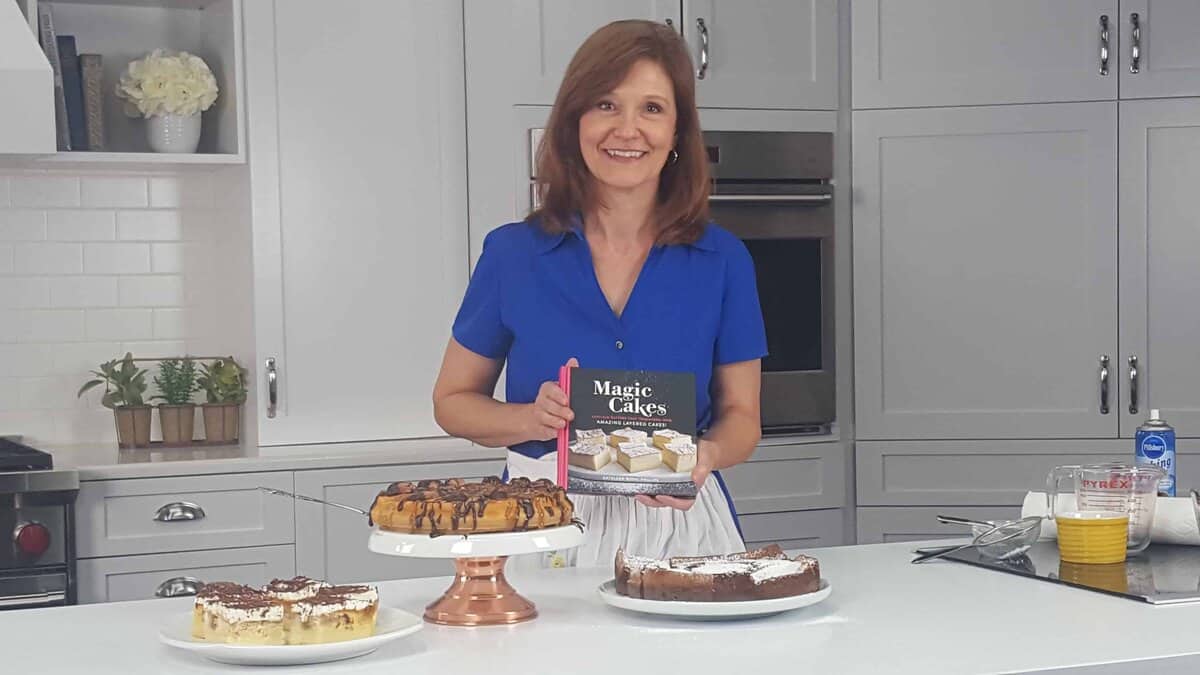
This is the best chocolate 3 layer magic cake recipe because I've tested it dozens and dozens of times! I've even authored the Magic Cakes cookbook with 34 different flavors and versions of magic cakes!
More specifically, I give you precise directions with exact baking times and step by step pictures to ensure you get those 3 separate layers every time!
A fun fact about this recipe! It's one of the recipes that started this blog! It's featured in my cookbook, Magic Cakes. My food blog, Grits and Gouda, was started to promote that cookbook! I decided to start adding other Southern shortcut recipes to the blog, and the rest was history!
Read more about my magic cakes book and how to order it. You'll find 34 different flavors like Turtle Magic Cake, Tiramisu Magic Cake, Magic Sticky Toffee Puddings and Maple Bacon Magic Cupcakes!
Shortcuts
- For lukewarm milk, I recommend either heating it in the microwave straight from the fridge 1 minute or on the stove top just until lukewarm. It's much safer than just leaving out milk at room temperature!
- Waiting for eggs to come to room temperature is like watching paint dry! Just place the cold eggs in a small bowl and cover them with very warm (not hot) tap water. Wait 5 minutes. Boom! You have room temperature eggs ready to crack open.
If you love chocolatey desserts like my Chocolate Peanut Butter Swirl Cheesecake, you'll love this rich, unique take on chocolate cake that creates three distinct layers while it bakes in the oven!
I even created a Purple Sweet Potato Magic Cake recipe that's not in the cookbook. Check it out. The color is gorgeous on this magic cake! You can also use orange sweet potatoes.
Ingredients
What you will need to make this chocolate magic custard cake:
Scroll down to printable recipe for exact ingredient quantities.
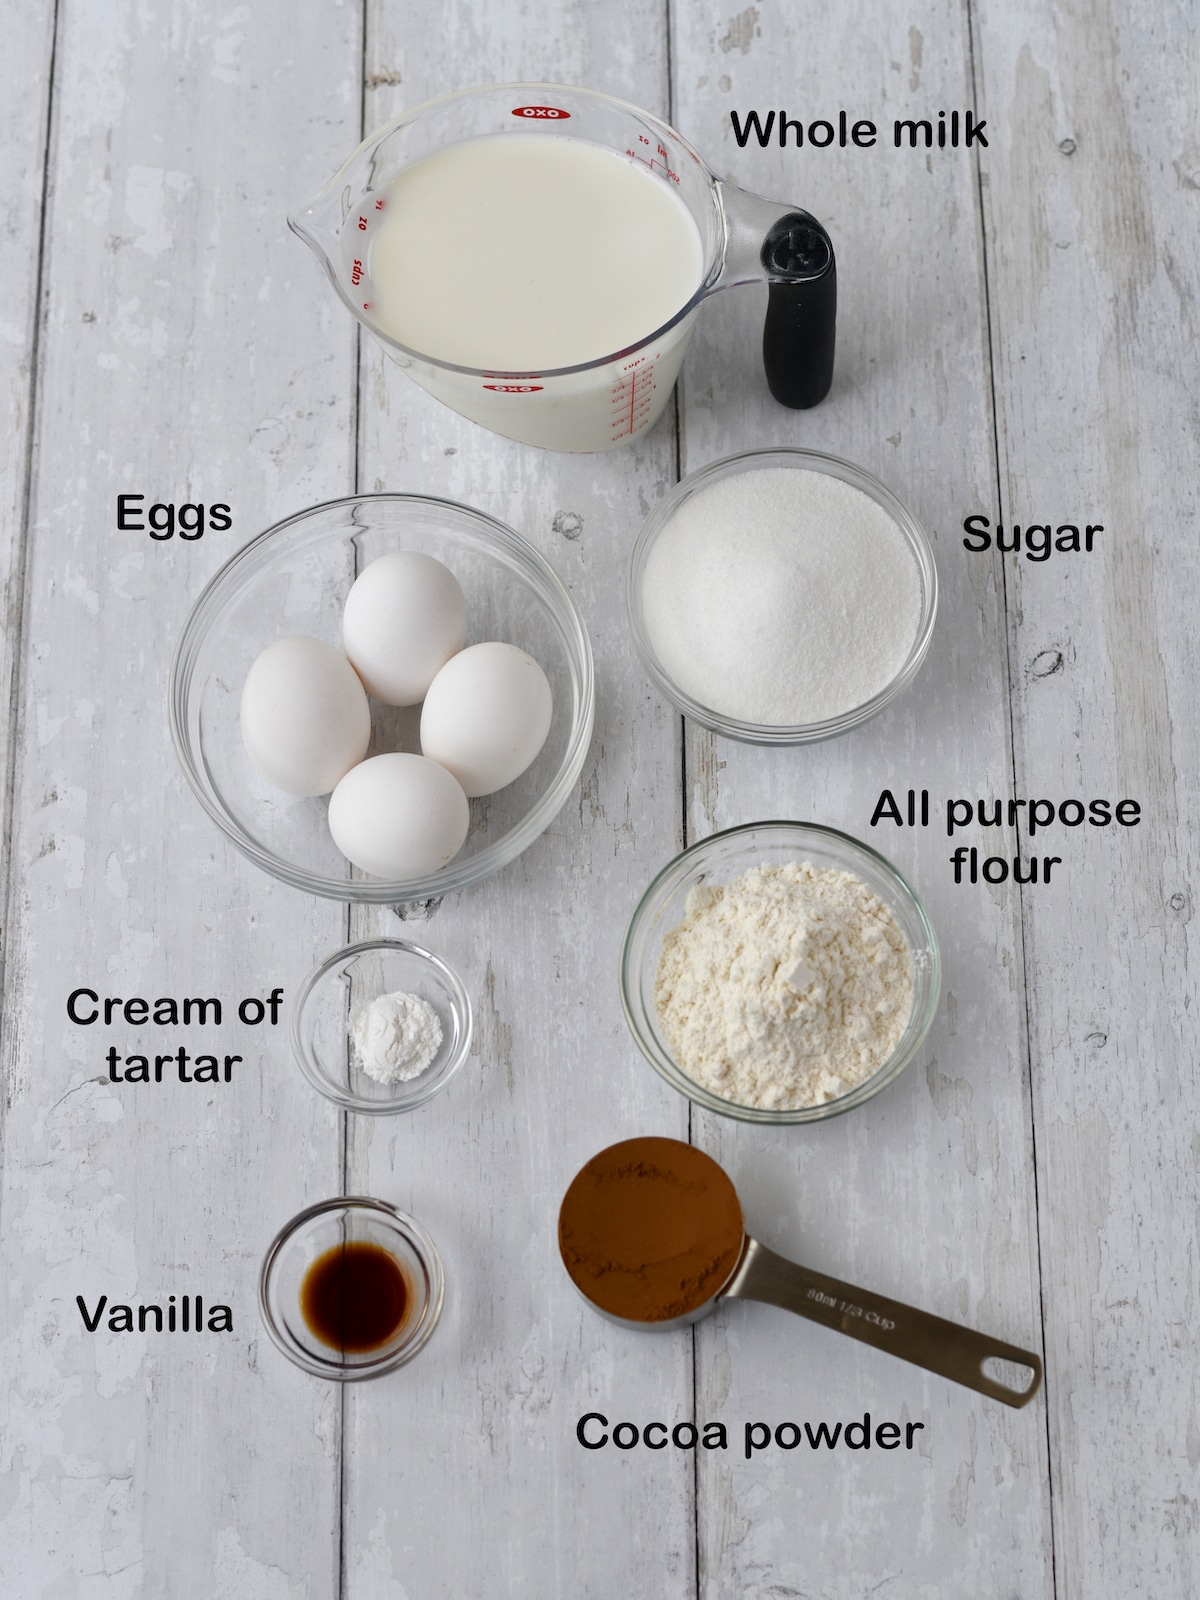
- All purpose wheat flour
- Salted butter- If you use unsalted butter, just add ¼ teaspoon salt.
- Cocoa powder- You can use either regular unsweetened cocoa powder or the darker cocoa called Dutch process like Hershey's dark cocoa.
- Vanilla extract
- Large eggs
- Cream of tartar - This is essential to stabilize those beaten egg whites to give you that light and fluffy sponge cake.
- Sugar- Granulated sugar.
- Whole milk - It's important to use dairy full-fat milk for this recipe.
How to Make a Chocolate Magic Cake
Scroll down to the bottom for the printable recipe with detailed instructions.
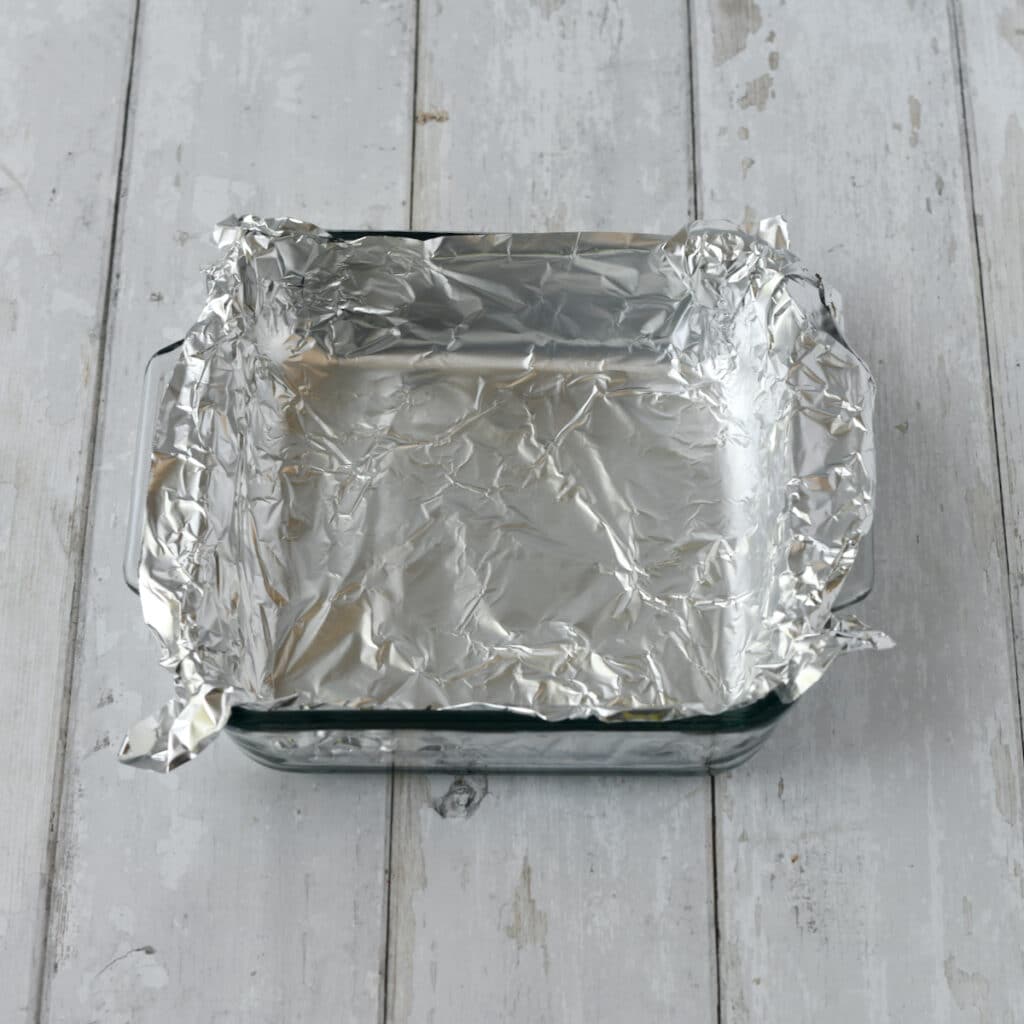
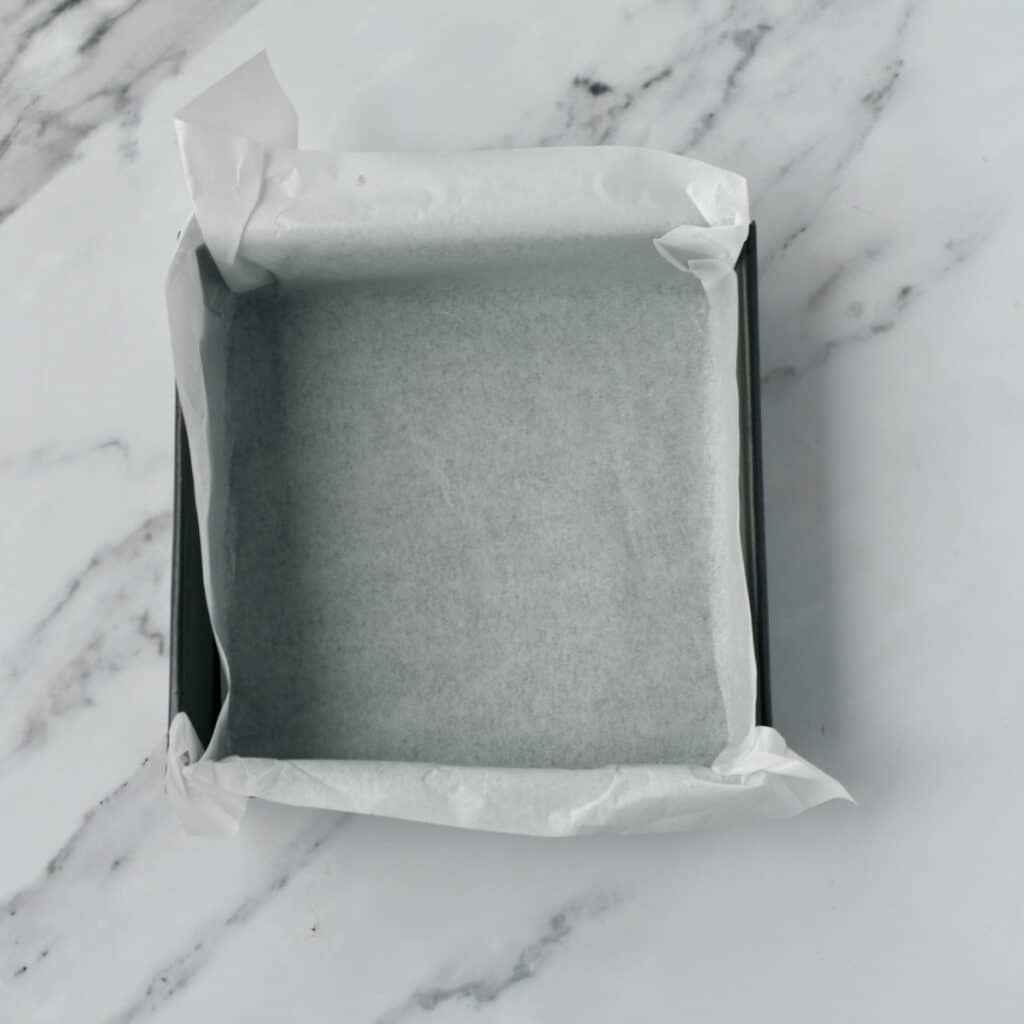
- Prepare an 8-inch pan or dish by lining with aluminum foil or parchment paper.
- If you use foil, also coat the foil with some baking spray or vegetable cooking.
A 9-inch square pan will not give you the best 3 separate layers. An 8-inch square pan is what you need. Discount stores like TJ Maxx and even thrift stores usually have them.
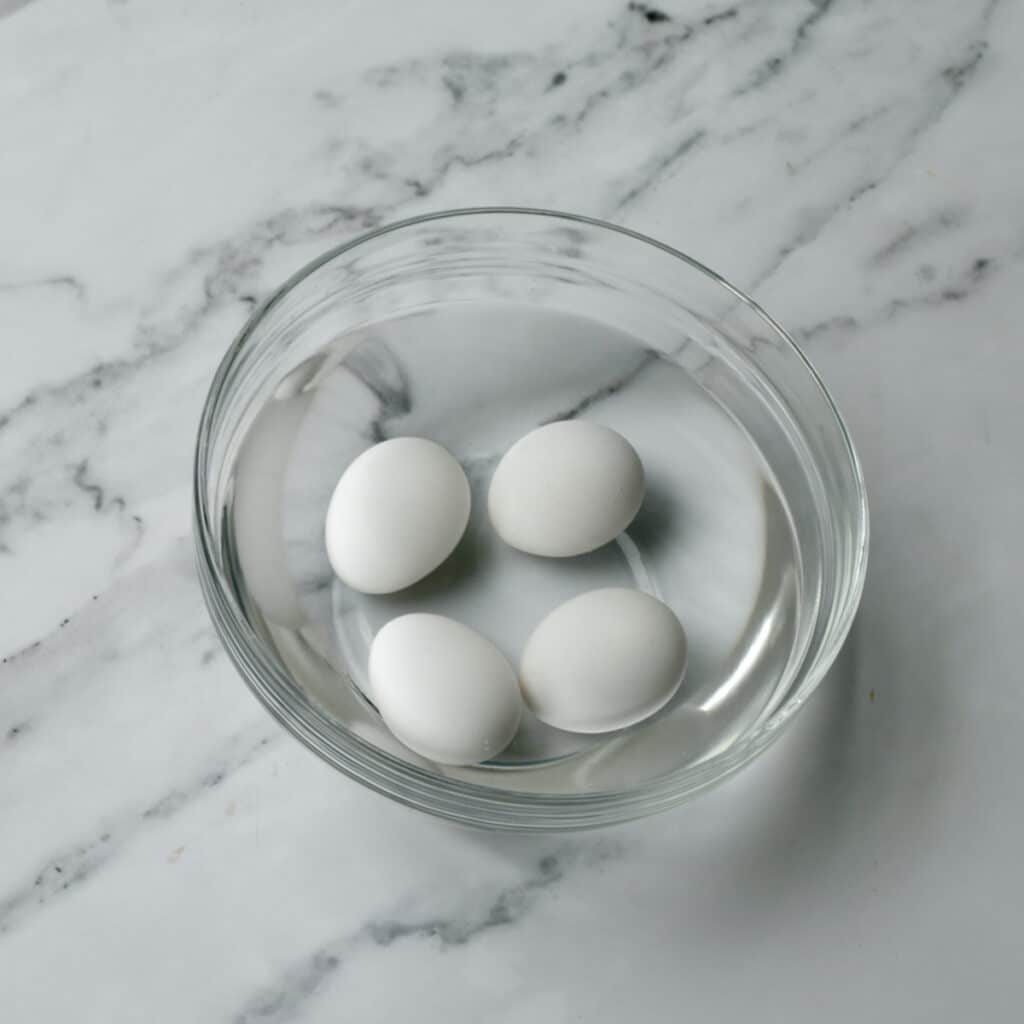
- Bring the eggs up to room temperature using my shortcut trick under SHORTCUTS section above.
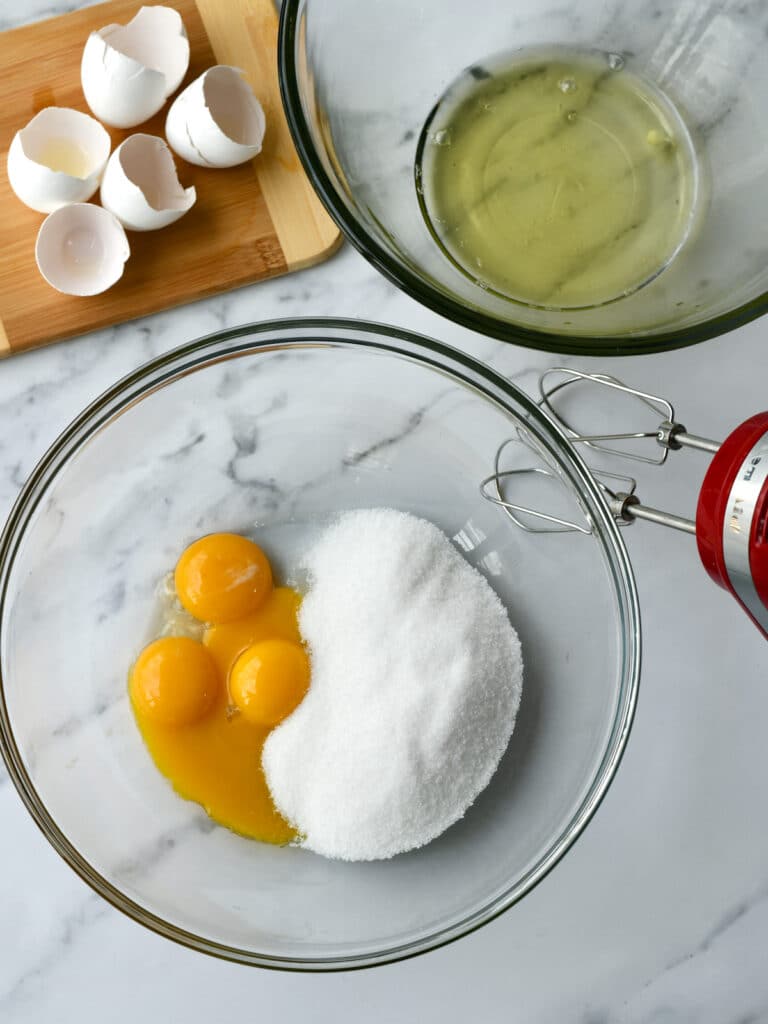
- Separate the eggs and add the yolks to a mixing bowl with sugar. Keep the whites in a separate bowl and set aside.
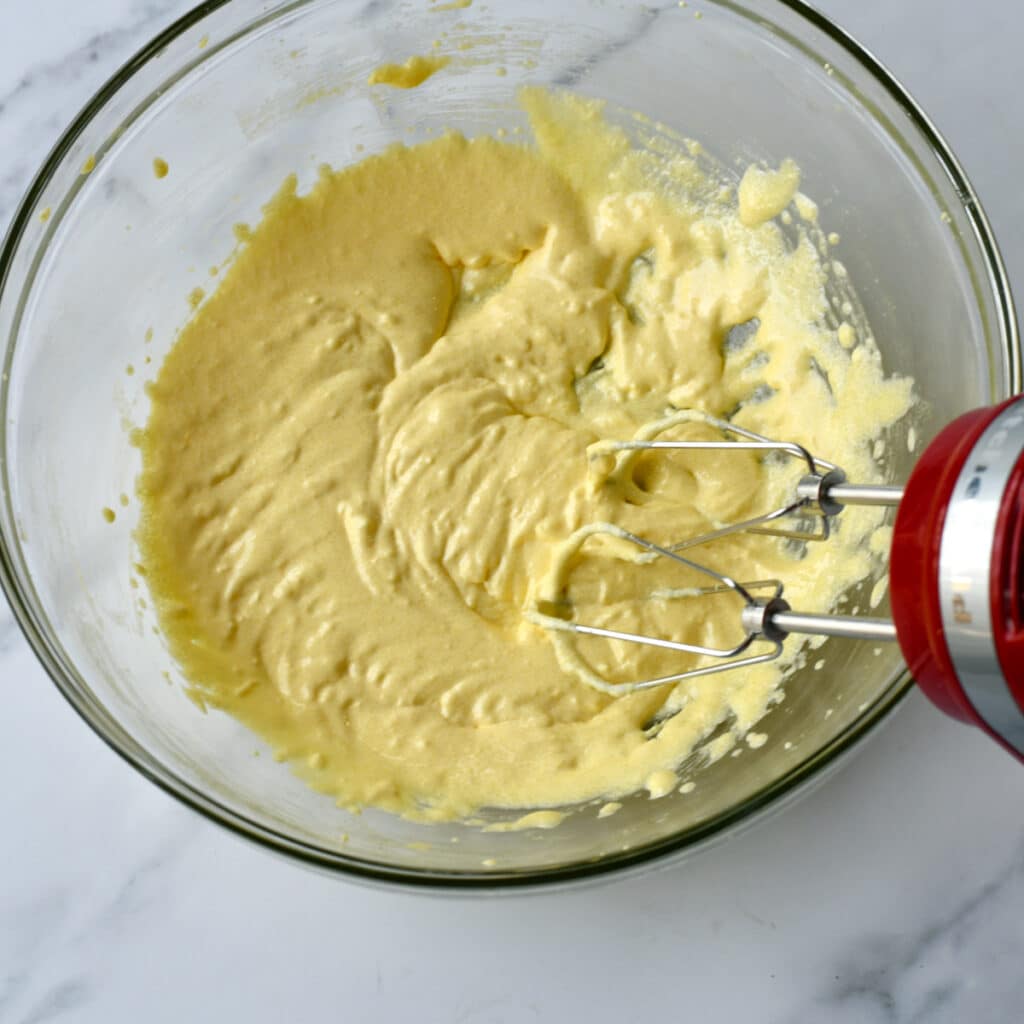
- Beat the sugar and egg yolks on high speed for 2 minutes, then add melted butter and vanilla and combine on low speed.
- Add flour and cocoa powder to the mixture, and beat until just combined.
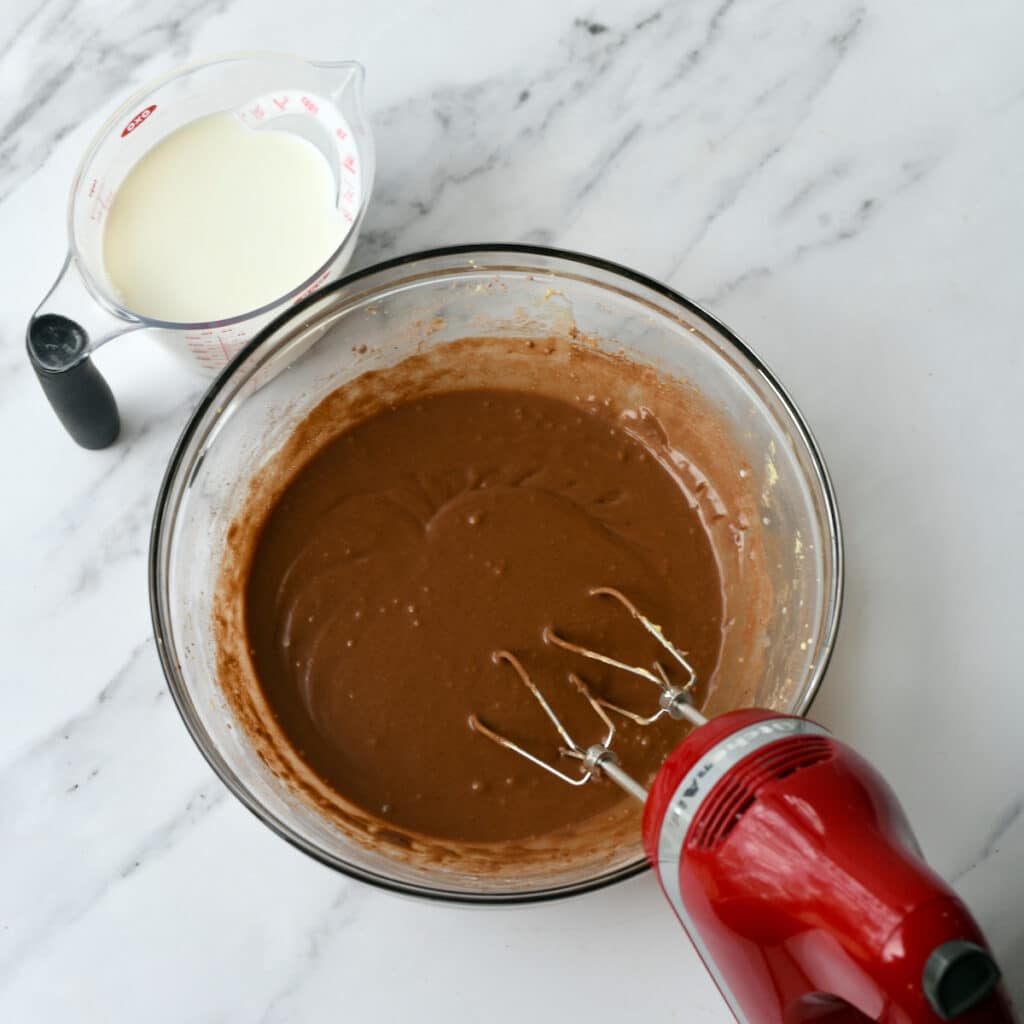

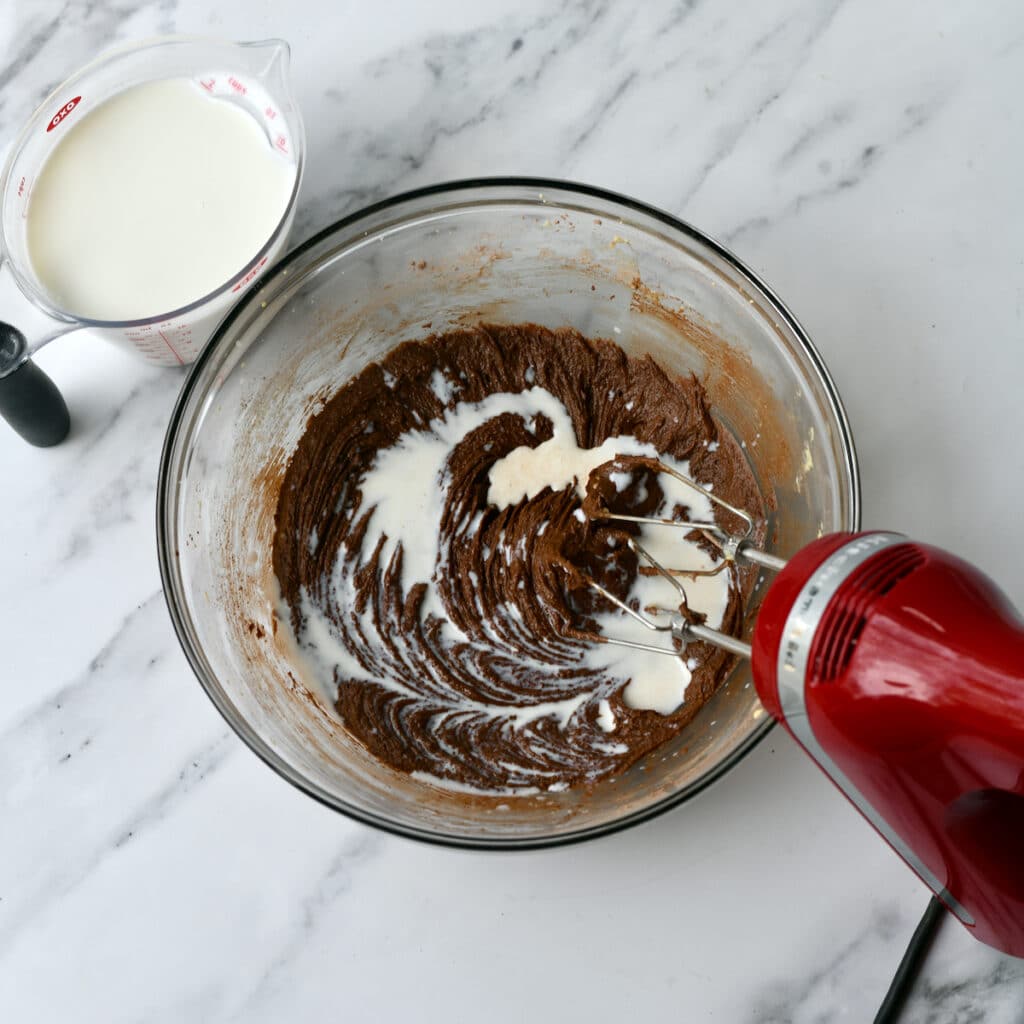
- Gradually add the milk a little at a time to prevent splashing.

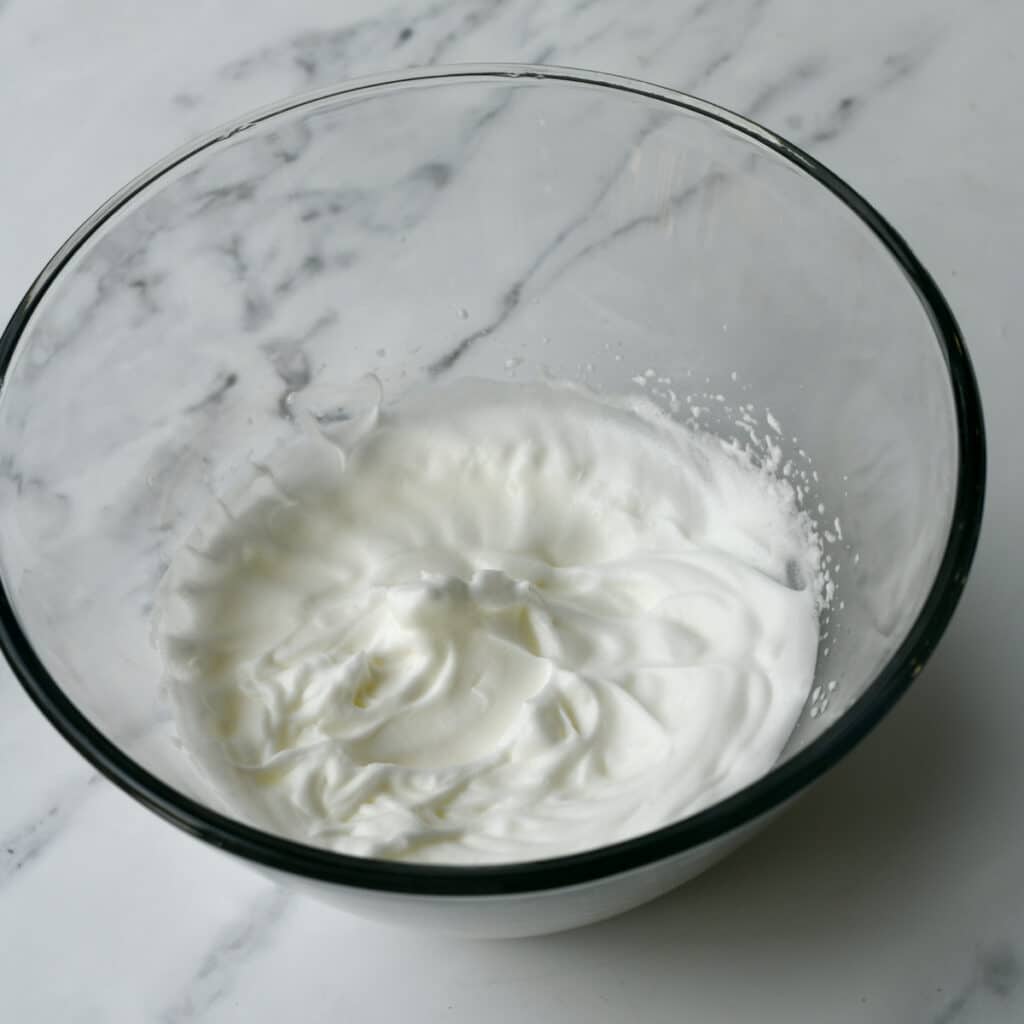
- Wash the beaters well to prevent getting egg yolks in the egg whites. Beat egg whites on medium speed until frothy and foamy.
- Add cream of tartar to the beaten eggs, then beat on high until stiff peaks form.

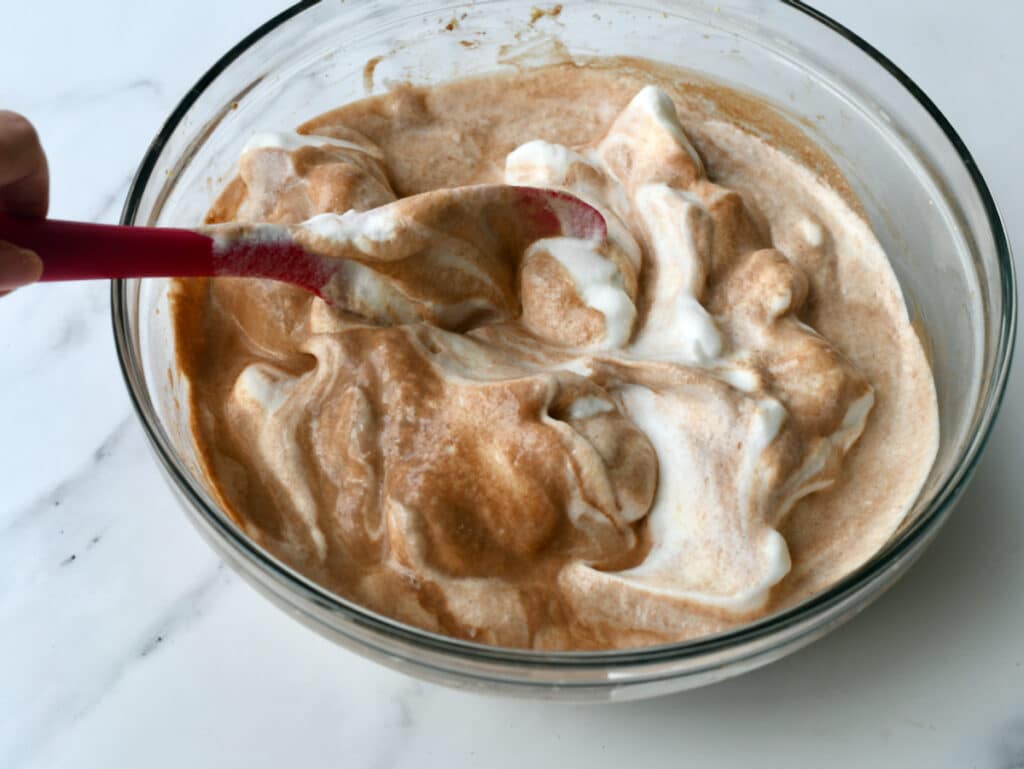
- Add about a third of the egg white mixture into the chocolate batter and carefully stir it in. I just take off my mixer's beaters for this step.
- Add the rest of the beaten egg whites to the batter and fold them in gently with a spatula. For best results, don't over-mix (it's alright if there are some streaks of egg white in the batter).
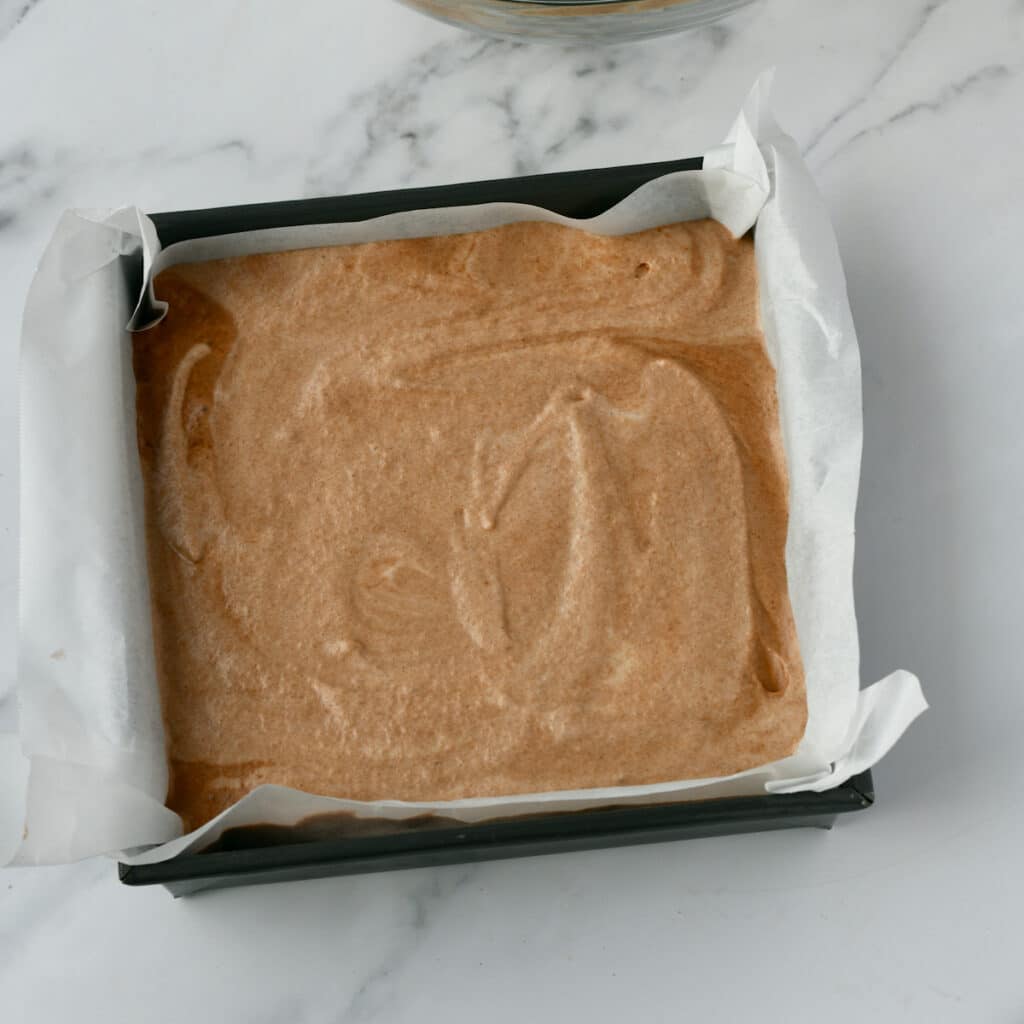

- Pour the batter into the prepared pan.
- Bake at 325F degrees for 38-40 minutes. Read the printable recipe below carefully to know exactly when to pull it out of the oven!
- Let it cool on a rack for about an hour until cooled. Cover and chill for at least 2 hours in the fridge.
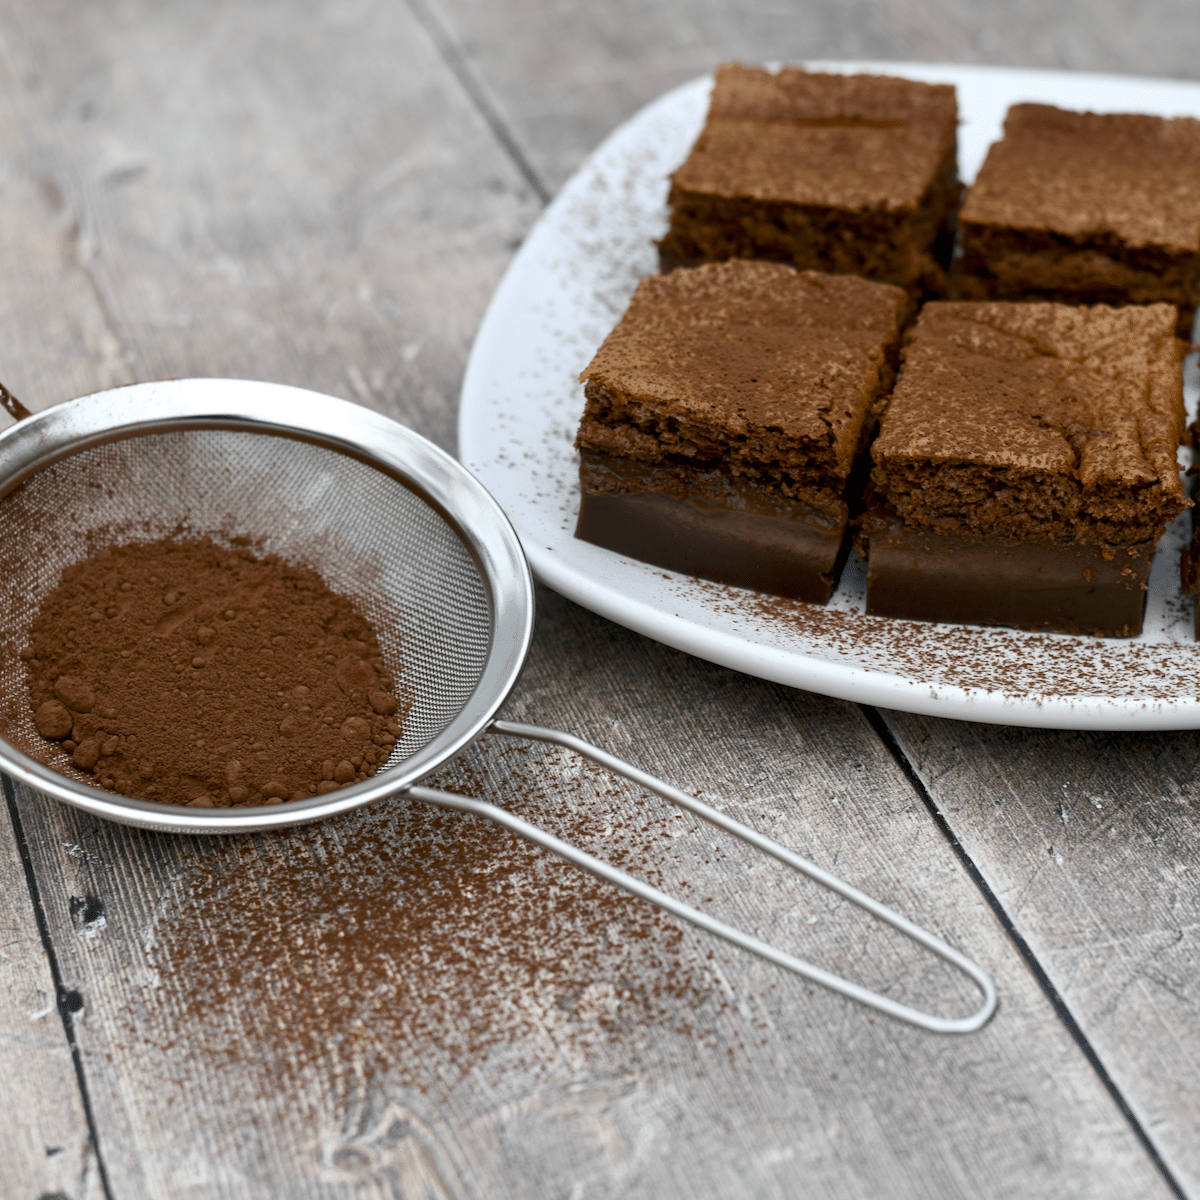
- Lift the cake from the pan using the parchment paper and cut into squares, then dust with cocoa powder, if you like.
Pro Tips
For this recipe to work, it's crucial that all of the ingredients are relatively the same temperature. If you've forgotten to let your eggs sit out, cover them with warm (not hot) water in a bowl and let them sit for about 5 minutes to warm up.
Video
Click on the image below to watch me make Chocolate Magic Cake in the Southern Living digital studio!
Substitutions & Variations
Trade "this" for "that" in this magic chocolate cake recipe.
- Topping - Instead of cocoa powder, you could also sprinkle some powdered sugar for added sweetness. Another great option is a swirl of whipped cream on each slice!
- Milk - When it comes to the milk in this recipe, I don't recommend using a non-dairy substitute. The whole dairy milk is what helps the layers form, especially the middle custard layer.
Helpful Information
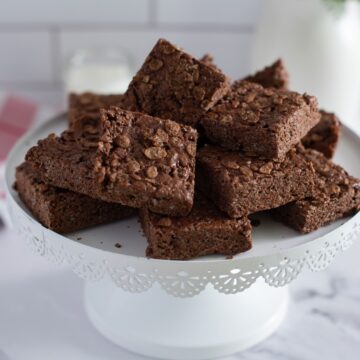
A magic cake starts with one thin batter and separates into three unique layers as it bakes! The bottom layer is dense and fudgy, the middle layer is creamy and similar to custard, and the top layer is a light and airy sponge cake.
To check for doneness, give the pan a little jiggle in the oven. The center should have a slight jiggle to it, but the edges will be more firm. Don't worry about the jiggle in the middle, that custard layer will firm up once it's chilled!
I tested the vanilla magic cake recipe using Bob's Red Mill gluten-free 1 to 1 baking flour (rice flour) and had very good results. I have not tested it using nut flours.
Storage Tips
- To Store. Store any leftovers in the refrigerator, covered or in an air tight container. Your magic chocolate cake will last for 3 to 4 days.
- Can I freeze a Magic Cake? I do not recommend freezing a magic cake because of the custard layer in the middle. It is best served fresh after chilling. When it thaws, it does not retain the same exact texture. If you do freeze your magic cake, it can be frozen for about 2 months, but thaw it overnight in the fridge!
Follow me on Facebook, Instagram, Pinterest and YouTube. Be social and share, y'all! Don't forget to sign up with your email so you don’t miss a single post on my Southern shortcut recipes!
If you make this recipe I'd love to see it! Tag me on social media with #gritsandgouda or @gritsandgouda. Leave a comment below the printable recipe if you have questions or tell me how you liked the recipe. Don't forget to rate it 5 stars if you love it!
Want More Cake Recipes?

Chocolate Magic Cake
SAVE THIS RECIPE
Equipment
Ingredients
- 4 large eggs at room temperature
- ¾ cup granulated sugar
- ½ cup salted butter melted
- 1 teaspoon vanilla extract
- ½ cup all purpose flour
- ⅓ cup unsweetened cocoa powder plus 1 teaspoon for garnish
- 2 cups whole milk lukewarm
- ½ teaspoon cream of tartar
Instructions
- Preheat oven to 325 degrees F.
- Line an 8-inch square cake pan or dish with aluminum foil or parchment paper. If using aluminum foil, coat the foil with cooking spray or baking spray.
- Separate the eggs; place the egg yolks in a large mixing bowl with the sugar. Place the egg whites in another large mixing bowl.
- Beat the egg yolks and sugar on high speed with an electric mixer for 2 minutes. Mixture will be thick and lemon-colored. On low speed, gradually add the melted butter and vanilla, scraping down the sides as needed.
- Add the flour and cocoa powder to the egg yolk mixture. Beat just until flour is combined. Gradually add the milk, beating just until combined.
- Wash the beaters thoroughly so there’s no chance of getting any egg yolk in the egg whites. Beat the egg whites on medium speed of the mixer until foamy; add the cream of tartar. Increase the speed to high and beat until the egg whites form stiff peaks, about 2 minutes.
- Whisk about one-third of the egg whites into the thin batter. Tip: I just take off the two beaters from the mixer to avoid washing another utensil.
- Gently fold the remaining egg whites in with a flexible spatula. It’s ok if there are still a few streaks of egg whites. Pour the batter in the prepared cake pan.
- Bake at 325 degrees for 38 to 40 minutes, or just until the center jiggles slightly when gently shaken. If it doesn’t jiggle at all, it has baked too long. It will firm up when chilled.
- Let the cake cool completely on a wire rack, about 1 hour. Cover and refrigerate at least 2 hours to chill thoroughly. Using the overhang of aluminum foil or parchment paper, lift the cake out of the pan and cut into 9 squares. You should see 3 distinct layers. Sprinkle with 1 teaspoon cocoa powder, if desired.
Notes
- Be sure to use dairy milk to guarantee the layers form properly.
- Don't let the milk sit out on the counter to become lukewarm. Heat it in the microwave for 1 minute on HIGH or on the stovetop just until lukewarm, instead.
- Submerge eggs in very warm (not HOT) tap water for 5 minutes to bring them up to room temperature.
- For other topping ideas, dust with powdered sugar or add a dollop of whipped cream or Cool Whip.
Nutrition
Nutrition analysis on GritsAndGouda.com recipes are mostly calculated on an online nutrition calculator. I am not a dietitian and nutritional information is an estimate and can vary based on products used.
Kathy A Thornton
I have made Magic Cake before but I decided to try this recipe I made the mistake of using a 9x9 pan before and this time I found a 8x 8 in my cupboard, What a difference it makes. What I didn't do with this recipe was mix the egg yolk mixture first. I mixed the egg whites first and saved time having to wash the beaters. I have to say it turned out perfect and tasted oh so good I didn't eat it I inhaled it:)
Kathleen
Yes! It is crazy how just one square inch of a smaller pan makes a big difference. So glad it worked for you by beating the egg whites first. My reasoning for doing those second, is so they wouldn't deflate while I did the other step. I'm glad to know it will work both ways!
Scott P
These are so good. Very cool to have 3 layers
Kathleen
Like magic, right? I know there is some food science going on in the oven with these, for sure!
Jan Noga
This is such a delicious and easy cake to make. These are amazingly delicious. It’s hard not to eat the whole thing in one sitting. When I made my test versions of both the vanilla and the chocolate, my husband woofed down a good third of each version before I chased him out of the kitchen. Ran these by family and got enthusiastic thumbs up from all of them.
I make cakes for a local tea shop when they do events. Every once in a while, they need a lactose-free dessert to go with the others that have dairy in them. I found that this adapts really well to lactose-free with almost no loss of taste (custard is just a teeny bit less rich and bottom a bit more dense). I use lactose-free whole milk which has the lactose removed but still has the milk fats. Not quite as rich as regular whole milk, but performs in a very similar way. For butter, I use Earth Magic vegan butter - fewer chemicals and starches (which make margarine a complete non-starter) and good structure. The lactose-free version of both the vanilla and chocolate magic cakes were a huge success and are a good companion to whatever regular cakes or treats I’m also providing.
I’m now very intrigued and planning to buy the cookbook to explore alternative flavors.
Kathleen
Thank you so much for sharing your positive experience with making the magic cake with lactose-free milk! It's great to know it works with that because many are looking for lactose-free desserts. I do hope you will purchase the book and try the many different flavors I've developed.
Nancy T
Hi,
Recipe looks delish! When you say to use "dairy milk" that does include 2% milk correct?
Please advise cause I'm gonna make this as soon as you respond! "smile"
Kathleen
The “full-fat” part of the listing does mean use the whole milk instead of a lesser fat content like 2% milk. The “dairy “ part is to let people know not to use an oat or nut “milk”. The custard part of the cake meeds the fat and protein structure. I have not made it with 2% milk but would love to know if it works if you try it. If you have some whipping cream or even half-and-half light cream to add to your 2% milk, That would bring the fat content up closer to the whole milk, which is 4%. I hope this helps!