
If you've ever wanted to try making homemade Dill Pickles for Canning, my step by step recipe is the perfect place to start! Whether you're making garlic dill pickles for a summer cookout or stocking your pantry for the winter, I've got you covered!
SAVE THIS RECIPE
Learning how to can dill pickles in a water bath is super easy. You don't need a pressure cooker or a fermentation pickle crock to make these small batch pickles.
I also have a trick for how to make dill pickles crunchy! It's just one added ingredient.
Once you have made this dill pickle canning recipe, be sure to save a jar to try my flavorful Shortcut Sweet Heat Pickles and Vidalia Onions. They actually start with canned dill pickles!
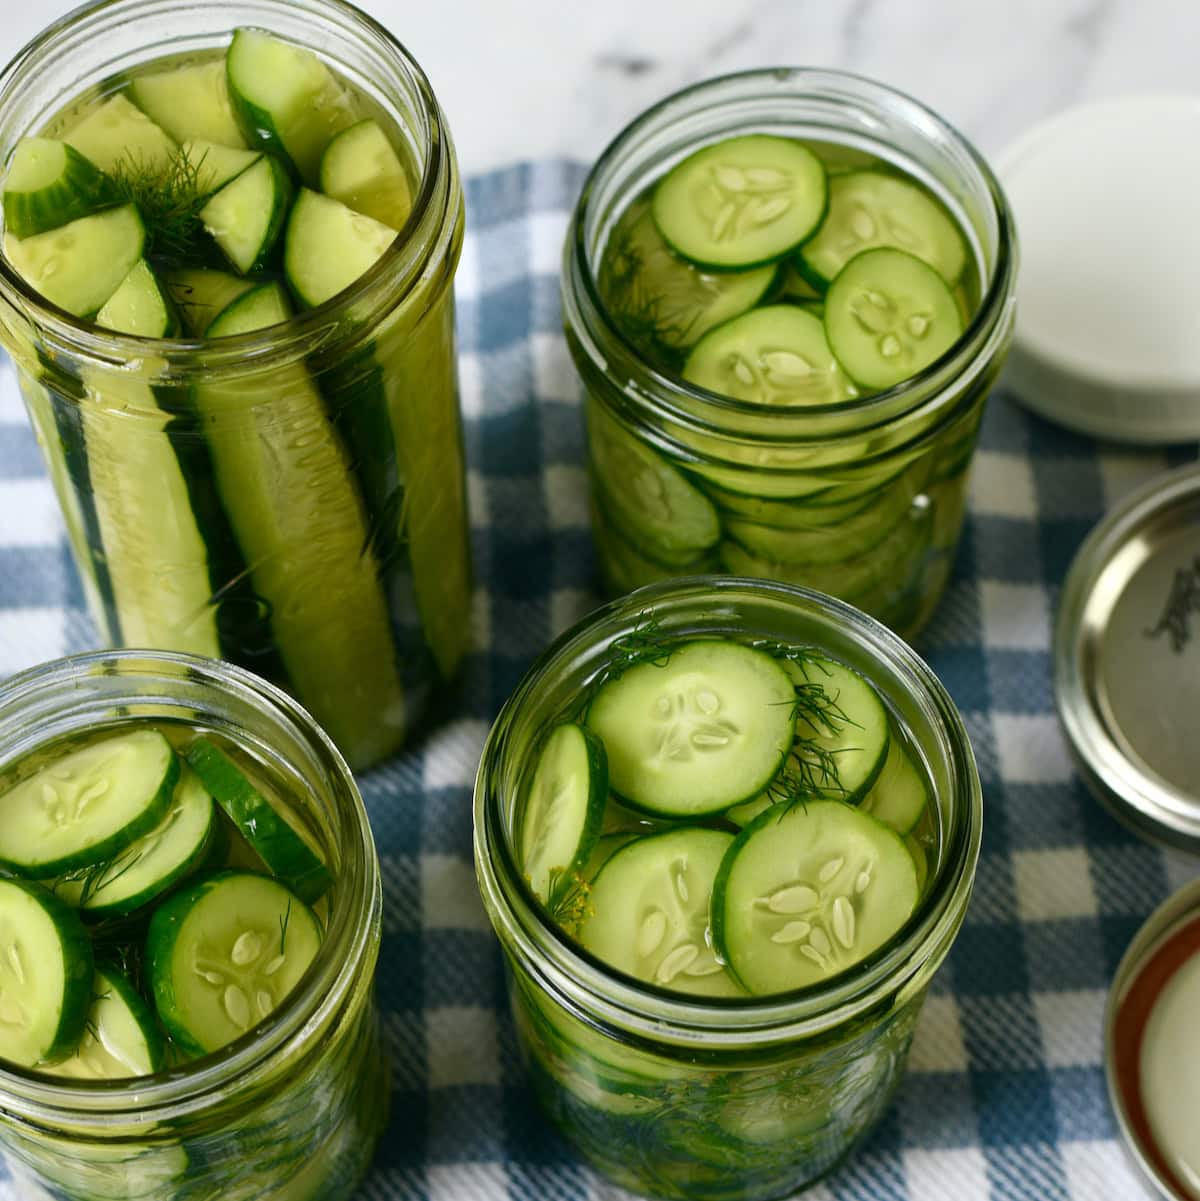
You can cut them into long spears or slice them into round "chips". The process for water bath canning dill pickles is the same.
Can I make these as refrigerator pickles?
Yes, to make easy refrigerator dill pickles, just skip the water bath process. Just twist on the lids and rings on the jars and store them in the refrigerator up to 3 weeks.
Shortcuts
- Not having to wait weeks to enjoy crunchy dill pickles is a shortcut! The addition of calcium chloride granules works like a charm without having to soak them in lime. They are found in the canning section of stores.
- Water bath canning is literally just boiling the sealed jars of cucumbers in a pot of boiling water. No special pressure canner needed.
Canning pickled cucumbers doesn't have to be a long drawn out process! Let me show you how! I've been making them for decades!
My favorite way to eat them is piled high on my Grilled Venison Burgers.
Ingredients
What you will need for cucumber canning.
Scroll down to printable recipe for exact ingredient quantities.
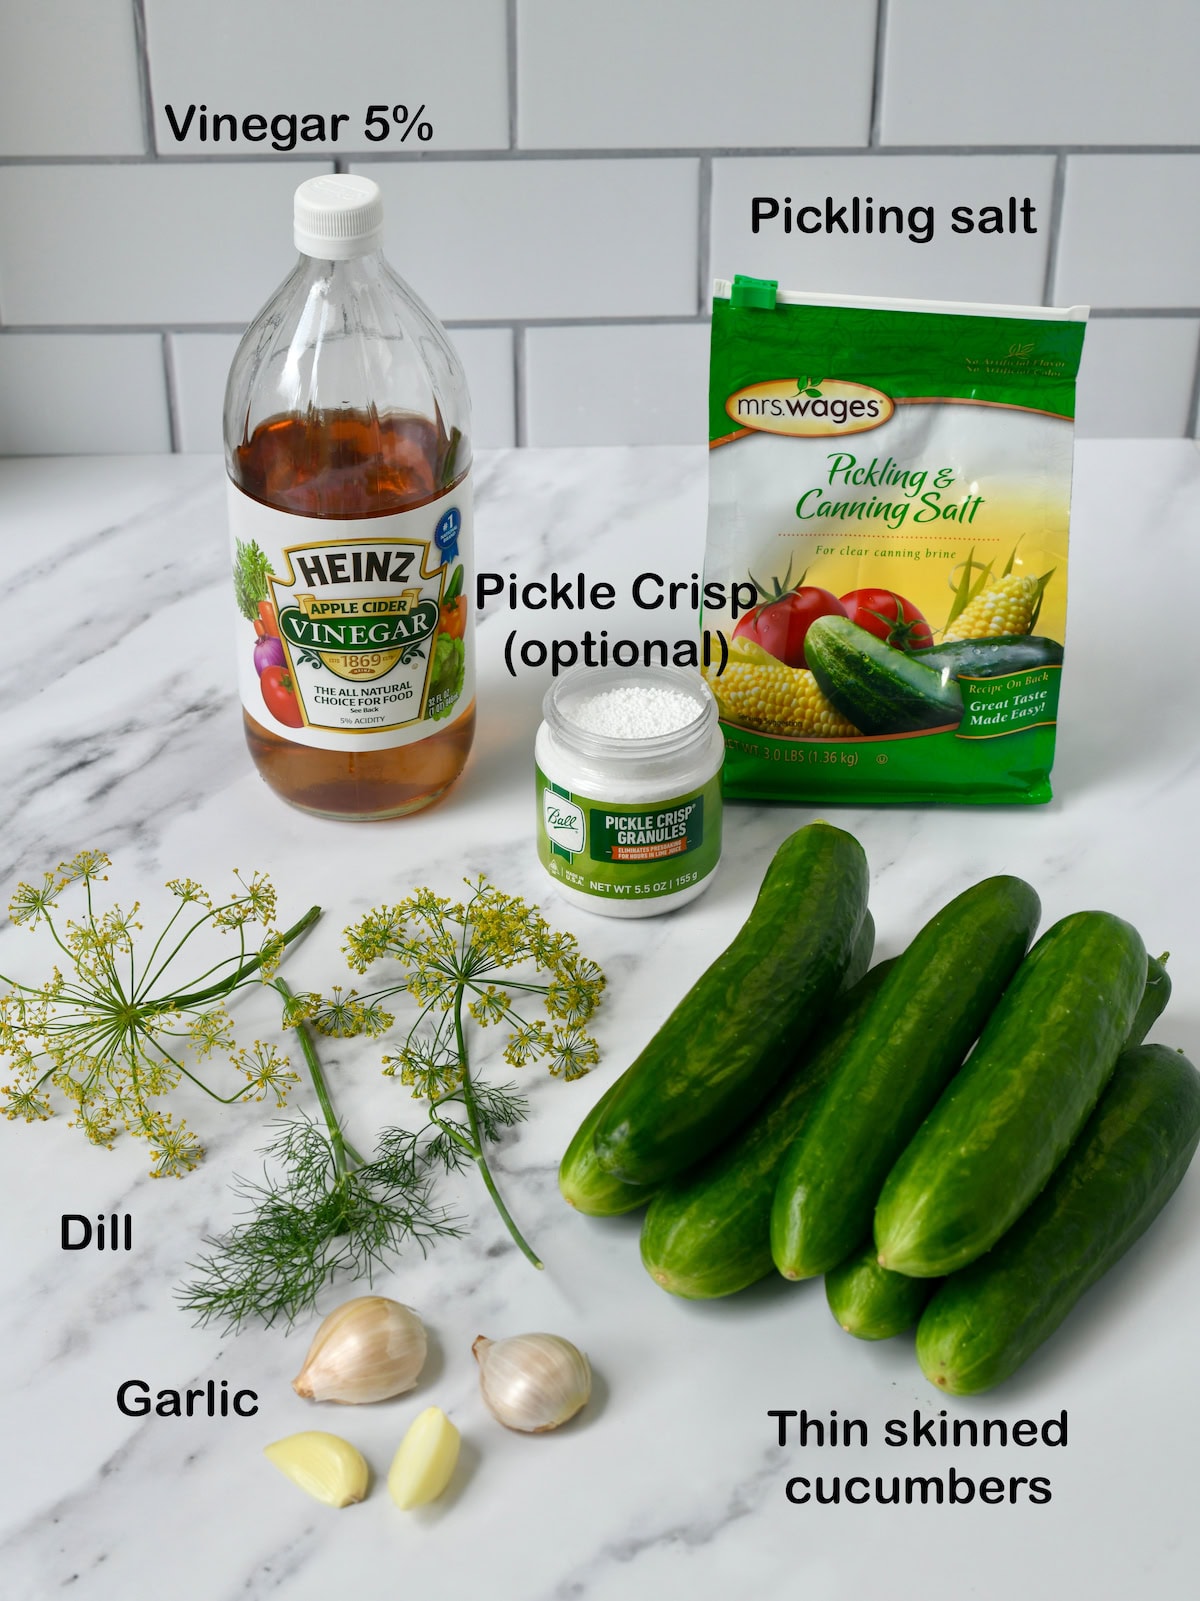
- Vinegar - Apple cider or white distilled vinegar. Make sure the bottle says 5% acidity.
- Cucumbers- Pickling cucumbers tend to have thinner skins and work better than the thick salad cucumbers. I leave the peel on, but you can also peel them.
- Water
- Pickling salt- Table salt is not the same as pickling salt. Kosher salt is closer to pickling salt because it doesn't have additives.
- Fresh Dill, Dill weed, Dill Seed- I love to use fresh dill if I have it in my garden, otherwise, I will use dried dill weed or ¼ teaspoon dill seed per jar.
- Garlic- Fresh garlic cloves adds flavor and makes a pretty jar of pickles but ¼ to ½ teaspoon chopped garlic will also work.
- Calcium chloride granules - Calcium Chloride granules, sold by Ball as Pickle Crisp and Mrs Wages as Xtra Crunch, makes homemade pickles crispy without having to soak the cucumber pickles in lime.
The calcium chloride granules are optional, but in my opinion, they make the best crispy dill pickles made with water bath canning.
Equipment
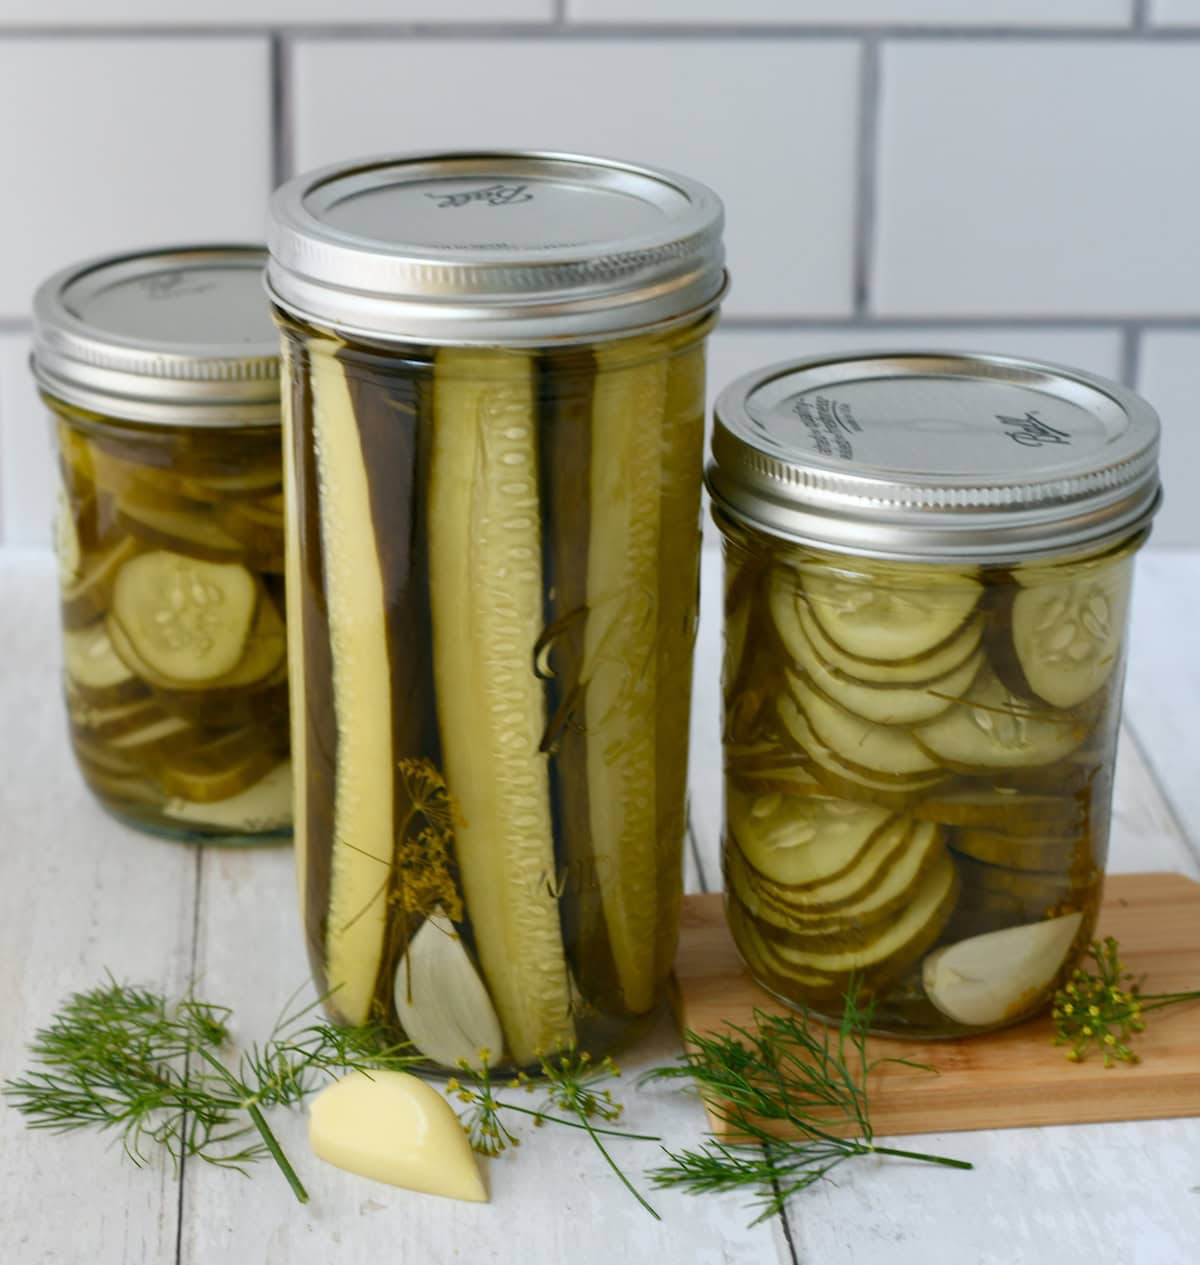
- 4 half pint jars (or 2 pints or about one quart jar) with lids and rings
- Large, tall pot to boil water (To cover 1 inch above size of your jar.)
- Canning rack or round cooking rack
- Canning jar lifter
Substitutions & Variations
If you like your pickles spicy or slightly sweet, you can make flavor changes without affecting the crispness of the pickles.
- Peppercorns and hot peppers- Add 6 peppercorns or 1 dried hot pepper to each pint if you like spicy pickles.
- Sweet n Sour- Add 1 tablespoon of sugar to each pint jar if you like your pickles a little on the sweet side.
How to make easy dill pickles
Some people call it "jarring" pickles instead of canning pickles because they are preserved in Mason jars.
Scroll down to the bottom for the printable recipe with detailed instructions.
Pro Tips
For crispy, crunchy pickles with water bath canning, here are my top 4 tips.
- Use calcium chloride granules.
- Soak your cucumbers in ice water at least 30 minutes before canning.
- Choose thin-skinned, fresh-from-the-farm cucumbers.
- Cut off the tip of the blossom end of the cucumbers. There are enzymes there that will turn your pickles to mush!
Start by preparing the jars.
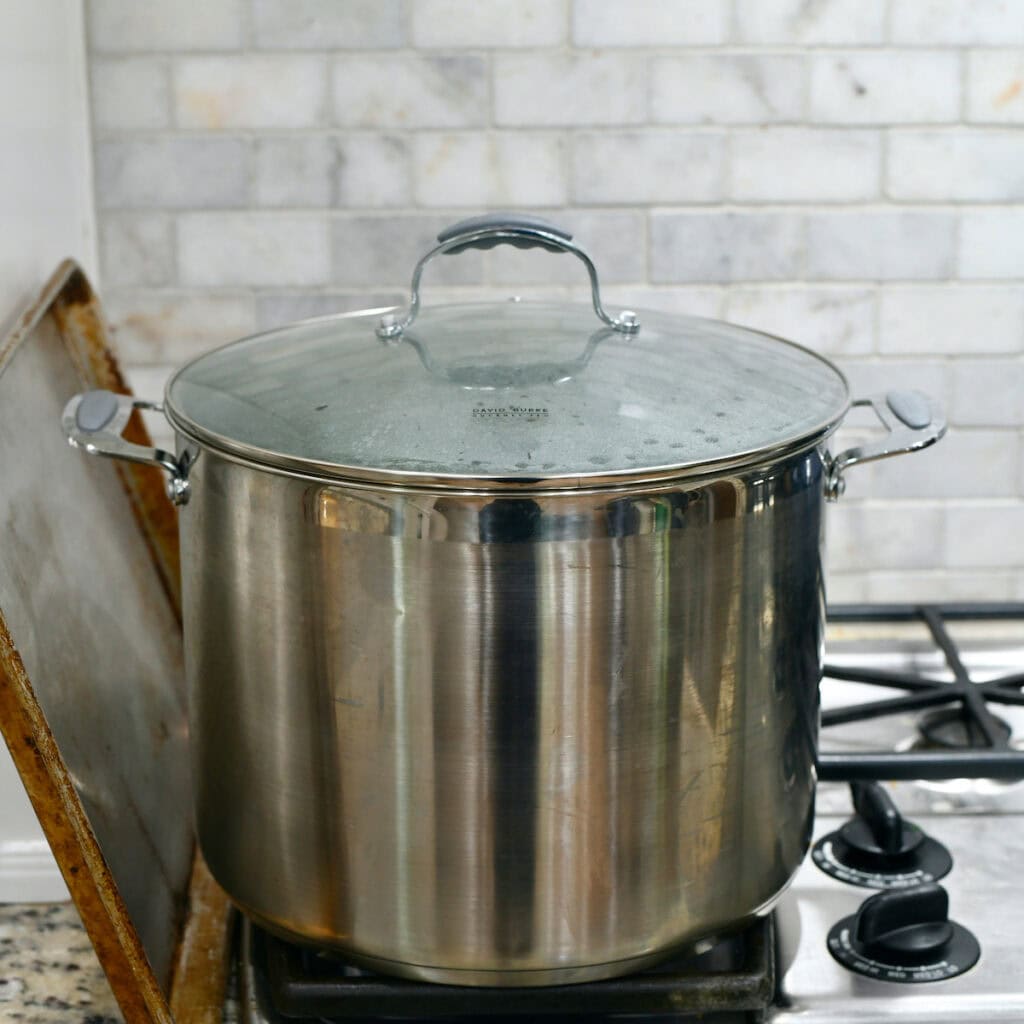
- Bring a large pot of water to a boil.
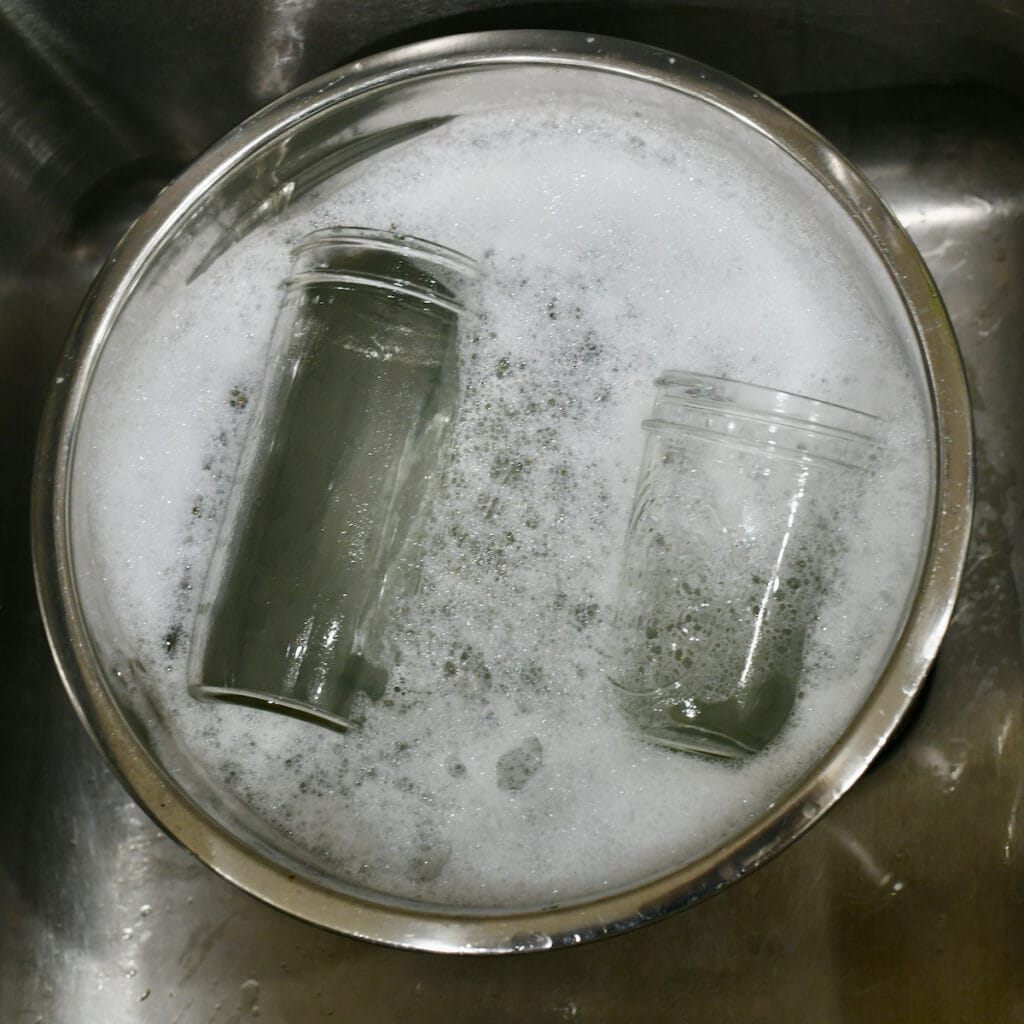
- Wash pint or quart jars in soapy water, then sterilize them.
Tip: If you're cabinet is close to your stovetop, like mine, place a sheet pan between your cabinet and the boiling pot of water. The pot can get very hot.
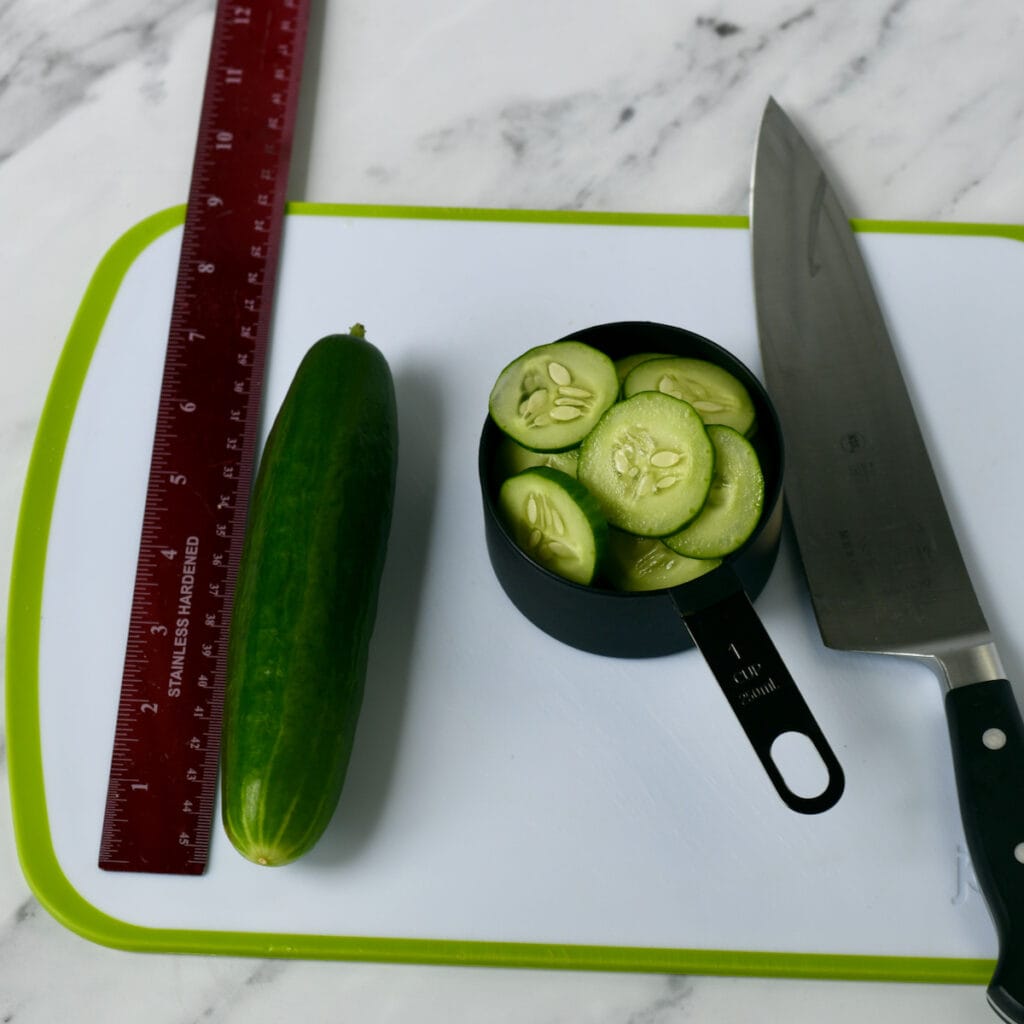
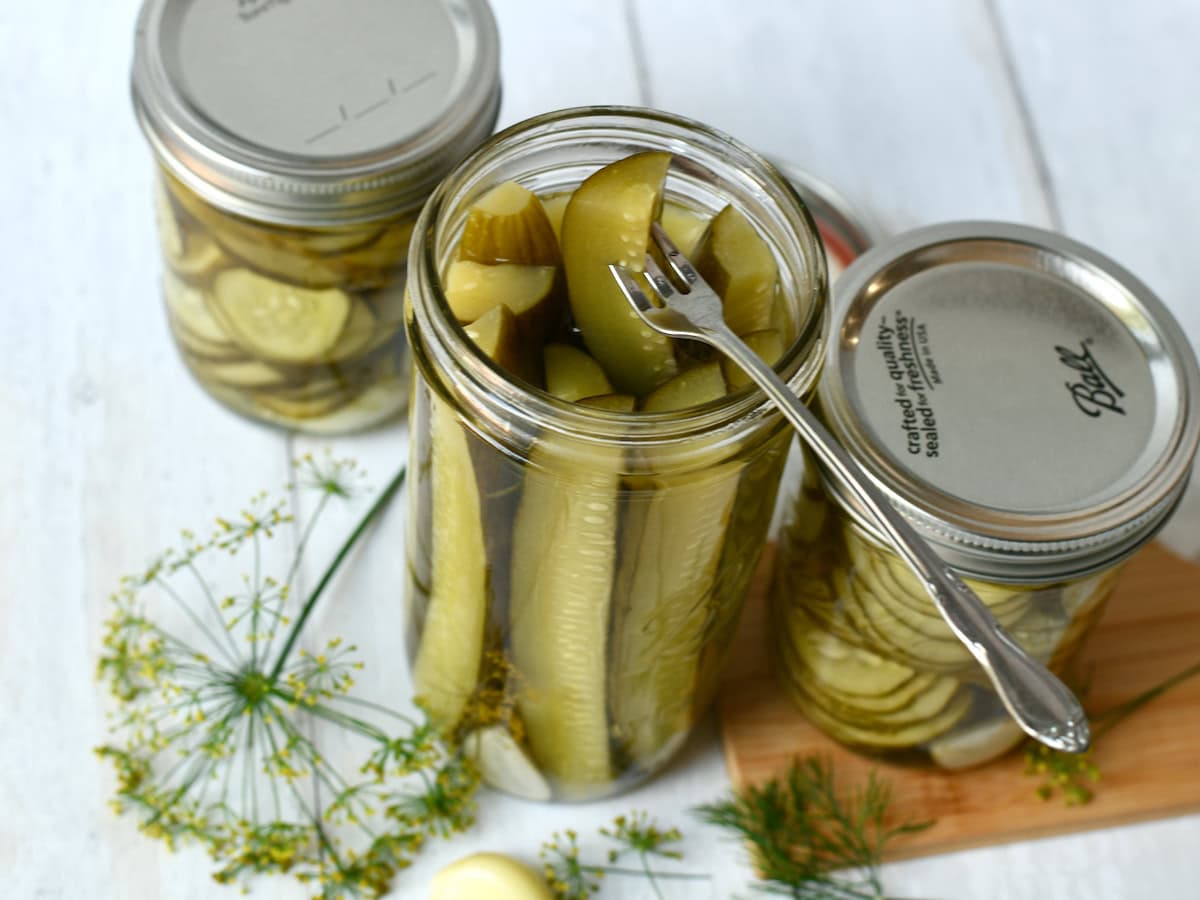
- Cut the cucumbers into spears or chips, discarding the blossom end tip!
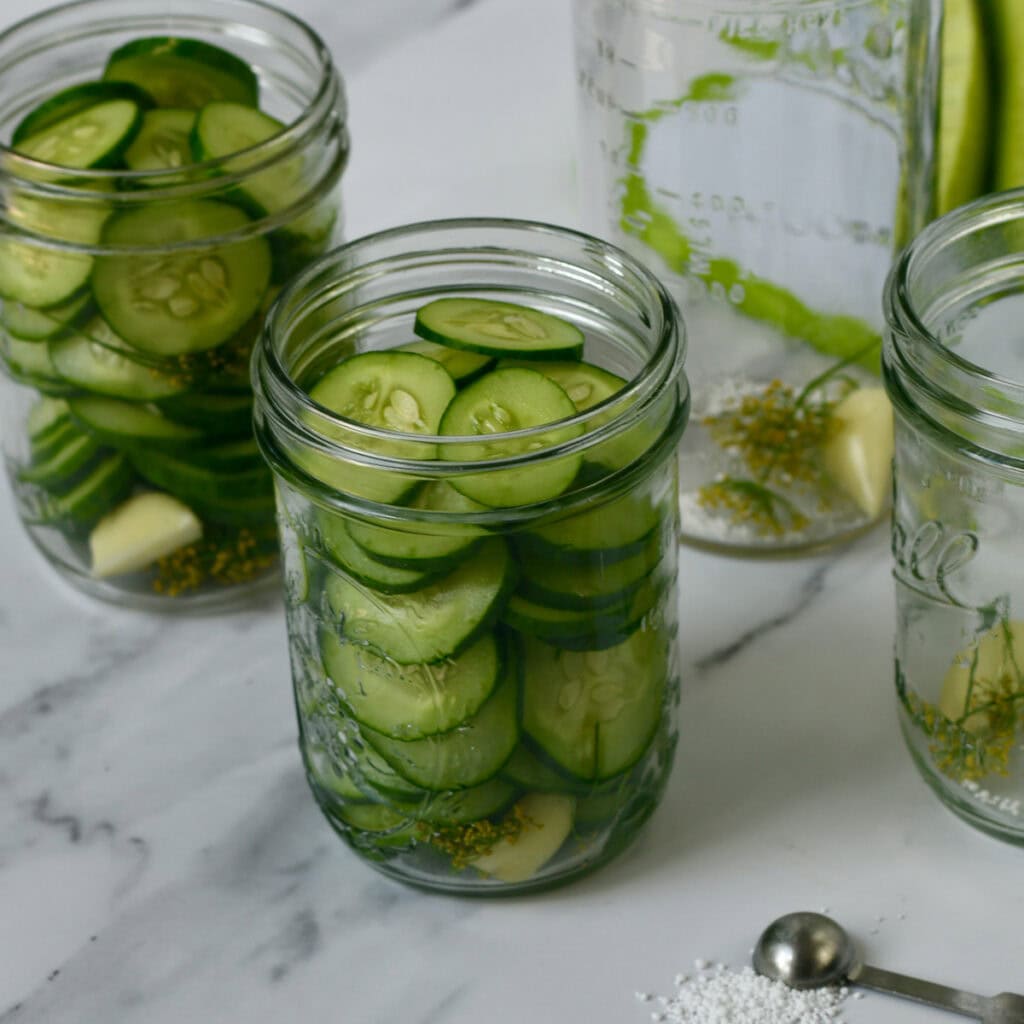
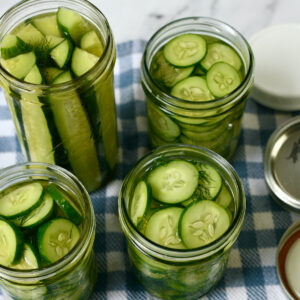
- Pack the pickles into 4 half pint jars.
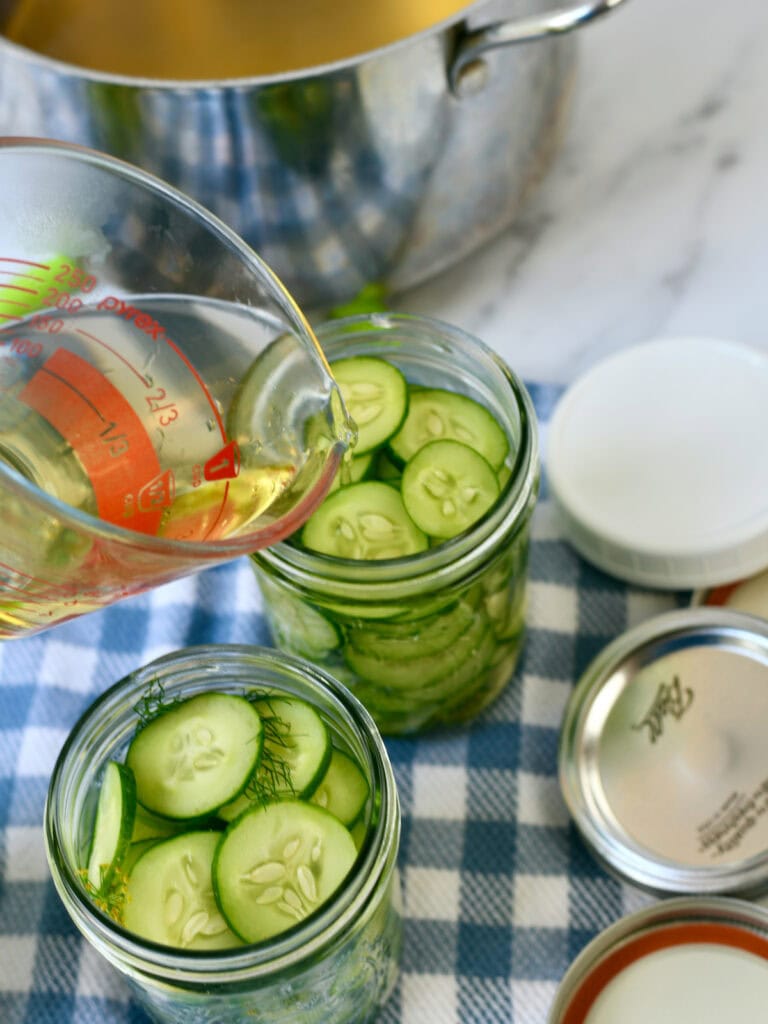

- Pour the hot vinegar mixture over the pickles leaving 1 inch headspace at the top.
- Place the lids on and twist on the rings. Lower the jars into the boiling water with the rack positioned in the bottom with a canning jar lifter.
- Make sure there is 1 inch of water above the top of the jar.
- Bring the water back to a boil and boil according to the times listed in the printable recipe below. Carefully remove the jars with the jar lifter.
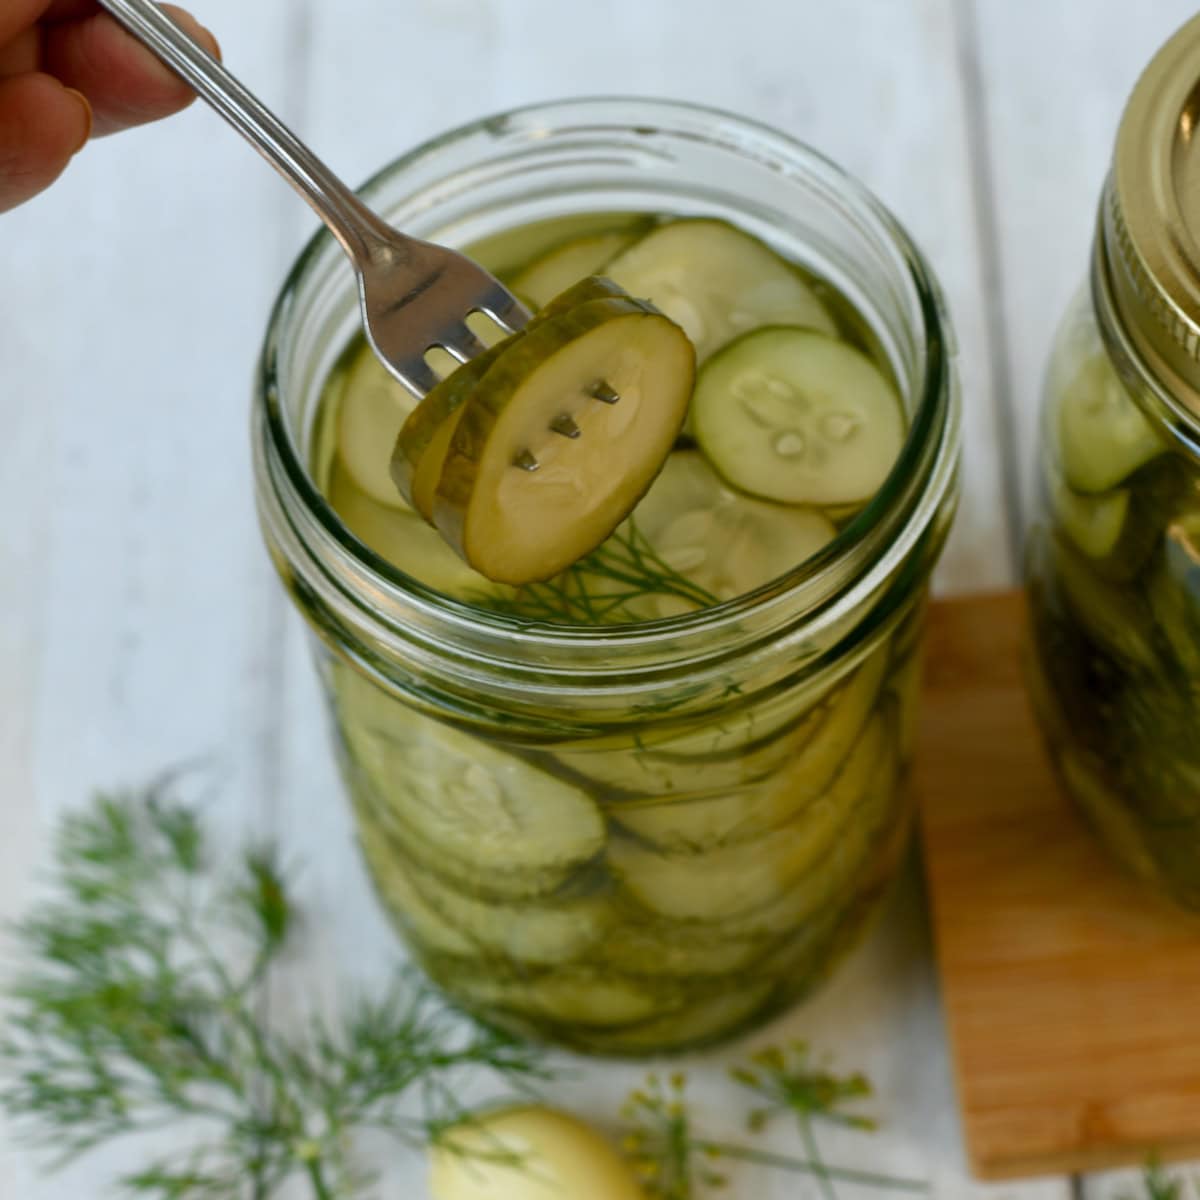
- Let the pickles cool completely and stand at least 24 hours before eating. For the flavors to meld, I recommend waiting 2 or 3 days before eating for best results.
Helpful information
No. Calcium chloride is a "salt" but not the same kind as pickling salt, kosher salt, or table salt. Calcium chloride is an inorganic compound that is a white solid, highly soluble in water. While it can have a salty taste, it is better suited as a firming agent in pickles, vegetables and cheese making.
How to store
- To Store: Store opened jars of pickles in the refrigerator with lid on for up to 2 weeks. Unopened, sealed jars of pickles can be stored on the counter or in a cool dark place for up to 1 year and sometimes longer.
Follow me on Facebook, Instagram, Pinterest and YouTube. Be social and share, y'all! Want all my new recipes and updates? Get my weekly newsletter in your inbox!
Leave a comment below the printable recipe if you have questions or tell me how you liked the recipe. Don't forget to rate it 5 stars if you love it!
Want more cucumber recipes?
- Cucumbers and Onions in Vinegar (fresh refrigerator pickles/salad)
- Easy Creamy Cucumber Salad
Easy Dill Pickles for Canning
SAVE THIS RECIPE
Equipment
- Stock pot or canning pot (comes with beginner canning tools)
- Half Pint jars for canning (Ball)
- Ball Pickle Crisp (calcium chloride)
Ingredients
- 6 (6 to 8-inch) pickling or English cucumbers (about 5 cups sliced) (about 2.5 pounds) (peeling them is optional)
- 4 small bunches fresh dill weed or ½ teaspoon dried dill weed or ¼ teaspoon dried dill seed (per jar)
- 4 large cloves garlic (halved)
- ½ teaspoon calcium chloride granules, divided (optional) (Ball Pickle Crisp or Mrs Wages Xtra Crunch)
- 2 ½ cups water
- 2 ½ cups apple cider vinegar or white distilled vinegar (5% acid)
- 3 tablespoons pickling salt
Instructions
- Bring a very large pot of water to a boil. Place canning rack or round cooling rack in the pot.
- Wash jars in soapy hot water. Sterilize in boiling water 5 minutes and let dry.
- Peel the cucumbers, if desired.Slice the cucumbers ⅛ to ¼-inch thick if making hamburger chips. For pickle spears, slice each cucumber vertically into 4 spears.
- Place one bunch of dill and 1 to 2 garlic clove halves in each jar. Arrange the pickle slices or spears in the jars, packing firmly. Be sure to leave ½ inch headspace at the top.
- Add ⅛ teaspoon calcium chloride (Pickle Crisp) to each half pint jar.
- In a large saucepan, combine water, vinegar, and salt. Bring to a boil over medium heat, stirring often. Using a liquid measuring cup or ladle, pour enough vinegar mixture over the cucumbers, leaving a 1 inch headspace at the top of the jar.
- Add the lids and twist on the jar bands.
- Water Bath Canning:
- Lower the jars into the boiling water with the rack positioned in the bottom with a canning jar lifter. Make sure there is 1 inch of water above the top of the jar. Boil half pint and pint jars for 10 minutes and quart jars for 15 minutes. Carefully remove the jars with the jar lifter and let cool completely.
- Pickles are ready to eat in 24 hours but even better in 3 days.
- Store in refrigerator up to 2 or 3 weeks. Store in cool dark place up to 1 year and sometimes longer.
- Yield: about 4 half pint jars or 2 pints.
Notes
-
- Use calcium chloride granules. (Pickle Crisp)
-
- Soak your cucumbers in ice water at least 30 minutes before canning.
-
- Choose thin-skinned, fresh-from-the-farm cucumbers.
-
- Cut off the tip of the blossom end of the cucumbers. There are enzymes there that will turn your pickles to mush!
- Be sure to use 1:1 ratio vinegar to water to meet USDA and extension service safe canning guidelines.
Nutrition
Nutrition analysis on GritsAndGouda.com recipes are mostly calculated on an online nutrition calculator. I am not a dietitian and nutritional information is an estimate and can vary based on products used.
This recipe was edited recently to meet USDA and Extension Service canning guidelines for vinegar and water ratios.

Brenda
These are such great pickles. So simple and very good
Kathleen
I'm so glad you loved them! I have more cucumbers in the garden. I need to make another batch!